|
Yay, it's Friday!! I will admit, the end of the week doesn't have the same meaning as it did before I retired! Fridays now for me are a day with Sawyer, and I always look forward to time with her! Sawyer just turned two! For my loyal friends and followers, you know this blog and Sawyer were born on the same day, and Dished With Love is dedicated to her, with much love! I have been busy, busy lately. With Summer comes a lot of vacations and requests for a pet sitter, and I have a nice client list. I have a photo gallery on here of my pet "clients". I was home this week and was able to cook a little in the kitchen and prep a few things for next week when I'll be gone again! I had some chicken breasts thawed out and bought some fresh mushrooms earlier in the week, so I came up with this easy and delicious recipe! I was doing several things at one time, so I didn't even think about taking photos until the dish was already in the oven! It is so easy, though. I had two chicken breasts that I bought at Sam's. They came in a package that had two breasts individually wrapped in four separate packs that were ready for the freezer! Most of the time I'll save money and separate large packages and put in individual freezer bags myself, but sometimes these convenience packages are so appealing that I can't resist! I cut the large breasts into four pieces, about four ounces each. 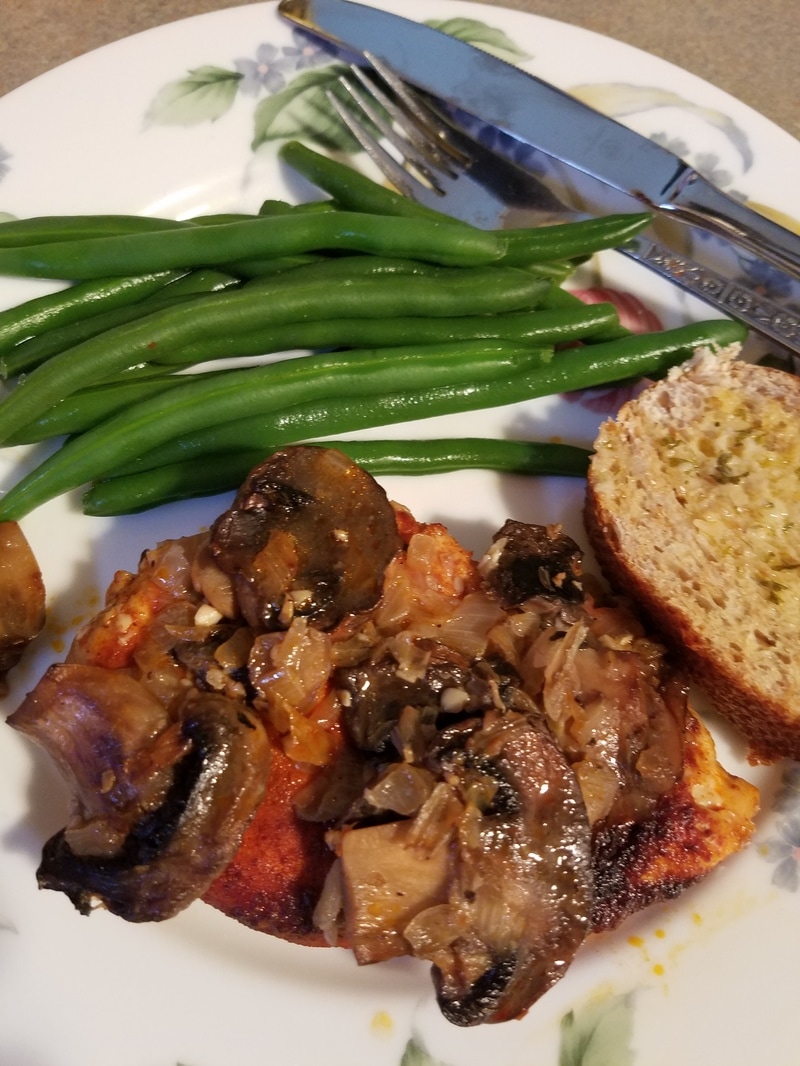 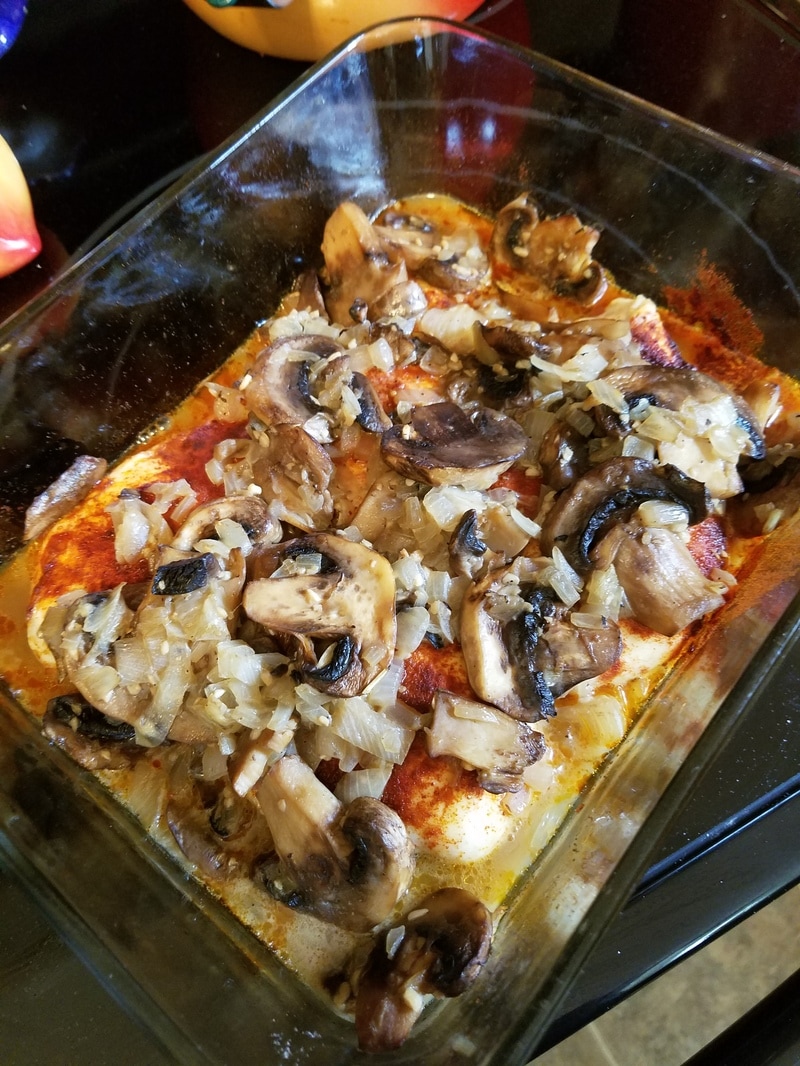 Ingredients:
Directions:
Enjoy this easy, impressive, delicious, and healthy dish! I have two honorable mentions this week. Sawyer just turned two, so I must show you how beautifu she is. From this picture you can tell she gets that from her beautiful mother, Lindsay!  On a sadder note, my pet friend, Bo, died last week. He was the sweetest big dog who loved to play catch with his tennis balls and cool off in the pool. He belonged to my friends, Jeff and Carrie, and was part of Willie and the Boys. Willie is the cat and Marley is Bo's brother. They have all been featured in previous blogs and Willie, Bo and Marley are in the pet slideshow on the right side of this page. He is missed.  Sweet Bo!
3 Comments
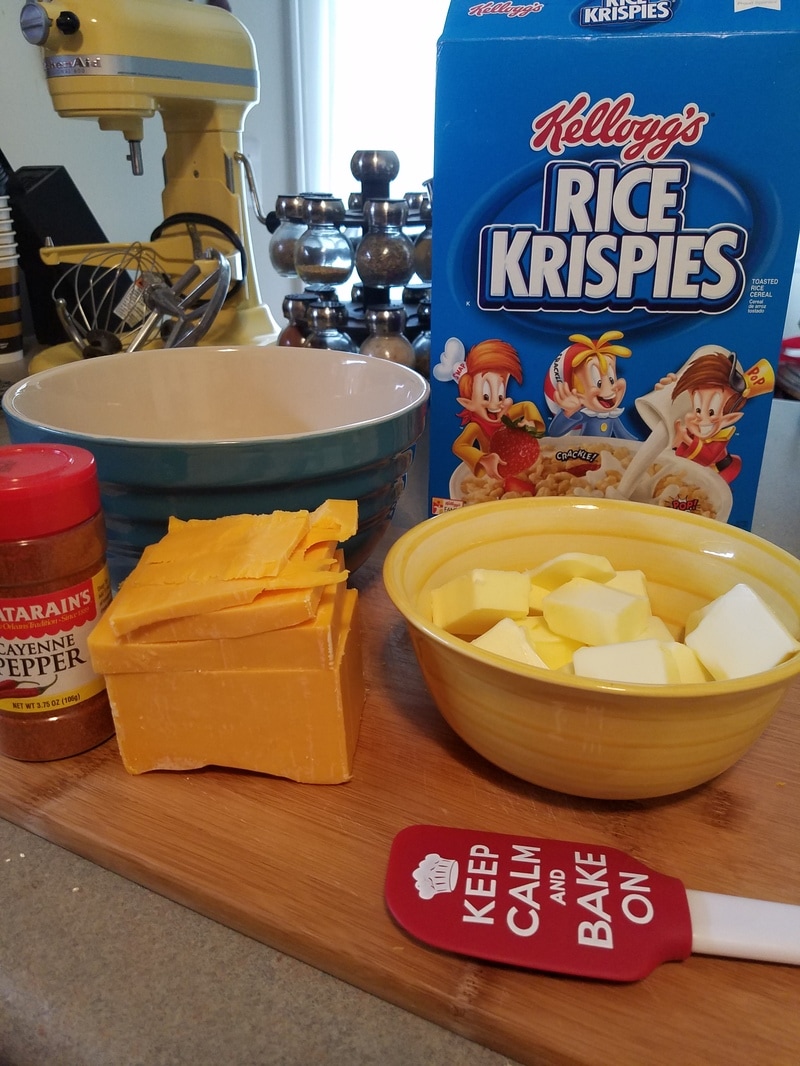
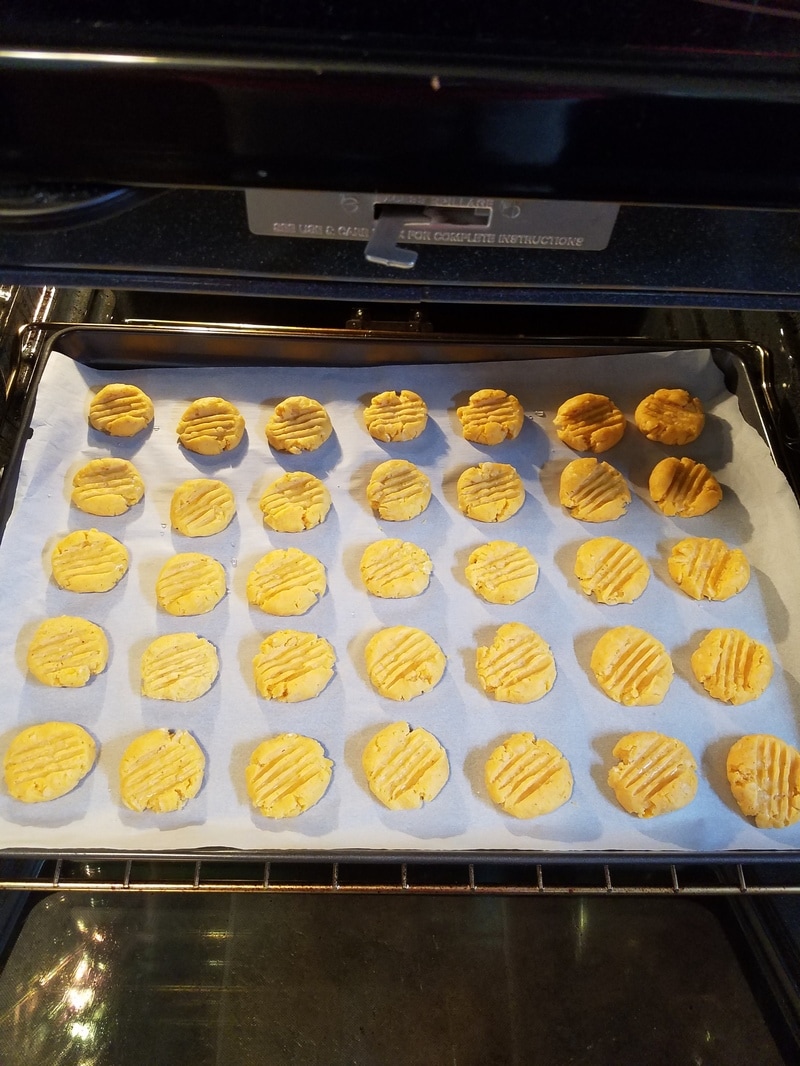
Another cheese recipe!! Yum! These are a Southern favorite, and a must have at any baby shower, bridal shower, wedding, etc. They might be a favorite up North, too, but I've never been there, so I don't know! You can find an Olive Cheese Ball recipe that I made for a friend a while back by using the super-duper search feature on this page. Another friend mentioned that she liked the cheese straws with Rice Krispies in them, so I found a recipe I like, tweaked it a little bit, and they turned out wonderfully! I will admit that I made two batches and by the time I got to the end of the second batch the crisps were getting bigger and bigger, not uniform and professional looking the way they started out. I took the last batch on vacation with us and I did have to put it back into the oven to cook a little longer. They crisped up very nicely and stayed crisp in a tin canister. I sent some to my sister's office, and some to my friends, Jimmye and J.C. Jimmye says J.C. buys them from the Byrd Cookie Company in Savannah, and I told her to tell him I was taking orders! If you want a real crowd pleaser that is easy to make and delicious, this is it! They make a great gift! 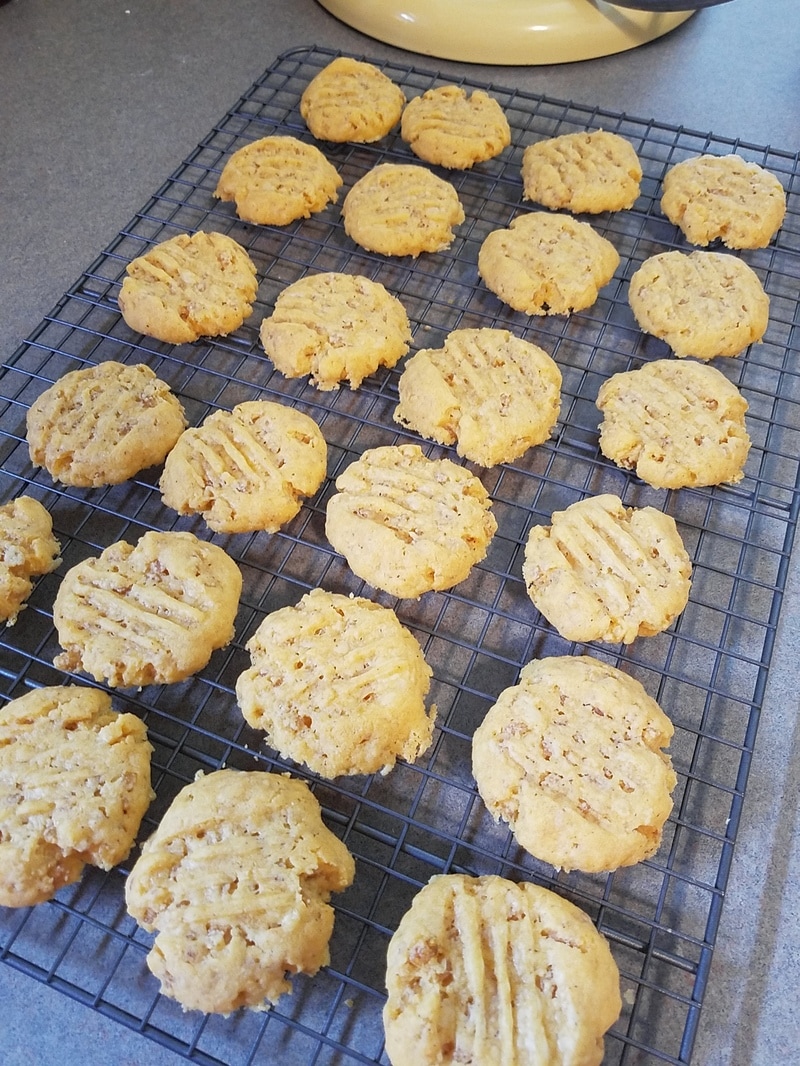 INGREDIENTS:
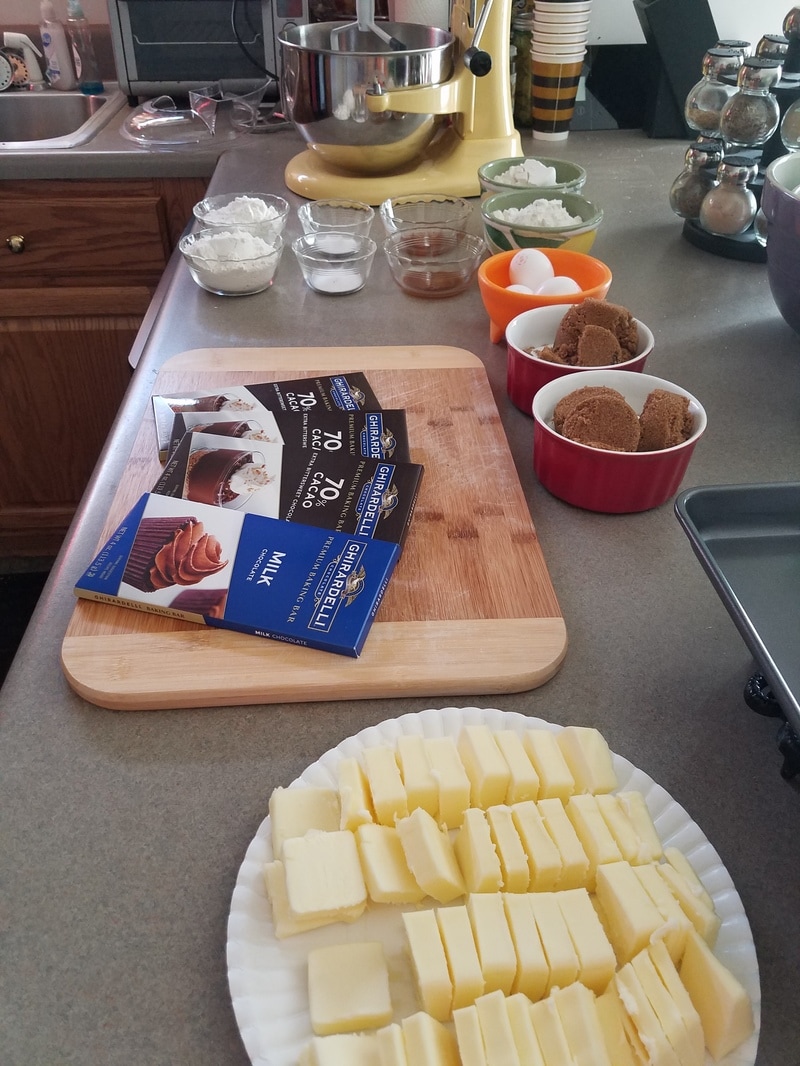
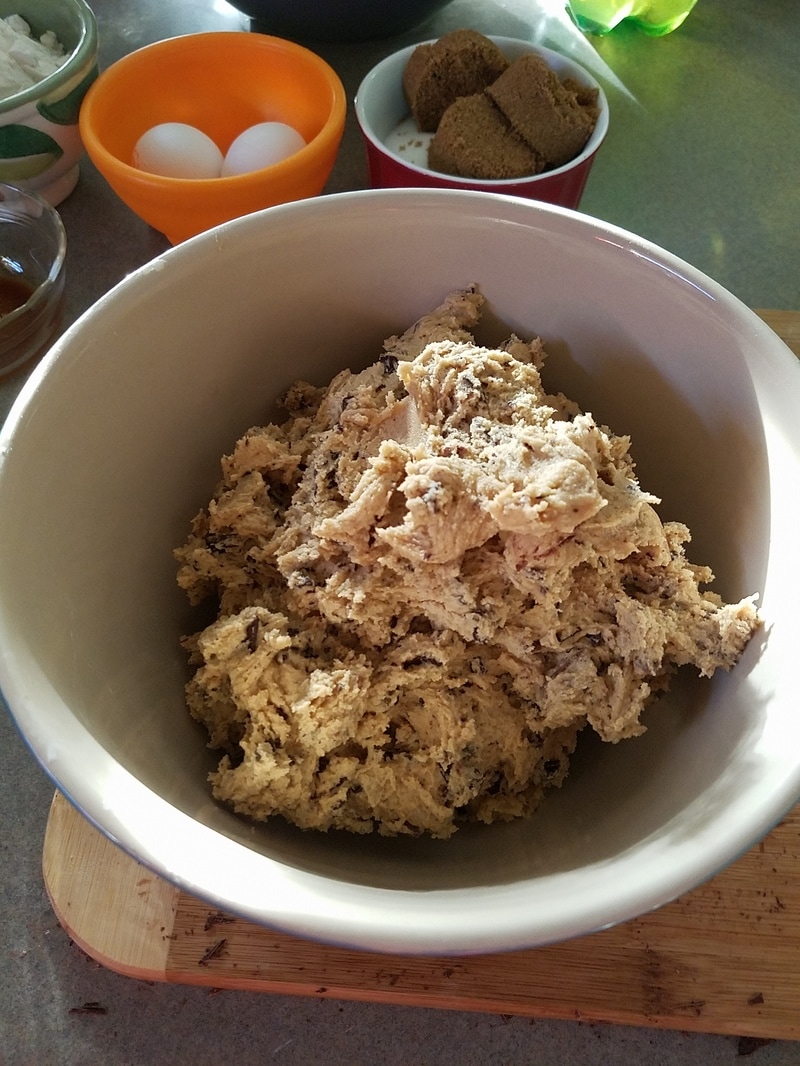
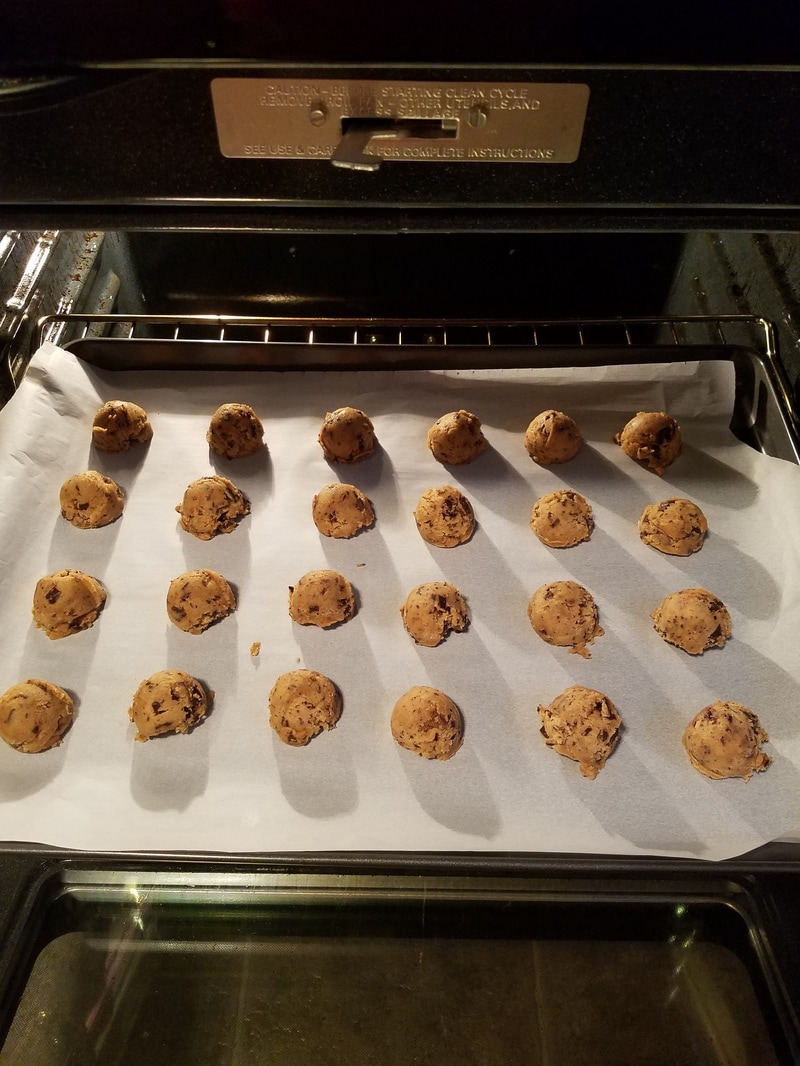
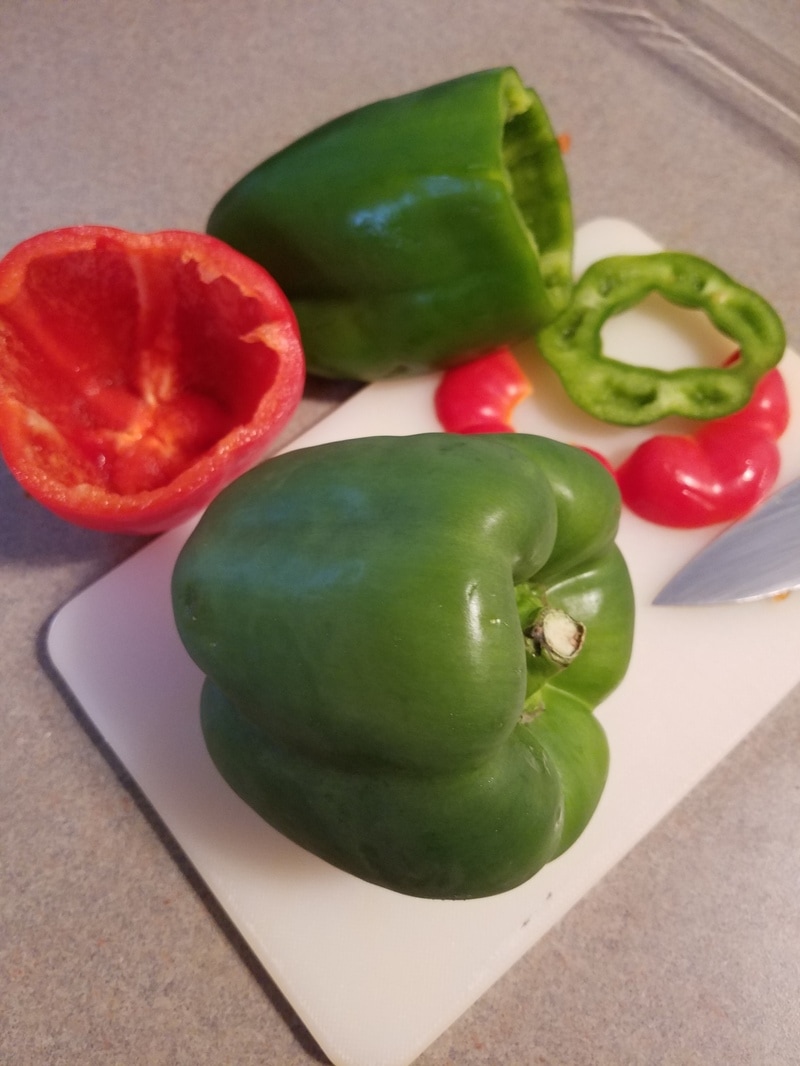
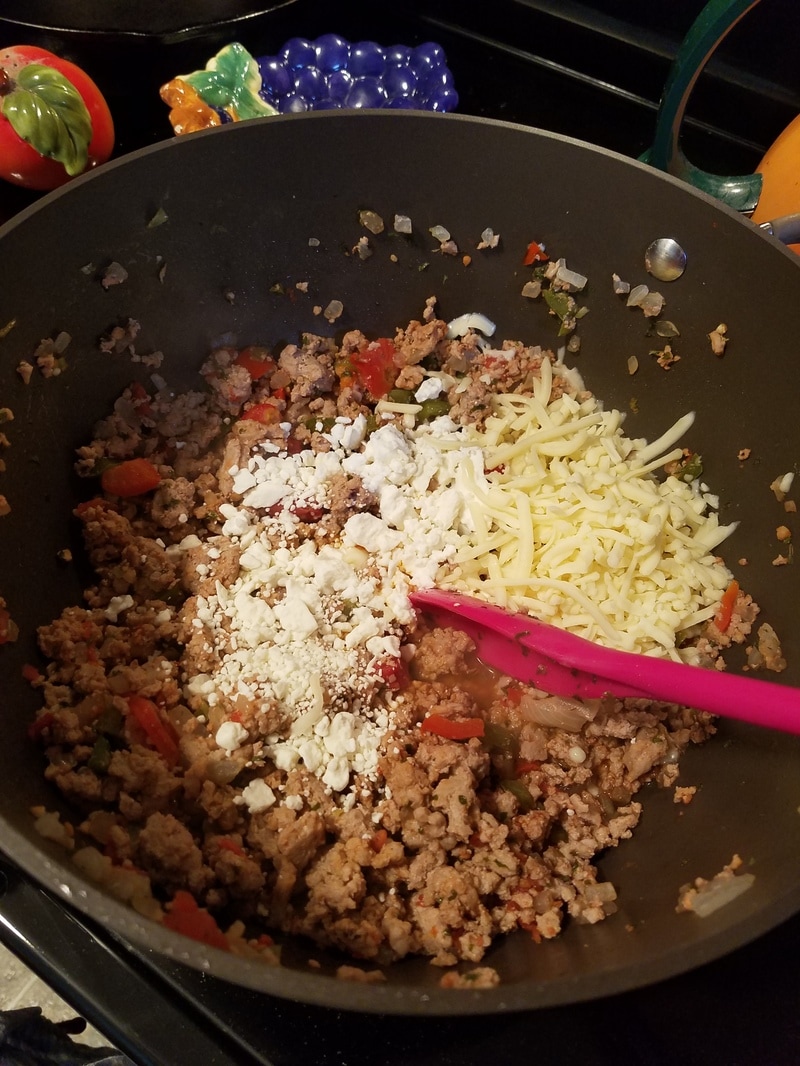
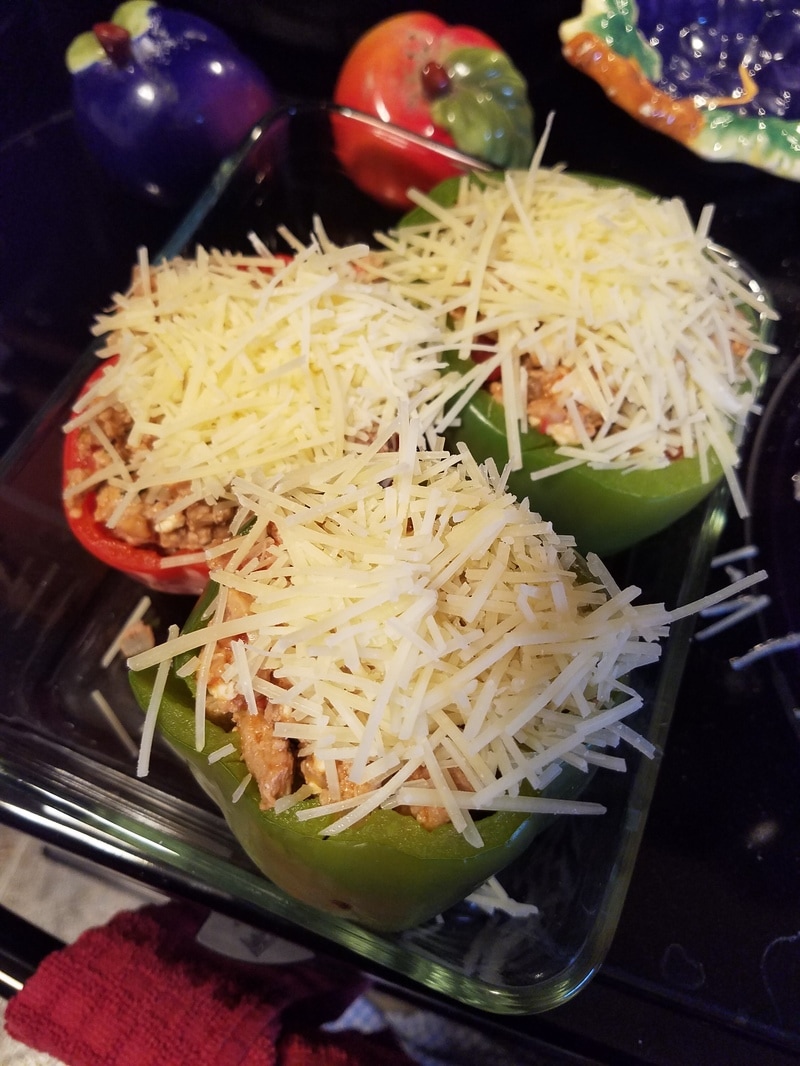
16 oz extra sharp cheddar cheese, grated 2 cups all-purpose flour 2 sticks butter, softened 2 cups Rice Krispies (or other puffed rice cereal) 1/2 teaspoon ground cayenne pepper (or to taste) INSTRUCTIONS: Preheat oven to 325 degrees. Line baking sheets with parchment paper, or very grease them very lightly with a cooking spray. Combine all of the ingredients together. Mix all of the dry ingredients first before adding the butter. This can be done in a large electric mixer with a dough hook, but I donned my food service latex gloves and mixed it by hand. Don't over-mix any kind of dough because it will become tough! Roll into small balls about one inch in diameter and place them on the cookie sheets an inch apart. Flatten the balls with a fork that has been dipped in water and bake at 325 degrees for 12-14 minutes or until lightly browned. Don't forget! If you make the balls much more than one inch in diameter then you will need to cook them a little bit longer, depending on how big they turn out. Just watch them in the oven, without opening the oven door if possible! I made some special crisps for myself by sprinkling extra cayenne powder on top of them before baking. I do like spicy! Enjoy! Denise My sister and I were getting ready to go on vacation with a friend, Jan, to who I owe a birthday dinner. We live in different towns so we haven't been able to connect on that, but when my sister said that Jan always has chocolate chip cookies in her house, that made her birthday gift easy to decide on! This recipe came from a Facebook page that I follow, Once Upon a Chef by Jennifer Segal. The cookies turned out wonderfully fat, crispy on the edges and soft on the inside, with lots of chocolate! Click on the picture of the cookies for the recipe! These were enjoyed by many! I made two batches and shared with my sister's co-workers, set aside some for Jan, and had a batch to carry with us on vacation. They were also super easy! Try to make them ahead of time so you can put the dough in the refrigerator overnight. Best of all, the dough can be made a week or month ahead of time, per the recipe! Easy and delicious, and loved by all! You can't beat that! 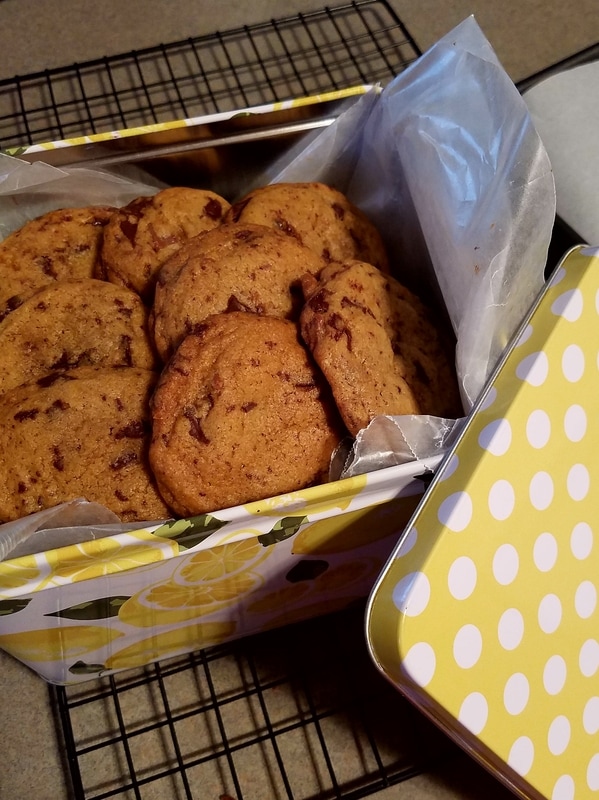 Here's a dish that we enjoy at home, and it can be done up many, many ways, and as healthy as you want it! I use 93/7 ground turkey and I leave out the "fillers" of rice or orzo. When you buy turkey, any turkey, you do need to make sure you have good seasonings, as it can be bland, and some times some added fat. I use a little of a good olive oil when needed. I do buy the 93/7 ground beef occasionally, because it does taste very good! As with the turkey, the addition of a little fat may be necessary for moisture. One negative here, of course, is that the leaner meats are more expensive. If you have space in your freezer (mine is limited), it is cheaper to buy these in bulk. This recipe is for four peppers, but I only had three on hand. I had some goody leftover stuffing to have later. I love to buy the pretty bright colored peppers, and I can't wait until the homegrown tomatoes start coming in. They are good for stuffing, too! Did I mention there are three cheeses in this recipe? I buy the fat free Feta and low-fat mozzarella. The parmesan on top came from Sam's in a big container, because you can use it on many, many things, such as sauces and vegetables! Enjoy! 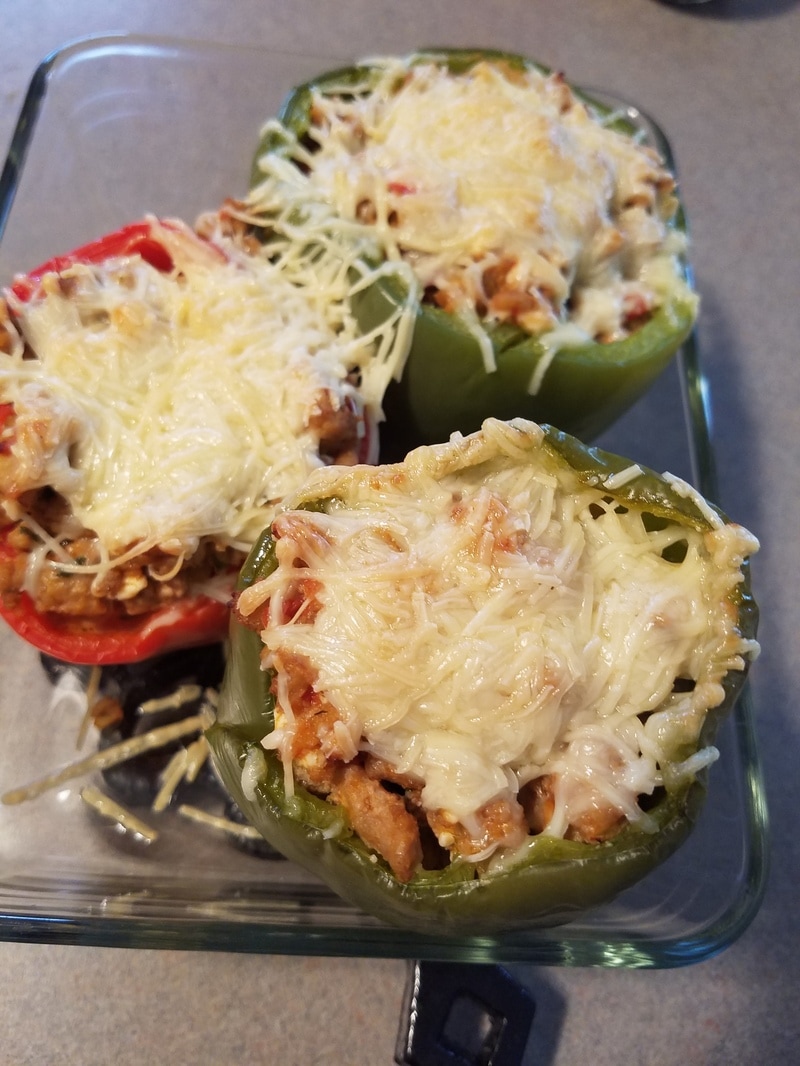 Greek Stuffed Peppers! INGREDIENTS:
4 3-oz. bell peppers, with flattest bottoms you can find (I only had three peppers on hand) 16 oz. ground turkey (or beef, or lamb) 2 oz. onion, finely chopped 1 Roma tomato, finely chopped 1 T. tomato paste 1/3 c. water ¼ c. red wine 1 large clove garlic, minced 1/8 tsp. dill weed (optional) ¼ tsp. crushed dried oregano ¼ c. parsley, chopped ½ c. feta ½ c. Monterrey Jack cheese 4 T. Parmesan (I used shredded, or sometimes the grated in the sprinkle bottles) I also used extra, as you can tell in the photos. DIRECTIONS: To speed up the cooking process, boil the bell peppers for 4-5 minutes to soften before stuffing and baking, after you cut off the tops and clean out the inside. Dice those pepper tops up to cook in the ground meat. Then preheat the oven to 350º. Brown the ground turkey in a non-stick skillet. Add onion, diced bell pepper, garlic, tomato, tomato paste, wine and water. Next add the parsley and spices. Simmer about 10 minutes, stirring, until tomato and onion are fully tender and the liquid is evaporating. Add feta and Monterrey Jack cheese. Stir to blend and melt. Remove from heat. Stuff the peppers and sprinkle the tops with the Parmesan cheese. Pop in preheated 350º oven for 30-35 minutes or until pepper shells are tender. |

Denise ClarkA place to share my favorite things...friends and food, dogs, college football, and my inspiration, Sawyer, the most beautiful little girl in the world! CategoriesArchives
December 2022
|


 RSS Feed