|
Hi, Friends! It has been a while!!! I'm just stopping in while I'm renewing my website that I have not even used in way too long, but I keep it with every intention of jumping back on here regularly!
I hope you are all having a wonderful Holiday Season! My sister and I are taking our annual birthday trip, which is usually to Tunica, Mississippi and Memphis, Tennessee, and this year is no different! Maybe I'll get some great pictures and stories and especially some great culinary adventures to share with you when we get back! Hope you all have a Merry Christmas, and remember the Reason for the Season, the baby Jesus who was born on Christmas Day, who came to save us from our sins, that we may have eternal life. Love you all! Denise
3 Comments
Hi, friends! My life has been full of friends and Sawyer for quite a while, and I really wish I was organized enough to do everything I want, such as keep up with the blogging and cooking! I have done a lot of cooking but always seem to be too rushed or unable to take my time with recipes and photographs and blogging. I'm working my way back to you, babes!
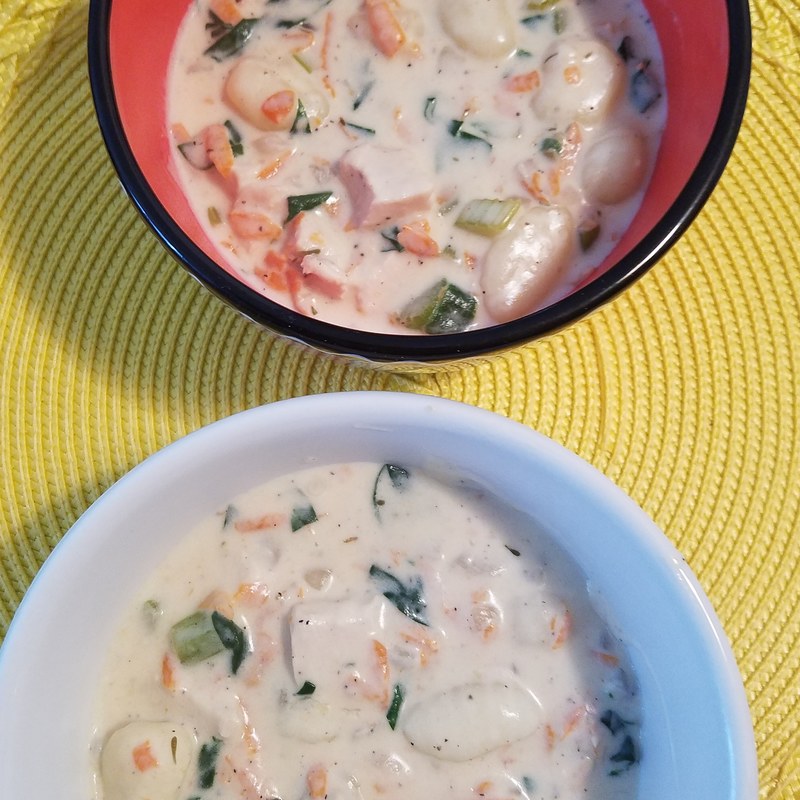
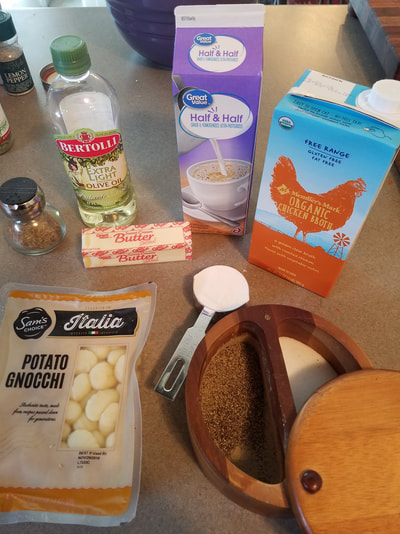
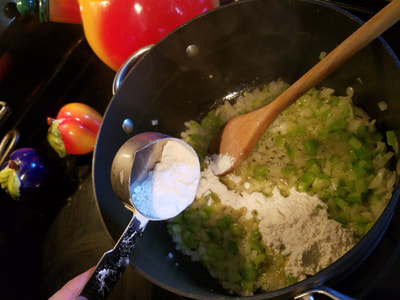
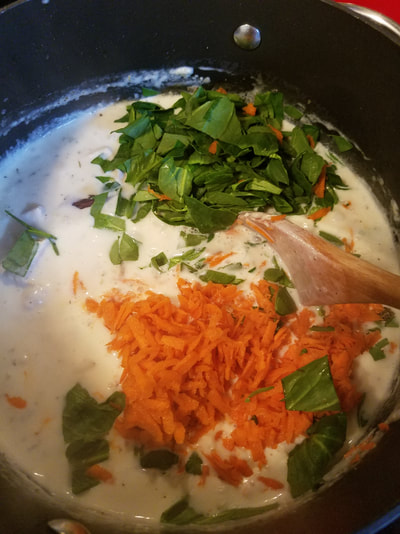
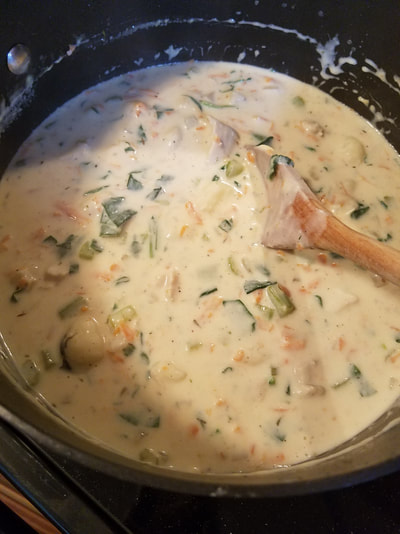
In the meantime, let me share with you some of the pics I've taken of the beginning and ending mostly of some of the cooking I've done and I'll share the recipes! Hi, my Friends! I have thought about you often over the last two and three months. I posted a couple of times on Dished With Love's Facebook page to keep in touch a little bit while trying to get back to you and the blog. Life has been busy! I am slowly updating the look of the blog, so please forgive me if the fonts are different colors and/or sizes. This is a soup I made for friends by request, another copycat of an Olive Garden Soup. You can use the handy, dandy search feature at the top right corner of the page and find the recipe for the hearty, meaty Zuppa Tuscana soup, mine and my friend 'Nette's favorite! Here's the recipe for the Chicken Gnocchi Soup: Copycat Olive Garden Chicken Gnocchi Soup Ingredients:
Instructions:
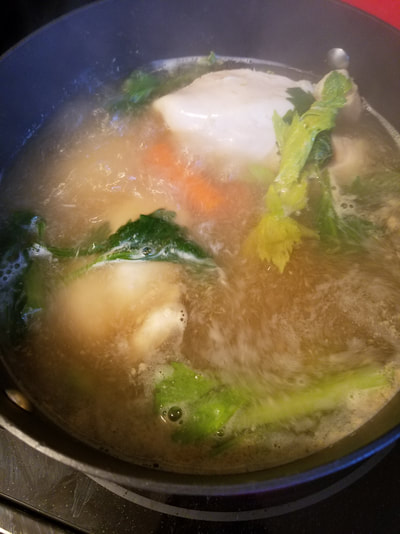
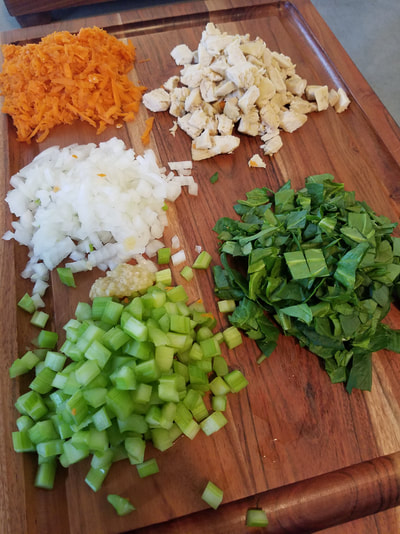
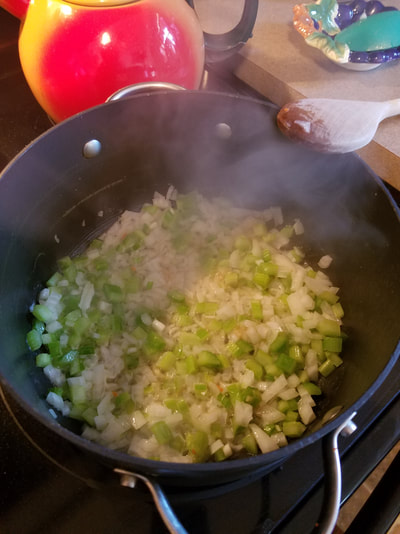
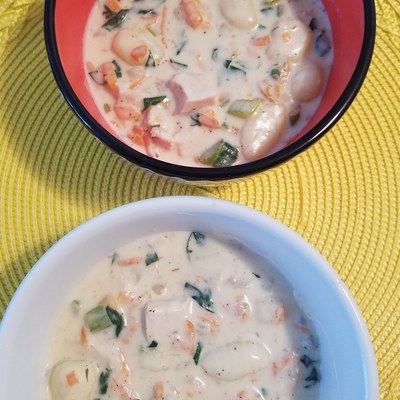
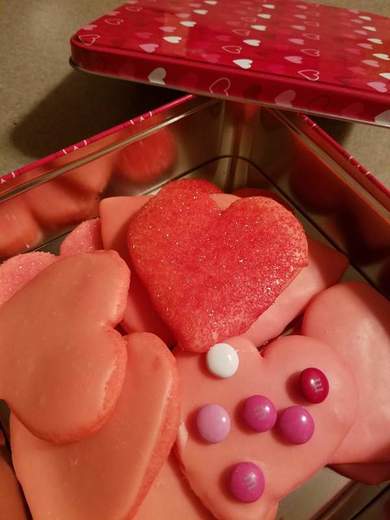
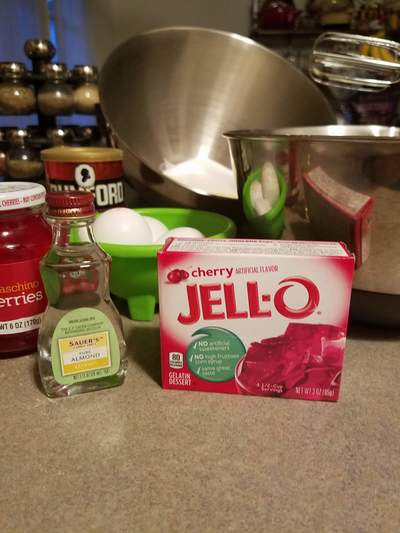
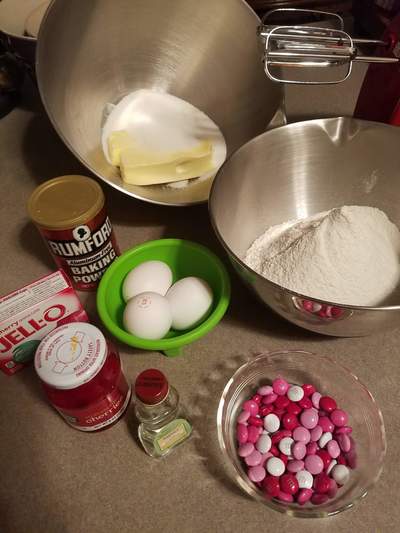
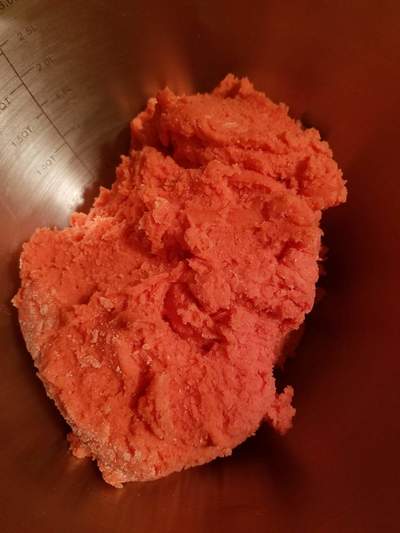
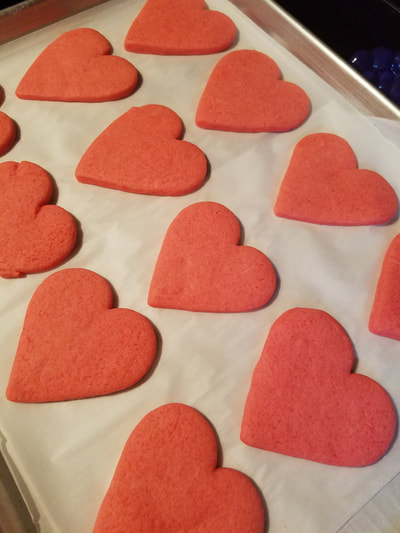
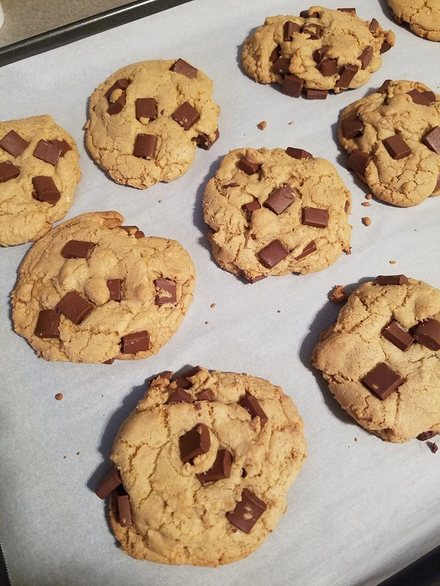
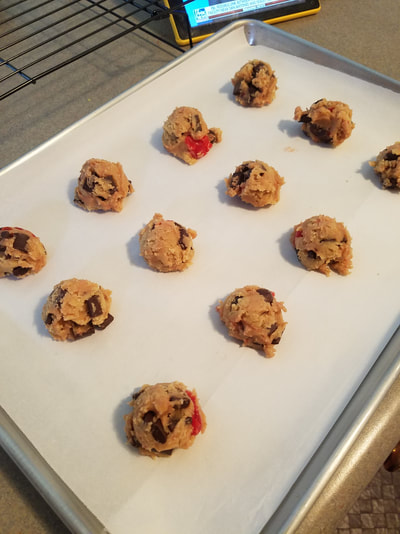
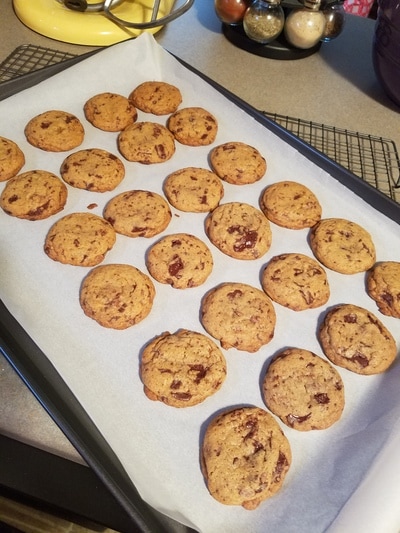
My sister is a fan of the Chicken Gnocchi Soup at The Olive Garden and she says their soup is not as creamy as mine; it has more broth in it. It's hard to make a copycat dish when you've never had the dish before. I don't advise that! I did have more chicken and gnocchi in mine, too. My friend, Kenneth, who requested it, asked for me to leave the gnocchi out and said it was delicious! He suggested a little heat would be good. Next time I'll add a pinch or two of ground cayenne pepper. I like a little heat, too! I will confess, I did not make the gnocchi, I bought it. I attempted to make gnocchi for my friend Ghee, Sawyer's dad, a couple of years ago I guess. It was a big, hot mess! I wish I had the photos still to show you my kitchen when I was attempting to make it I have matured a little, no, a lot, in how I prep and cook, and could probably make the gnocchi now, but as a matter of convenience, the potato gnocchi was store-bought this time. Home cooking is all about making foods the way you like them. I did make one recipe without gnocchi for Kenneth, and this photo includes the gnocchi for Sis and me. It's a beautiful dish, too! Look how the colored bowl brings out the pretty colors of the veggies! Since attending culinary school (the real school in Marietta, not the one in Rome that bought stock from Kroger), one idea I love so much is to make your own hearty broth for soups and other dishes. I don't make the stock from scratch a lot unless I am going to use it right away, but only because I don't have a freezer with room to store it. However, stock is something you can make every day if you have a pressure cooker, and that is on my wish list! So, save those celery leaves, carrot tops, onion and pepper pieces, chicken bones, shrimp shells, whatever you have and depending on what your dish is, and make your own broth. Remember, it takes a little while to get all the flavor if you're making it on the stove so that's something that needs to be done a couple of hours before you need it. Here's an easy to read article on simple stocks to make at home: fabulousfoods.com/articles/19919/stock-making-101-how-to-make-soup-stocks The most wonderful thing about this dish is that once the prep work is done, it all just goes into the pot! I made a stock by cooking the chicken breasts with water and chicken broth and the veggie "scrappings" I had. I took the chicken out of the broth once it had time to cook and let the broth simmer until I was ready for it. I cooked three large boneless, skinless chicken breasts (some chicken I saved for salad and tacos at a later time) in water, chicken broth, "scraps" from the celery, carrots and onions (these were cleaned), on medium high heat for 15-20 minutes. The chicken is done when it reaches 160-165 degrees on a food thermometer. Since this chicken is going to be diced, just slice the chicken at it's fattest point and make sure there is no pink in it! Before you slice the chicken, let it "rest" on the counter for about five minutes. This lets the juices that have built up during cooking redistribute throughout the chicken. There will also be some "carry-over" cooking during that five minutes that will continue to raise the temperature, so it's okay to take the chicken off the heat at around 160-165 degrees. You never know when you're going to have cold weather in Georgia, even after the warmer weather in the 70's we had this week, but this is a pretty good meal anytime, especially if it's loaded down with chicken. I hope you'll try it and enjoy it! I'm a little late in showing you the cookies I made for Valentine's Day, but I actually thought I had lost the pictures by accidentally deleting them from my phone. They were on the Dished With Love Facebook page. Sawyer loved the "cherry cookie" and so did the girls at Sis's office. These are simple, pretty, and delicious. Here's the recipe! Cherry Valentine Cookies 1 c salted butter (two sticks) 1 c sugar 1 (3 oz) package cherry Jello 3 eggs 1 tsp. almond extract 3 c flour 1 t baking powder 1/2 t salt Mix and chill the cookie dough overnight. Roll out like a sugar cookie on a floured surface. Bake cookies on an un-greased sheetpan or on parchment paper at 375 degrees for 8 minutes (larger cookies) – 7 minutes (smaller cookies). Cool completely and frost by dipping the tops of the cookies into the frosting and let them dry. Top them with a few M&M's if you have them, they are always appreciated in this house! For the Frosting: 1 c powdered sugar 2 tsp cherry juice (from maraschino cherries) 2 tsp light corn syrup 1 tsp almond flavoring Mix and add more corn syrup and cherry juice to get the right consistency. Here is a wonderful chocolate chip cookie recipe that are "yuge" like the ones you can buy in the store. I made the chocolate chip cookies before and called them Hurricane Cookies because we actually had a hurricane warning in Northwest Georgia last September! You just never know about the weather here! Here's a picture of the large cookies I made. Click on the picture for a link to the recipe! And this is what you do with leftover chocolate chunks and maraschino cherries! I used the same recipe from the link above and added a jar of maraschino cherries, without the juice (I don't know what size, not the smallest jar but not the biggest). Instead of measuring the cookie dough out in a 1/4 cup measuring cup, I used a cookie scoop and the recipe made about three dozen cookies. If you use chocolate chips instead of chunks the cookie dough will go even further. The smaller cookies only take 7-8 minutes to cook per batch. Take them out of the oven when they're a little bit brown on the edges! Well, Friends, I'm happy for the chance to catch up with you a little bit. I would love to hear from you to see if you like the recipes, and if you try them! Some of you who have been with me from the beginning of the blog know that it is dedicated to the most beautiful girl in the world, Sawyer! Dished With Love, the blog, is dedicated to her and was started on her birthday, and she will be three in May! Here are a few current photos of her and her lucky parents, and the Easter basket she got from Niecey and JJ! She's growing up so fast, and she's as sweet as she is beautiful! Until next time, love from Dished With Love! Denise xoxoxo
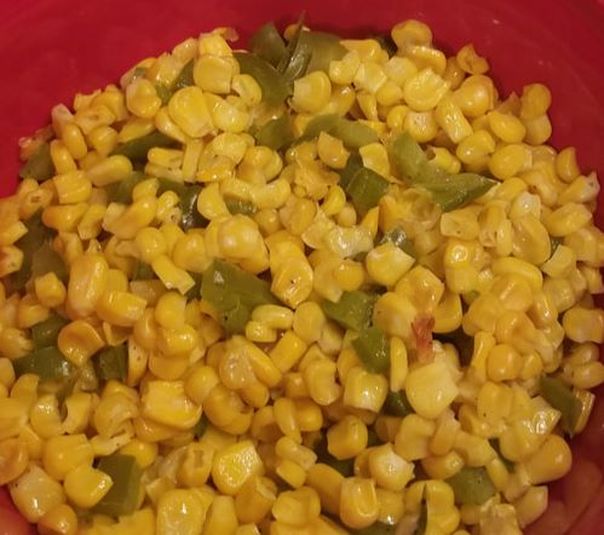
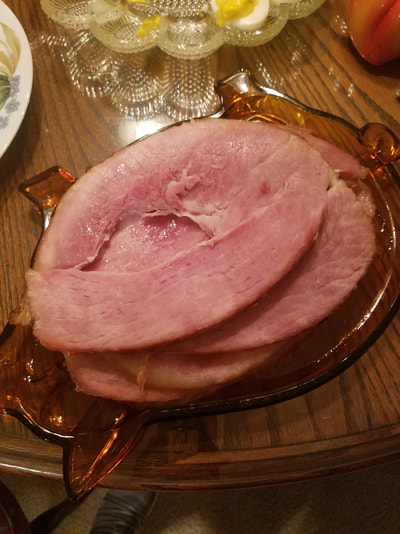
Friends, I hope you all had a great Thanksgiving! We certainly did! It was so nice for my sister, Janise, and I to visit with my brother Bob and his wife, Connie. We had good food and good company! The entrée was a pre-cooked spiral ham, just because that's a personal favorite of all of us. The only time I cooked a turkey was just a few years ago and I fixed Thanksgiving dinner for an old boyfriend. The biggest thing I remember about that dinner was, if you're going to "garnish" the turkey with pineapple, wait until the turkey is almost cooked to place the pineapple on it instead of letting the pineapple cook for hours. It doesn't hold up well. Let me show you what I did this year! This was one of my favorite dishes. It's beautiful to look at with its bright colors, it is tasty and crisp and it offsets "some" of the fat, and there is a lot of it, in the other dishes. It was also the most simple dish to make. Ingredients
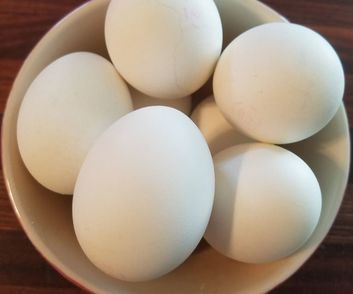
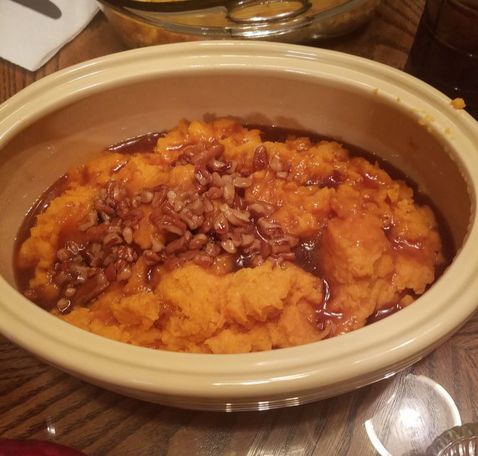
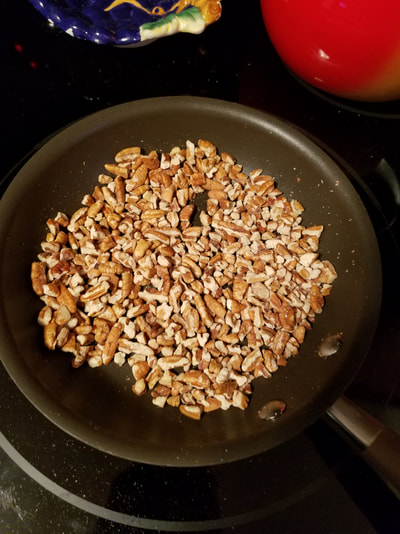
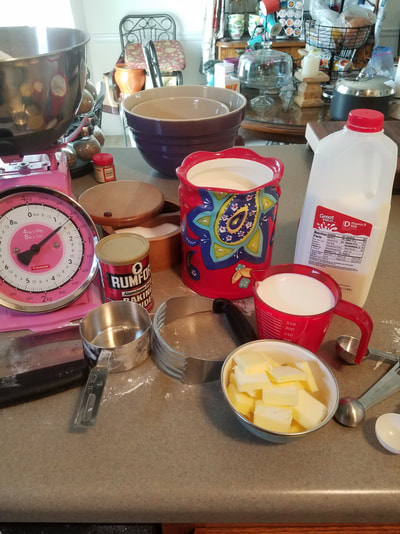
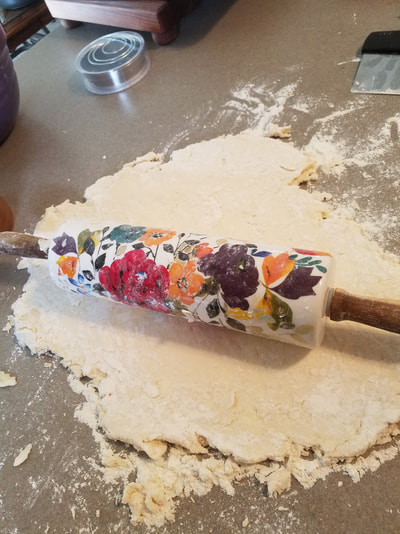
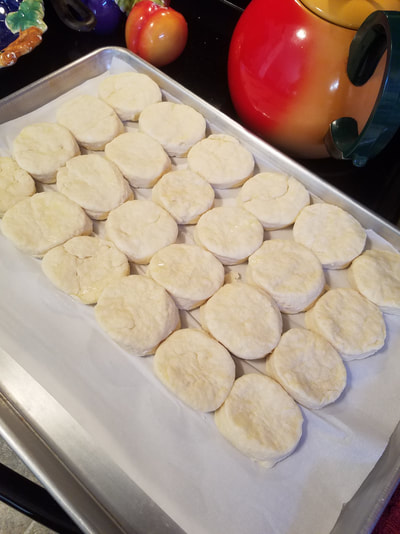
Directions In a non-stick skillet, heat the oil over moderately high heat until it is hot but not smoking Add corn and diced green pepper and saute', stirring, until tender but still crunchy, about three (3) minutes. Stir in red pepper flakes and cook 15 more seconds. Season with salt and pepper. Here's an honorable mention: these are the hard-boiled eggs my sous chef painstakingly peeled, and I took the yoke to make deviled eggs with salt, pepper, sweet salad cubes and too much mayo. They were delicious but were not photogenic at all. Another delicious take on deviled eggs is to add chopped green olives and add them instead of sweet salad cubes. Yum! This recipe was so wonderful, I could have eaten the whole dish! I did not do a great job of taking photos during prep or you would see the toasted pecans heated in a sauce pan with butter and maple syrup! Click on the picture of the whipped potatoes for the recipe. If you've never checked out "The Kitchn" Facebook page and blog, it is well worth checking out for tons of kitchen tips and recipes! Here are the biscuits from scratch for the dressing. Here's a recipe we were tested on in culinary school. I converted the measurements for those who might not have a food scale, so they might look a little wonky. Also, because this recipe does not include buttermilk, my friends have called into question that they are "Country Biscuits". I agree, but cutting extra cold butter into the dough will make for some flaky biscuits! Country Biscuits Ingredients:
Directions: Line a sheet pan with parchment paper. Preheat the oven to 425 degrees.
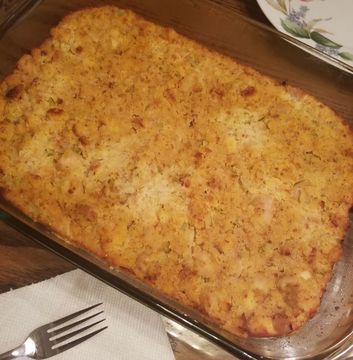
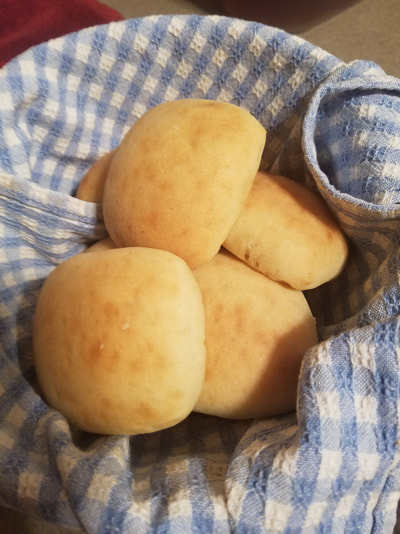
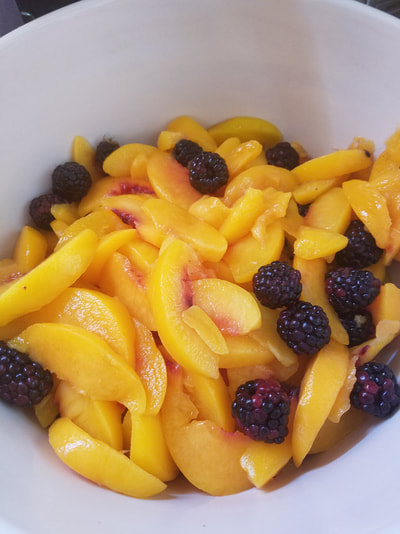
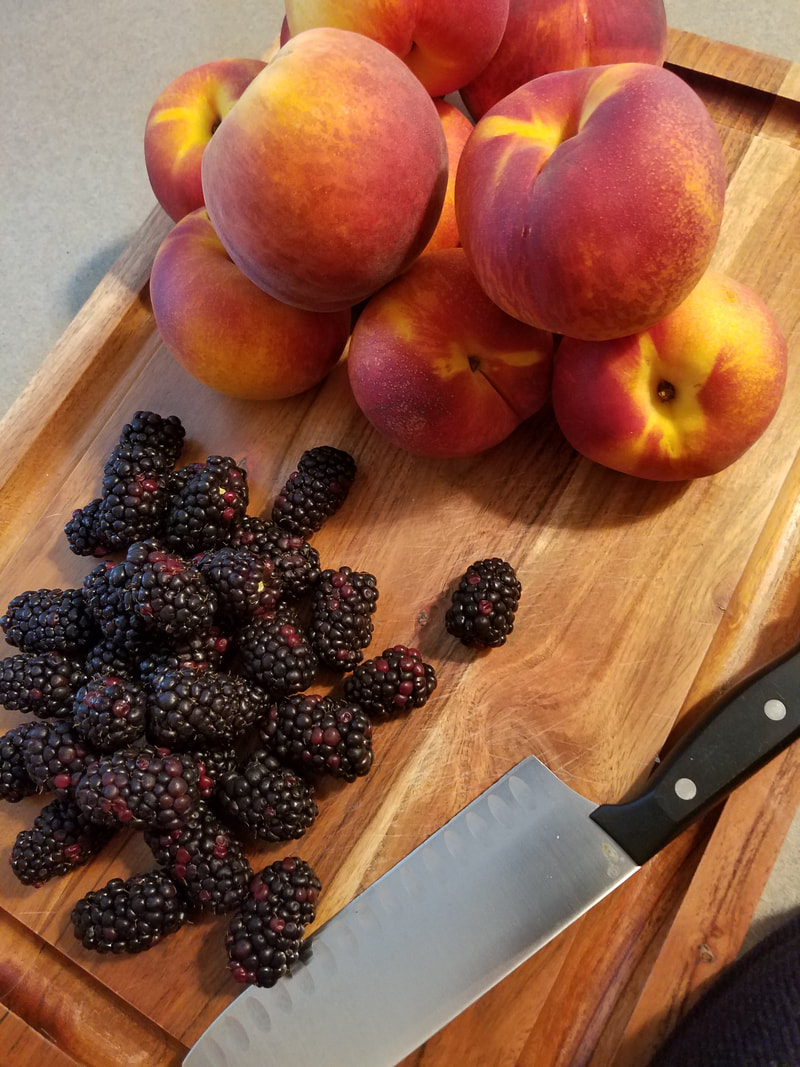
Cook's Note: Okay, you can't beat a hot, buttery homemade biscuit; however, for purposes of expediency, or for this dressing where the biscuits are mixed with cornbread and other ingredients, you have two other options. They are: (1) You can still make the biscuits from scratch and use self-rising flour and buttermilk (eliminates the need for baking powder and/or baking soda) . Check out this recipe! http://www.marthawhite.com/recipes/famous-buttermilk-biscuits-2462 or (2) Buy Mary B's Buttermilk Biscuits in the freezer section at your grocer's. They are so convenient and taste like homemade! They also make the idea of creating a dressing seem not so daunting! I forgot to take a picture of the cornbread but I use the Martha White Southern Cornbread recipe. It is an easy-peasy recipe. I use lard (yes, politically incorrect) to grease a cast iron skillet. Here's the link: http://www.marthawhite.com/recipes/southern-cornbread-2630 Then comes the dressing! This recipe is awesome, and the gravy recipe is almost drinkable. I did not make enough gravy! These are two of the dishes I made last year. I tweaked the recipes a little on last year's blog. You can find them here: http://www.dishedwithlove.com/blogging/tis-the-season-to-be-thankful-and-jolly Also, on the same blog post from November of last year, you will find this delicious homemade cranberry sauce recipe. How pretty is it in one of the jars my friend Karen gave me! http://www.dishedwithlove.com/blogging/tis-the-season-to-be-thankful-and-jolly More Honorable Mentions: Sister Schubert's Dinner Yeast Rolls and Smithfield's Spiral Sliced Ham with Classic Ham Glaze! Southern Peach Cobbler With Blackberries! Since Bobby and Connie had not had this wonderful peach and blackberry cobbler before, I decided to share this with them rather than my original plan of a homemade apple pie. Turns out it was my brother's choice! I made this for a "tailgating" party in September when peaches were still fresh, but let me tell you, the frozen ones are just as good and a lot more convenient! Here's the link again: https://www.onceuponachef.com/recipes/southern-peach-cobbler.html It's just a coincidence that more than one recipe has the name Southern in them! I hope you've enjoyed the blog as much as I have enjoyed putting it all together for you. One day I'll learn to pace myself so I can get lots more pictures of the prepping, which is my favorite part. There's nothing like preparing all of the ingredients and then putting them all together to make something beautiful and delicious, except for the looks on the faces of the friends and family who are enjoying the dishes!
We're spending Christmas with cousins at Seminole Lake in South Georgia. Sis's birthday present to us this year is a trip to Callaway Resort and Gardens to visit the gardens and see the Fantasy of Lights on our birthday, which is four days before Christmas! Merry Christmas to all of you. Let us all remember the Reason for the Season, Jesus Christ! Dished With Love, Denise! This year is going to be a little different, Friends! This year our family Thanksgiving dinner is going to be at mine and Sis's home and my brother, Bob, and his wife, Connie, will be here! I am very excited to have them here, and happy to be cooking for them.
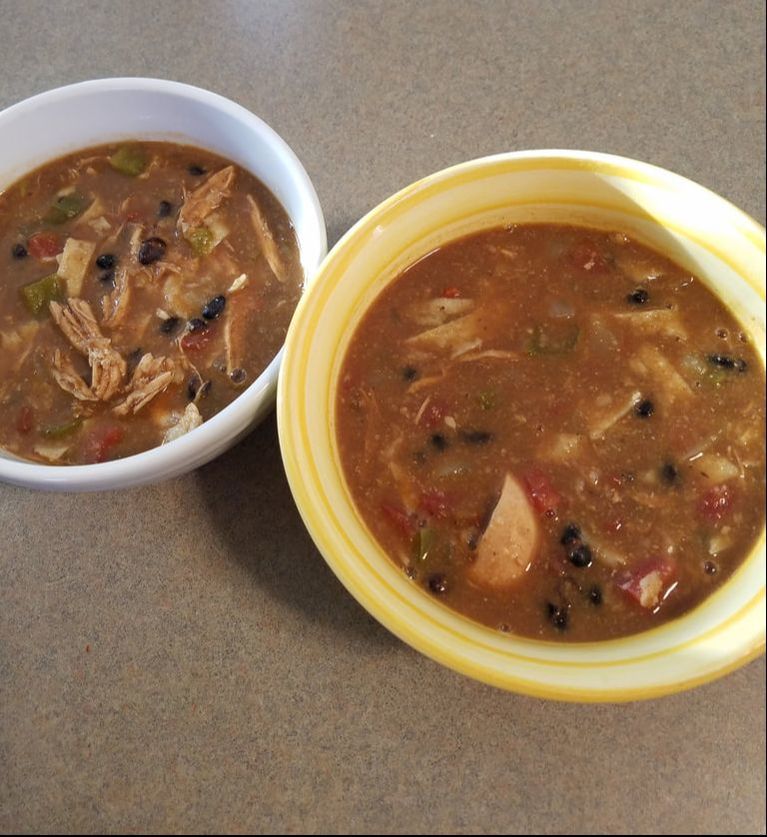
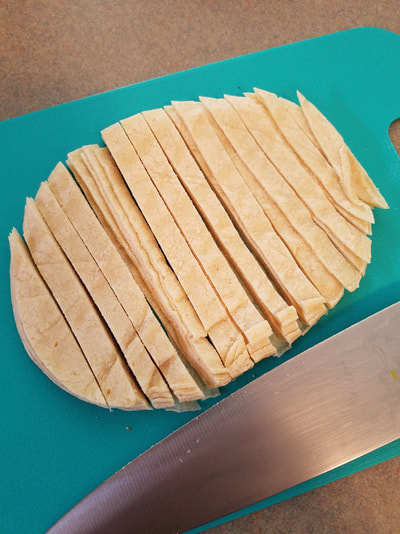
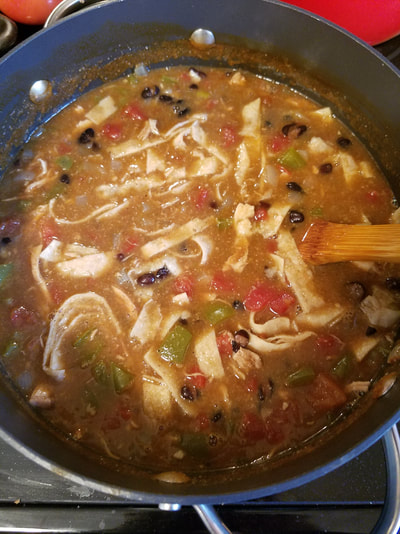
I have experience with three of the dishes we're having (for you that do not know, I have only been cooking for about four years) and I am trying a couple of new ones. The menu consists of traditional dishes, and a couple of them will be embellished a little. Sis, Janise, is here today to help me prep the dinner, and clean the house. We have lots to do! I have to start things now. This is one of my favorite things to do, cooking for friends and family. I think I have allotted plenty of time to do everything and also take lots of pictures for the blog, so I'll be sharing this culinary experience with you soon! Happy Thanksgiving to you all! I hope you all have a great time with friends and family, and a lot of great food! Don't forget this weekend is great for football! I'm not from Alabama but the Iron Bowl sounds like it is going to be exciting this year! Dished With Love, Denise Chicken Tortilla Soup is one of my favorite things! The LaCabana Mexican restaurant in the tiny town of Cave Spring where I used to work had THE best. It was simple with just a few ingredients, but the tastes of the fresh pico de gallo and cilantro were my favorite ingredients. I didn't have all of the fresh ingredients to make a copy of LaCabana's soup, but here is a wonderful recipe by the Pioneer Woman that I have made many times. I also did not have the garnishes recommended for the soup, so I am calling this the healthy version! This is perfect for this time of year when it is beginning to get cold, and it more than satisfies a craving for Mexican food! Enjoy Chicken Tortilla Soup Prep Time: 10 Minutes Difficulty: Easy Cook Time: 90 Minutes Servings: 8 Servings Ingredients
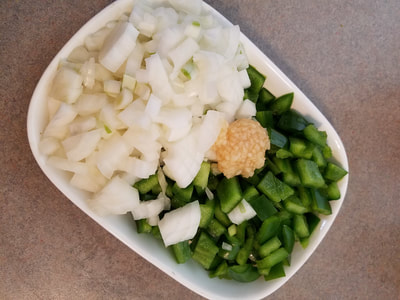
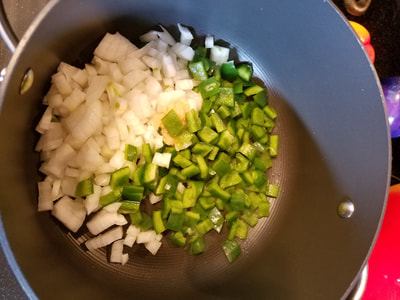
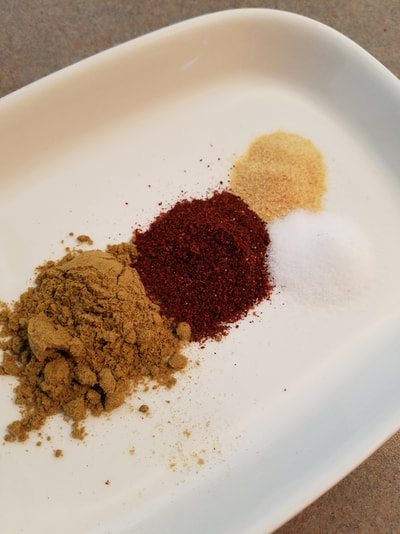
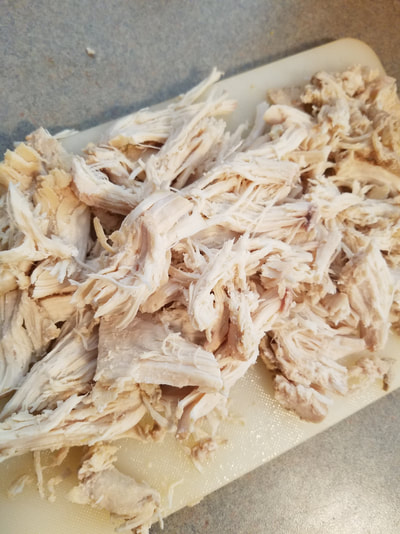
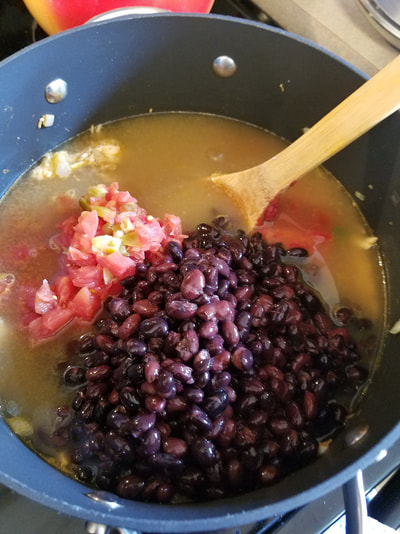
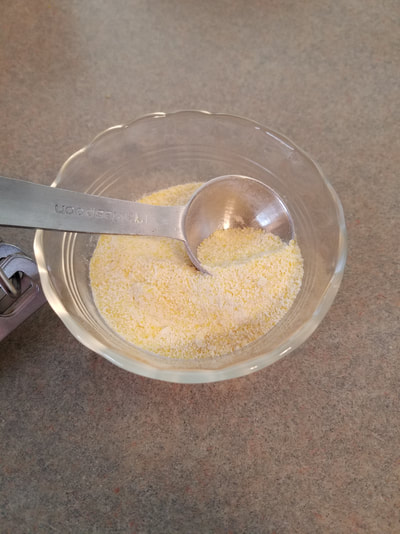
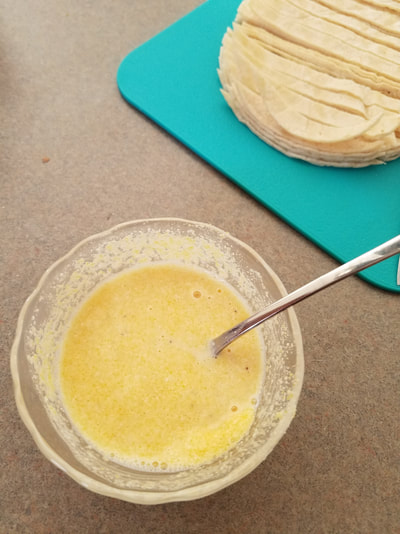
Instructions Preheat oven to 375 degrees. Mix cumin, chili pepper, garlic powder, and salt. Drizzle 1 tablespoon olive oil on chicken breasts, then sprinkle a small amount of spice mix on both sides. Set aside the rest of the spice mix. Place chicken breasts on a baking sheet. Bake for 20 to 25 minutes, or until chicken is done. Use two forks to shred chicken. Set aside. Heat 1 tablespoon olive oil in a pot over medium high heat. Add onions, red pepper, green pepper, and minced garlic. Stir and begin cooking, then add the rest of the spice mix. Stir to combine, then add shredded chicken and stir. Pour in Rotel, chicken stock, tomato paste, water, and black beans. Bring to a boil, then reduce heat to a simmer. Simmer for 45 minutes, uncovered. Mix cornmeal with a small amount of water. Pour into the soup, then simmer for an additional 30 minutes. Check seasonings, adding more if needed---add more chili powder if it needs more spice, and be sure not to undersalt. Turn off heat and allow to sit for 15 to 20 minutes before serving. Five minutes before serving, gently stir in tortilla strips. Ladle into bowls, then, if you have the garnishes, top with sour cream, diced red onion, diced avocado, pico de gallo, and grated cheese. For The Pioneer Woman's Crock version of Chicken Tortilla Soup, click on the link! http://thepioneerwoman.com/cooking/slow-cooker-chicken-tortilla-soup/
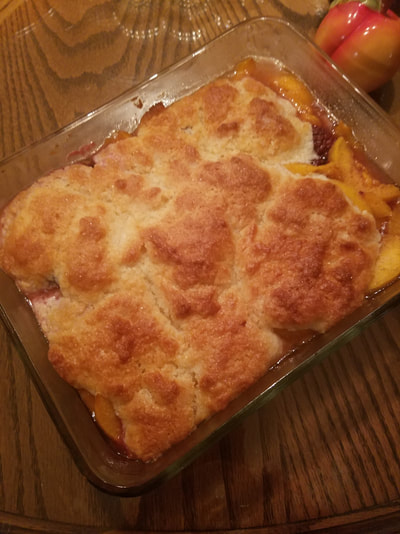
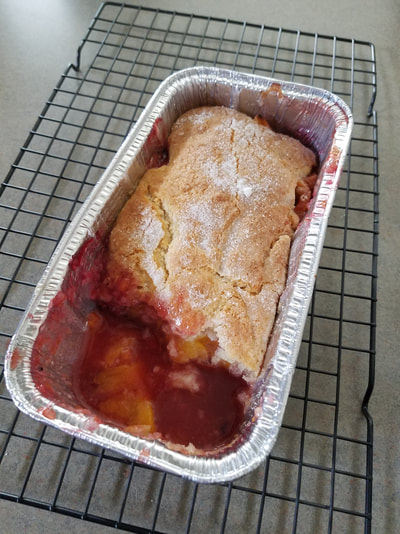
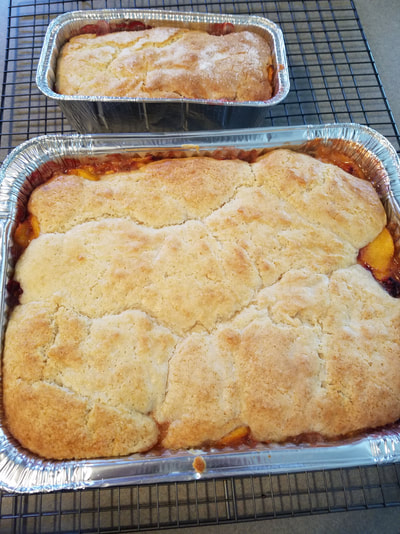
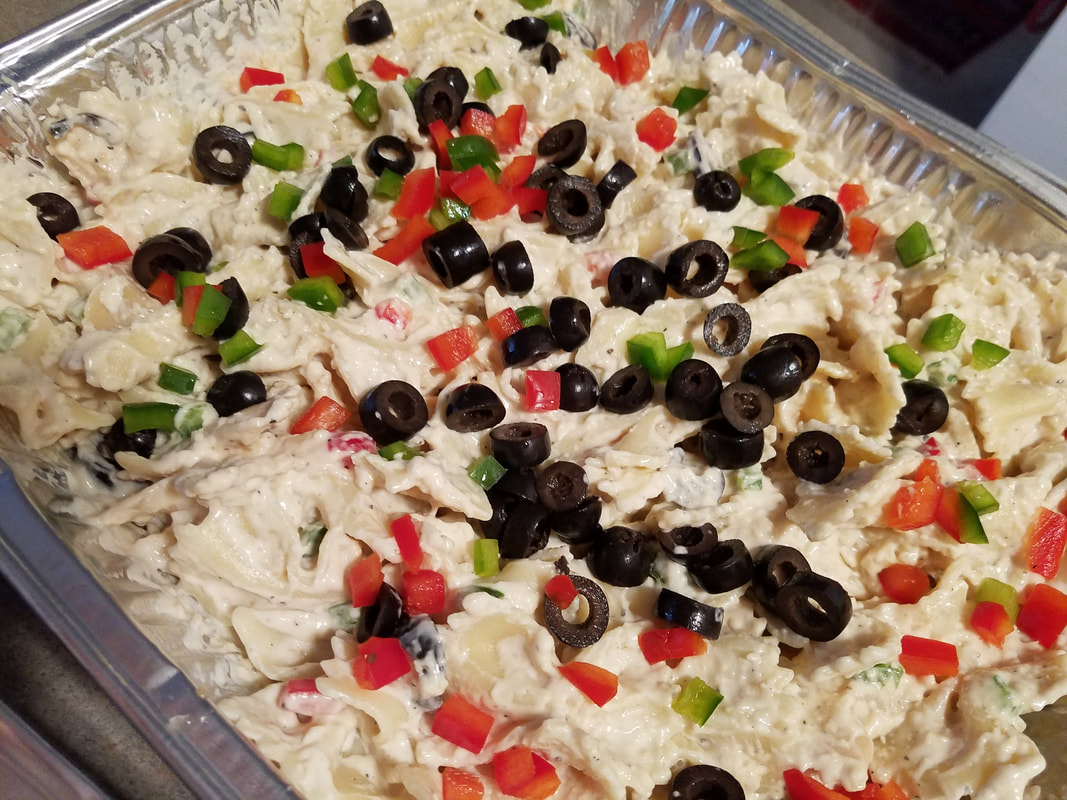
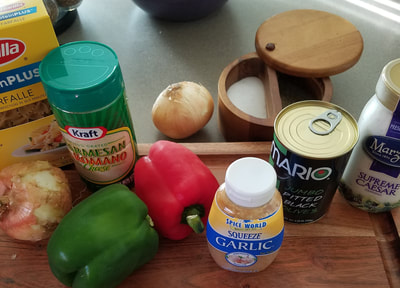
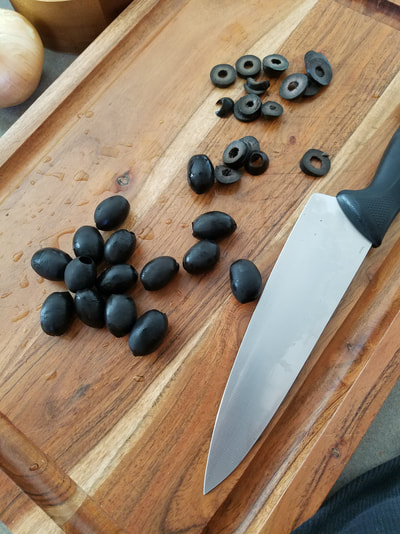
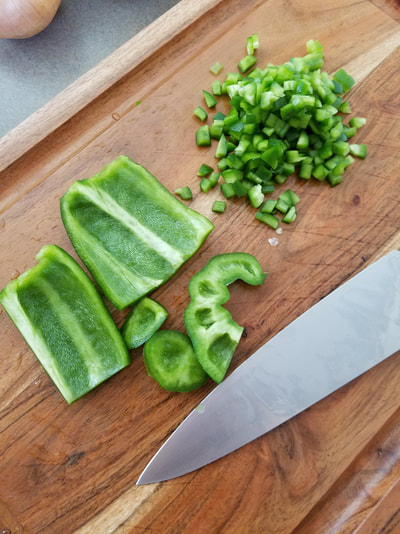
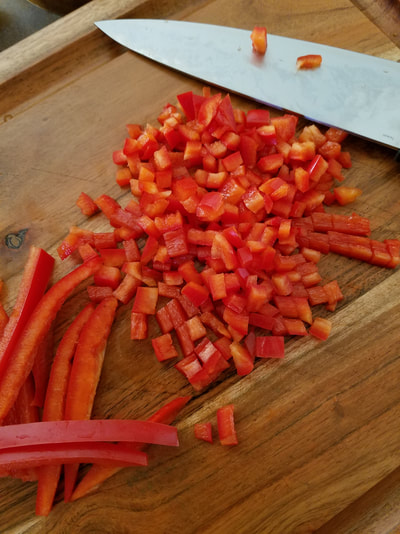
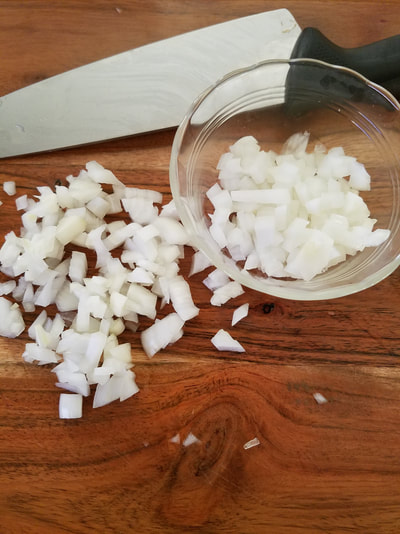
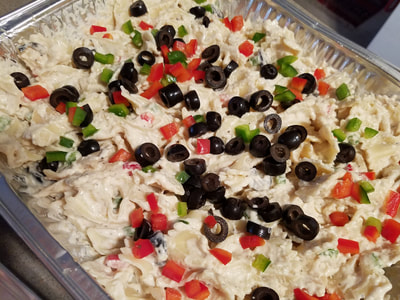
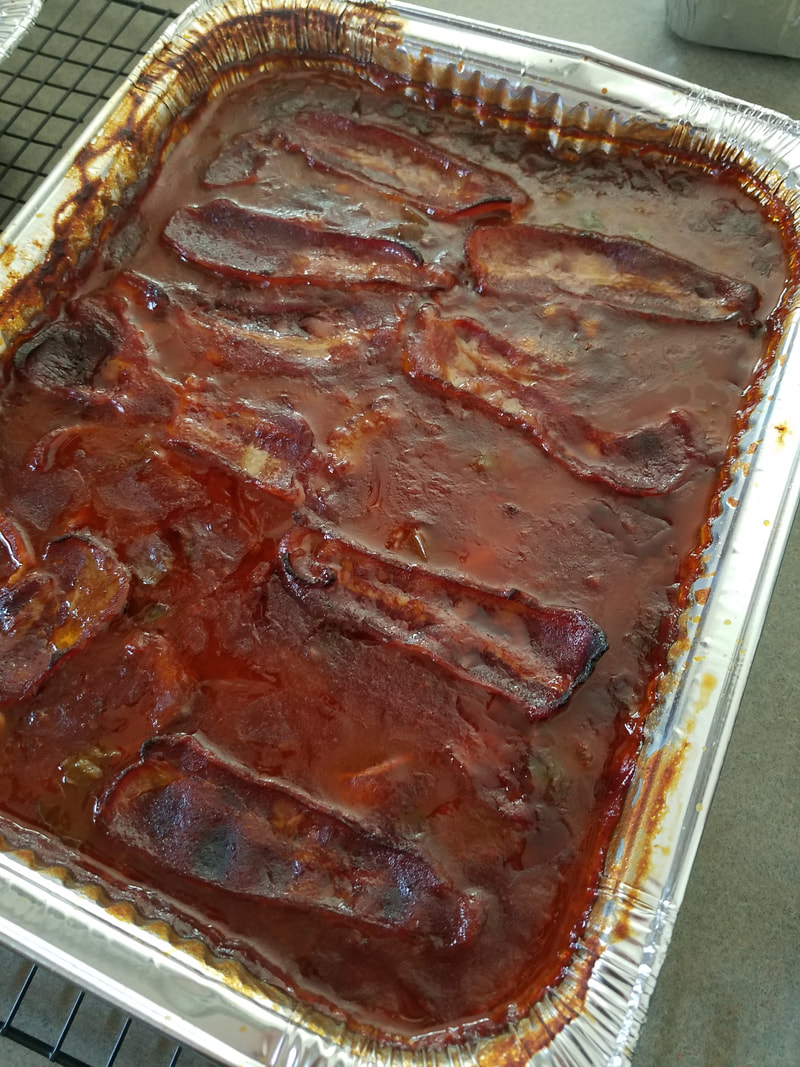
This is me catching up on the blog a little bit!! I started this blog before the end of Summer! It's almost Fall, but here's something to celebrate before the end of Summer, in addition to college football season, and that is peaches! Beautiful, delicious peaches! My friends Jeff and Carrie, mom and dad of Bo, Marley, Willie, Spooky and Lil' Bit, had a great Georgia-Notre Dame football party at their home and Tiki Bar, with lots of friends and food! I can't believe I didn't take pictures but I was too busy visiting and eating! Jeff made wonderful smoked chicken, ribs and brisket! Here is what Sis and I took! This recipe is from Once Upon a Chef. One thing about cobbler is a lot of people love the biscuit topping as much or more than the cobbler, and this topping is extra special because it is a sweet biscuit! This was beautiful, and a real crowd pleaser, and even more impressive because I used fresh Summer peaches! Click on the picture of the cobbler for the recipe! Here are a couple of dishes I've blogged about before, Bow-Tie Pasta Salad and Best Baked Beans Ever! The pasta salad is a recipe from culinary school, and one of our hostess' favorites! It's easy enough for anyone to do, and great for practicing your knife skills and dice cuts. If you want to get very industrious you can make your own creamy Caesar dressing, but I did use bottled dressing here, for convenience. Ingredients: 1 lb. bowtie pasta, cooked ½ c black olives, sliced ½ medium green pepper, small diced ½ medium red pepper, small diced (Prepare extra olives and peppers for garnishing) ¼ c sweet onion, finely diced ½ c grated parmesan cheese ½ c grated Romano cheese 4 c creamy Caesar salad dressing 1 clove garlic, minced ½ tsp black pepper Directions: In a large mixing bowl, combine cooked pasta, olives, peppers, and onion. Sprinkle with parmesan and Romano cheeses and stir to combine. In a small bowl combine the salad dressing, garlic, and black pepper, then stir well. Pour the dressing over the pasta mixture and coat well. Garnish with diced green and red peppers and sliced olives. Refrigerate at least an hour to chill and meld flavors before serving. ********************************************************* What goes better with smoked meats, Southern cobbler, and a cool, Summer salad? Baked beans, of course! This is one of my sister's favorites, and mine, and worth repeating over and over! Named Best Baked Beans Ever by The Pioneer Woman! Click on the picture of the beans for the recipe! Here's a picture of the Tiki Hut that Carrie took before the party, the best little bar in Cassville, and Matt, her handsome son who is in his last year at ABAC in Tifton, Georgia. This is such a fun place. Thanks again, Jeff and Carrie, for sharing with us!  Summer may be ending, but college football always makes things better! Until next time, friends, Denise!
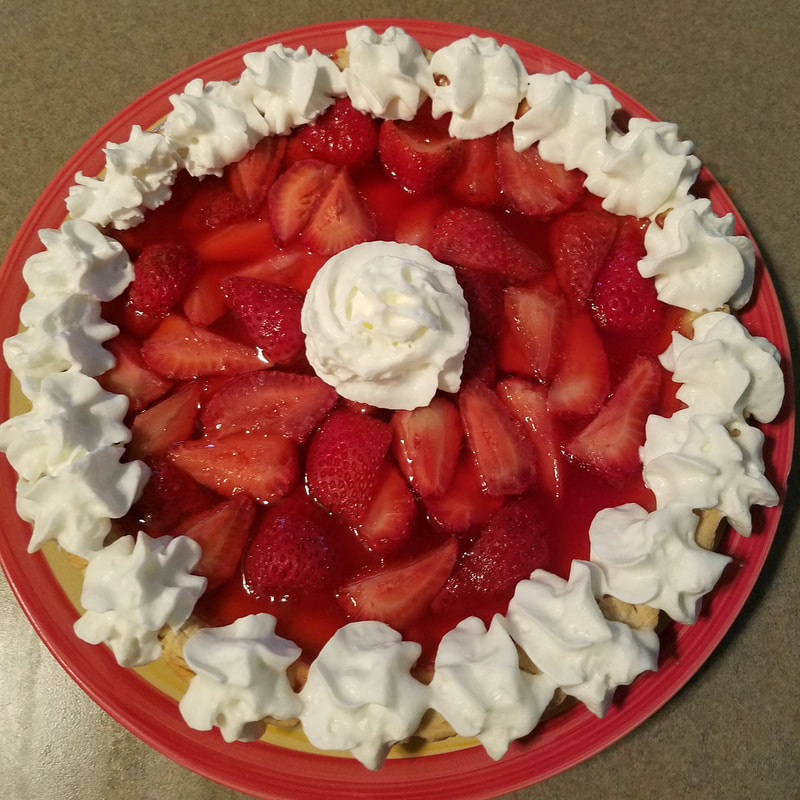
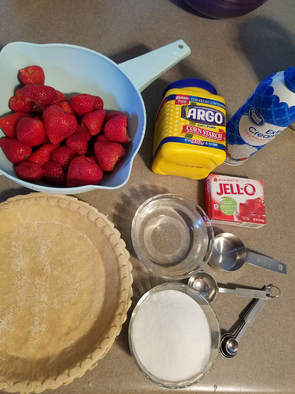
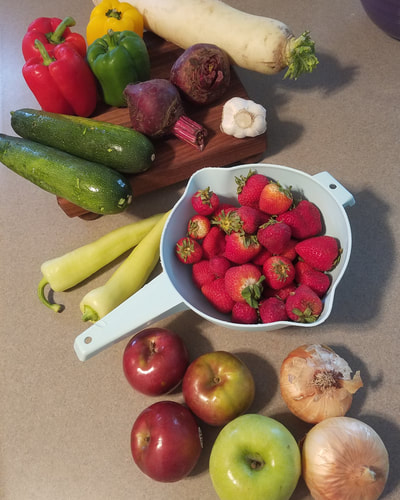
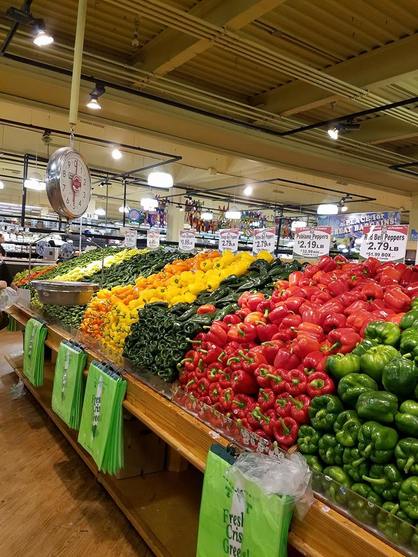
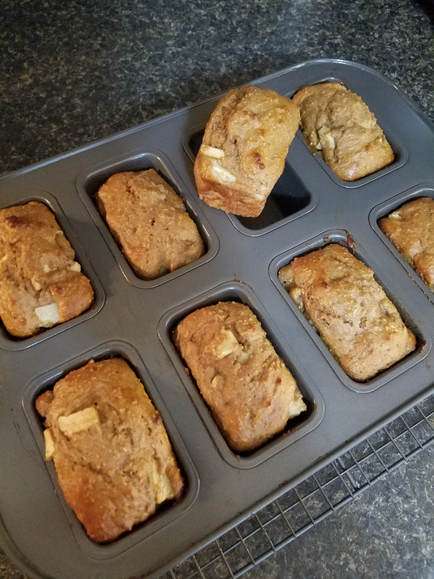
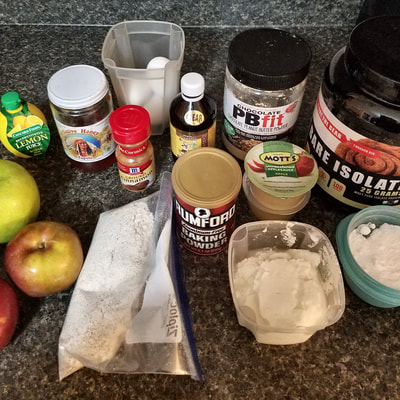
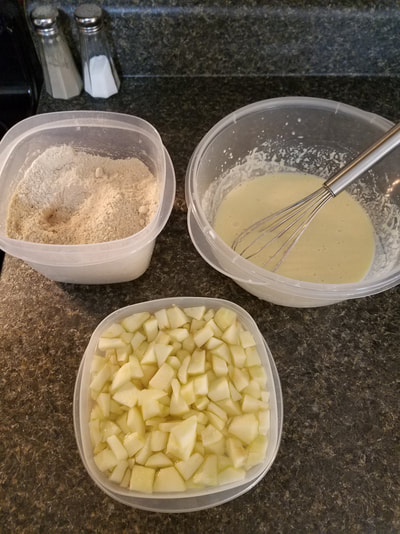
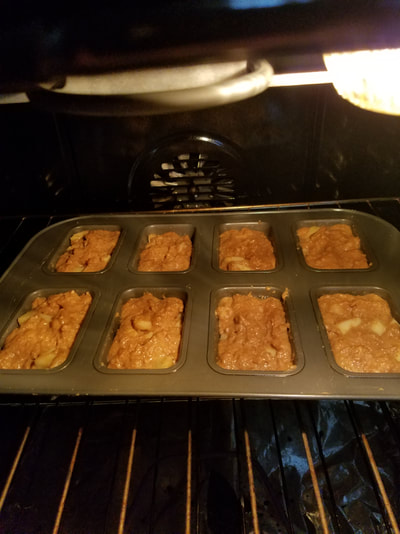
A fresh strawberry pie in Summer; can't get much prettier and tastier! My friend Patricia and I recently went to one of our favorite places, Buford Highway Farmers Market in Doraville, Georgia in the Atlanta area. One of the first things we saw was fresh strawberries on sale. They brought back many memories, like strawberry daiquiris my friends and I used to make on a hot, Summer day by the pool, and Shoney's Strawberry Pie. We don't have a Shoney's in Rome anymore, which is sad. They have the best breakfast and the best strawberry pie! For all this deliciousness, this is probably the easiest pie ever to make. I made one for us and one for my next door neighbors, who are the most neighborly neighbors! I was pressed for time, so I did use store bought pie crusts. Don't let me mislead you, I haven't made a pie crust since culinary school! So this is a six ingredient pie, and that includes the whipped cream! If you're feeling really productive you can make your own, but I just gave my neighbors a can of whipping cream. How's that for a trained cook? Convenience cannot be over-rated! This is so beautiful I think I'll make another one! You can, too, just click on the picture of the pie for the easy recipe! Here is some more fresh produce we picked up at the farmer's market: peppers, zucchinis, beets, apples, onions and garlic. It's just a heavenly garden smorgasbord! The market is an almost two hour drive for us, but the trip is well worth it! It is an international market with about every ingredient you've ever heard of if you're into cooking different cuisines, and much more than just fresh produce! I have bought hard sought out spices and ingredients there for Korean, Chinese, and Mexican dishes! Are you ready for some more healthy protein muffins? My next recipe isApple Cinnamon Protein Muffins. These are made with a combination of Granny Smith and McIntosh apples from the farmer's market! These turned out really moist and scrumptious! (I'm using other words besides delicious.) I might be getting the hang of this! Apple-Cinnamon Protein Muffins Ingredients (separated by dry and wet):
And now for your viewing pleasure, here are some of my pet friends I have been keeping while their owners are on vacation this Summer! I have had many jobs since May and few more lined up through September! This is part of the reason you haven't heard from me much in the last few weeks, but I'm trying to keep up some, in addition to having Sawyer two or three days a week. It has been a wonderful, busy Summer!
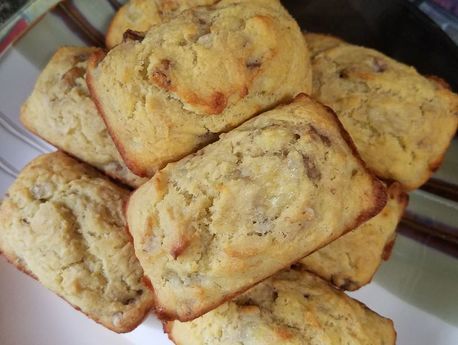
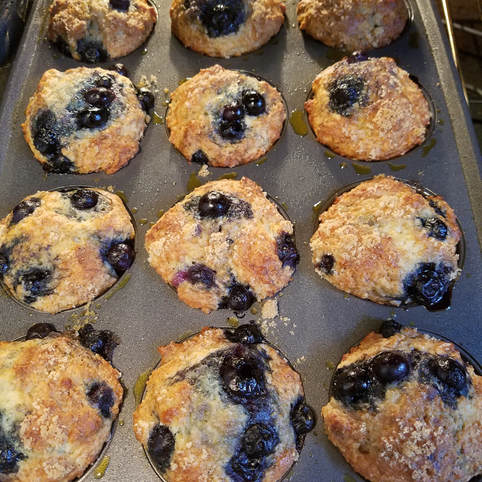
I hope everyone enjoys the rest of their Summer! Dishing With Love, Denise! My latest baking endeavors are high protein healthy muffins for Sawyer's dad, Ghee. This came as a challenge to me after Ghee bought muffins from his work-out gym and paid a pretty, pretty penny for them. I knew I could do better! It was a little more challenging than I thought, making high protein, low carb muffins that taste good and are not really, really dry! Here is my first attempt, a banana-nut muffin. The muffins from the gym contain 20 grams of protein each and are low in calories, so that's what we're working for here, plus taste! I have never worked with oat and almond flour before (except for Macarons), or worked with whey protein in baking, so this was trial and error for me. The banana-nut muffins did turn out dry. Maybe one reason was because the bananas should have been allowed to over-ripen more. I have also since learned to add more moisture because, in addition to the grain flours requiring additional moisture, the muffins contain whey protein that requires more moisture. I'm not going to give you the recipe to these banana-nut muffins until I get the recipe like I like, and like you'll like it! I use an eight cavity mini loaf pan. Sometimes I have extra batter depending on how much moisture I add so I'm going to buy another pan. Also, every protein muffin recipe I've made has had different cooking times so get those toothpicks out to check for doneness. They can dry out very quickly. I did learn a few things from that first healthy muffin endeavor, and I made Ghee some tasty blueberry muffins, and forgot to take pictures of them. Here is the Blueberry Protein Muffin recipe. This recipe is for my work-out buddies who favor a higher protein diet (Let me clarify that as my buddies who work-out, because I don't work out. I think about it every day; does that count?). So these recipes will call for ingredients that some of you may not be familiar with, but if you're one of those protein smoothie people like Ghee and my sister, you will recognize them. Ghee enjoys these during his work days and has been a wonderful guinea pig...I mean taste tester! Let me mention here, in case you don't know, the muffin method of baking is the easiest ever! See instructions below. Before I move on to the Blueberry Protein Muffins, let's break up the page a little bit. Here's a Pioneer Woman Recipe for some delicious, sugary blueberry muffins, great for anytime...breakfast, brunch, having friends over for coffee! Anytime! Click on the picture for the recipe! Now back to the protein muffins! First, here's a note on whey protein. Because different products contain different sized scoops and the grams in the weight of the product is different, we are measuring the grams of protein, not the powder. Got it? Also, cinnamon bun flavor was on hand and unless your product has an extremely strong flavor that would contrast with other flavors in the muffin, most of the time any mild flavor will do. Next, a note on the frozen blueberries (fresh blueberries will give you a slushy muffin, which is not really a muffin): Lightly coat the frozen blueberries with some extra oat flour and this will keep them from sinking to the bottom of the batter due to their extra water content. You will probably have to break them up a little first. Put them back into the freezer until everything else is done. Blueberry Protein Muffins Ingredients (separated by dry and wet):
*Note on eggs: Crack the egg and egg whites into a separate small bowl before adding to the other wet ingredients. This is to keep from getting egg shells into a whole batch of ingredients, in case there are egg shells. I also whisk my eggs before adding. I think it makes incorporating the eggs with the other ingredients easier. Nutrition Facts (these are approximate facts gathered by submitting ingredient information to a nutrition calculator but they have not been officially evaluated by anyone): Servings 8-10; Amount Per Serving: Calories 218; Total Carbohydrate 26 g: Dietary Fiber 4 g ; Protein 22 g. 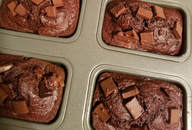 I also made Double Chocolate Protein Muffins. This recipe has to be tweaked, too, because it ended up with too much chocolate and too many calories. Imagine, I got carried away with the chocolate! Of course they were delicious, but lots of calories are not good when you're working hard at working out! 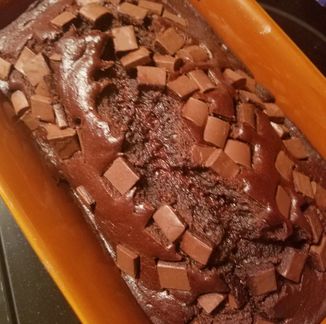 Triple Chocolate Banana Bread! Triple Chocolate Banana Bread! Triple Chocolate Banana Bread! Here's another goody for breakfast, brunch or having friends over, or just for having chocolate. My sister saw this recipe on Facebook and requested it. It was very good and very rich. A little goes a long way! Click on the picture for the recipe! Are you muffin-ed out yet? I have a couple of more recipes coming your way for tasty protein muffins. As I continue to make these and improve them, hopefully, I'll keep you updated. Please note that there is a comment section here on the blog and I would love to hear from you if you have any experience in baking, or if you have any questions.
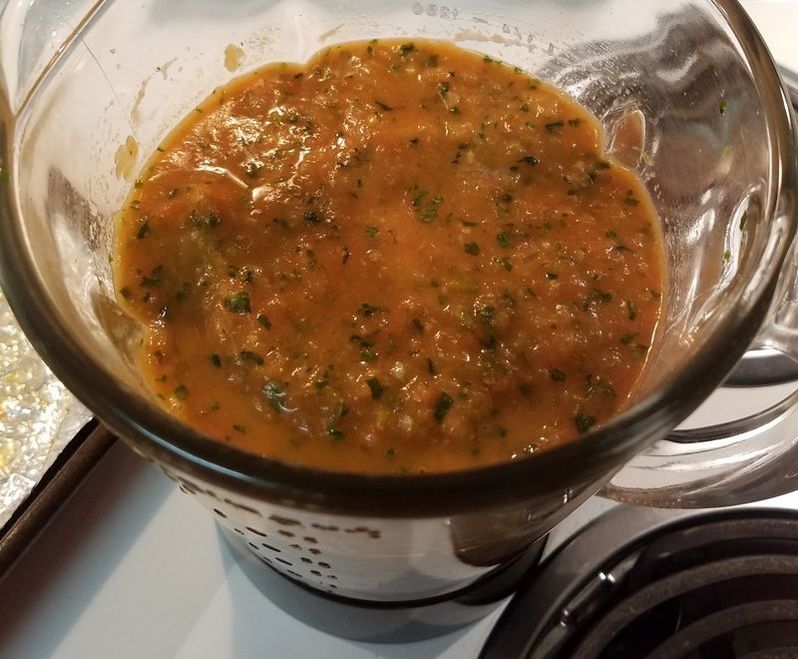
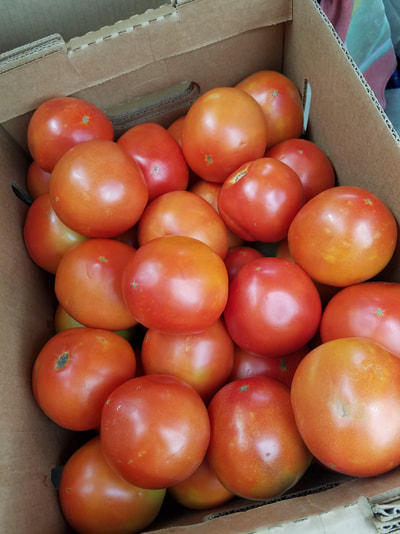
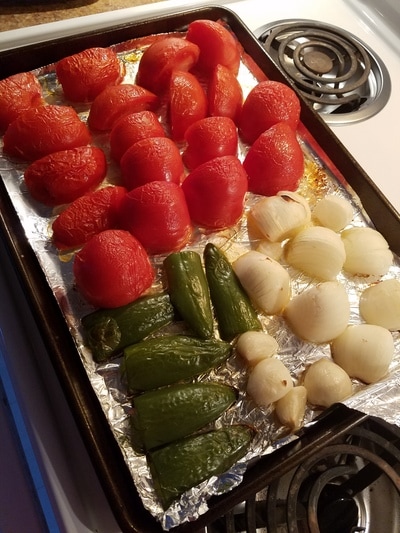
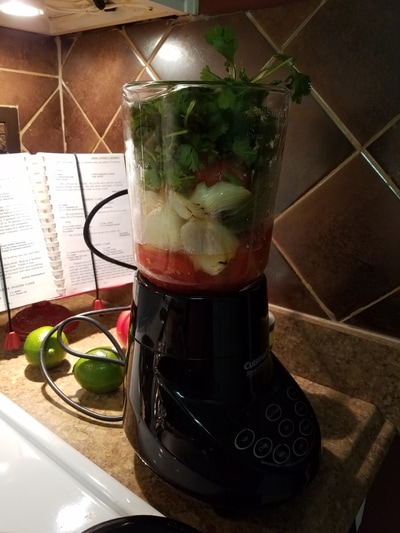
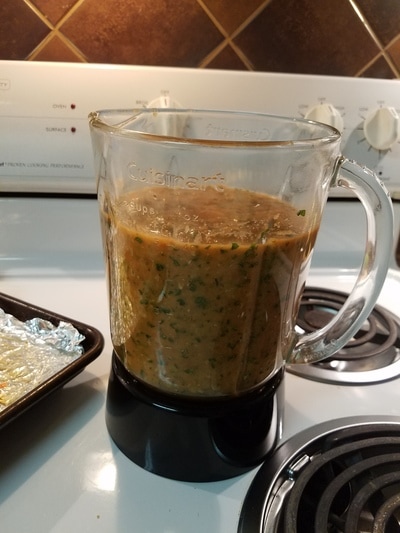
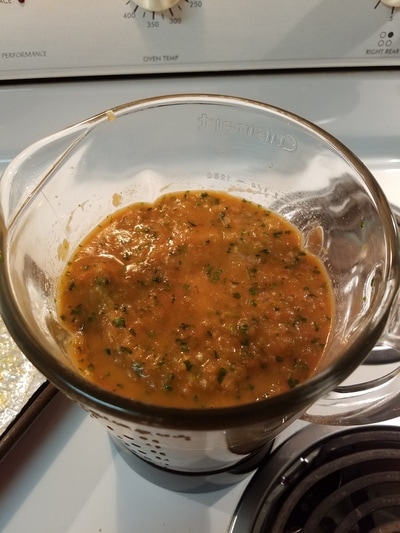
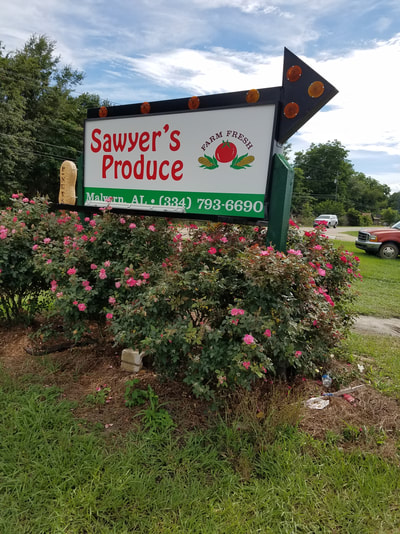
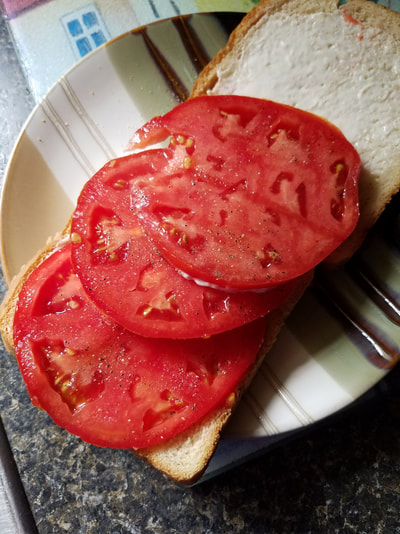
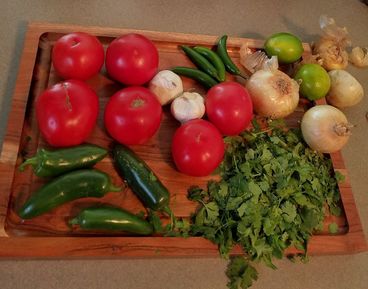
Dished With Love, Denise Making the perfect salsa from scratch and having the perfect salsa recipe has been a forever goal of mine. Making salsa is the BEST thing to do with any tomatoes that have met their prime, if they last that long. These vegetables were roasted in the oven. A friend of mine suggested grilling the vegetables and that salsa was delicious, also. It's hard for me to put roasted and grilled vegetables in a food processor because I love to eat them cooked like that! We picked these up at a place called Sawyer's Produce in Melvern Alabama after our friend Howard, who attended nearby Alabama's Troy University, told us about them. They are also known as Geneva-Hartford tomatoes. According to one of the local farms: "Slocomb tomatoes are not a variety; they are a culture in how the tomatoes are grown, picked, stored and delivered." I really love the name of the produce place! Most of the tomatoes were not fully ripe so they lasted for a while. We enjoyed them for weeks and we had lots to share! Here's a picture of a sandwich I made with the last of them. Look how beautiful that tomato is! These tomatoes, for you local folks, are from the Pick Your Own Farm on Hwy 53 toward Calhoun. These are also some beauties, and well worth picking in 100 degree weather! There is more than one variety, and one I like better than the others, so be mindful of that if you go. I grilled these vegetables and made salsa. The serrano peppers are for me, Sis likes the milder peppers. This salsa was also delicious, but not yet to perfection! Not the tomatoes' fault!! Here's a recipe for salsa that I used in a restaurant project in culinary school. This is a pretty great recipe I adapted from a recipe that I like a lot, and anyone can make it because the main ingredients, the tomatoes, come from cans! For all you food purists out there, the seasonings in canned tomatoes go a long way to tasty salsa!! It was a big hit on the Mexican Buffet! FYI: Mexican restaurants use canned tomatoes. I know, because I have asked!
Fire Roasted Salsa
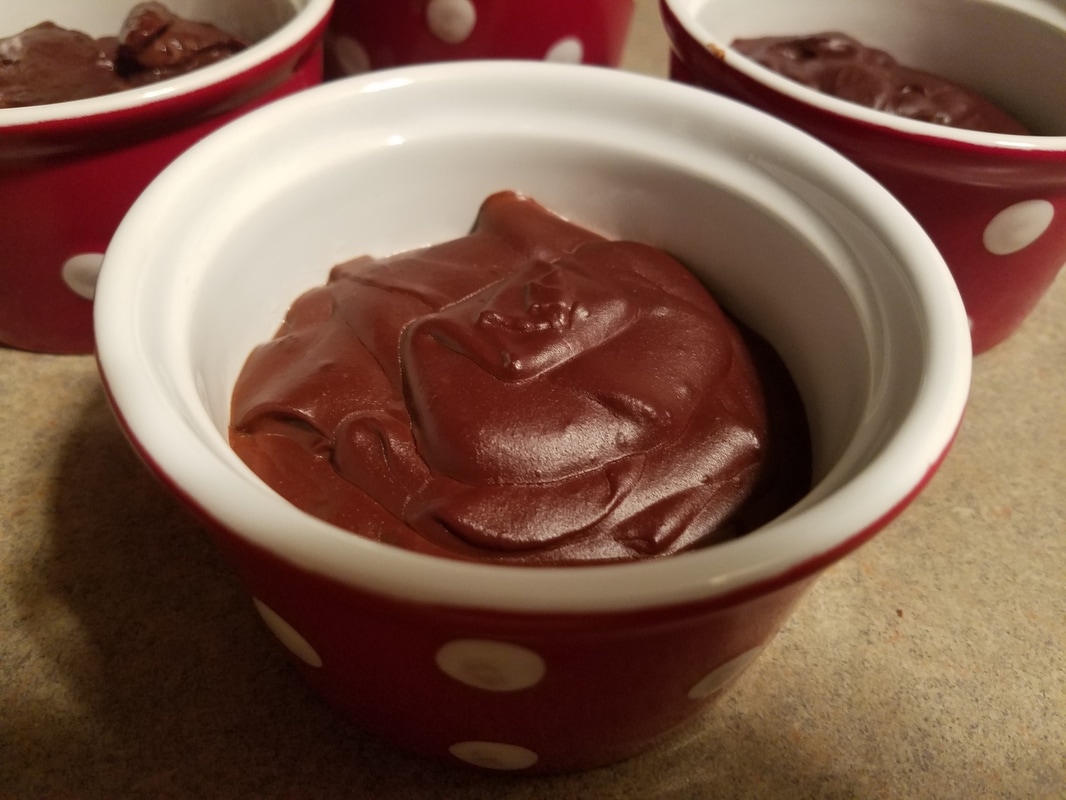
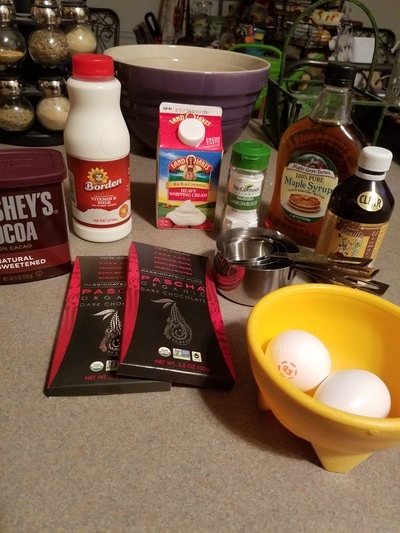
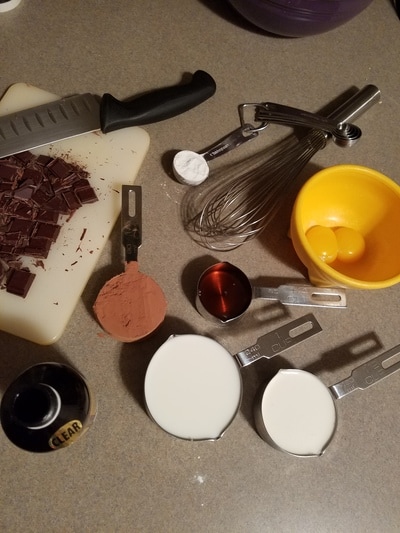
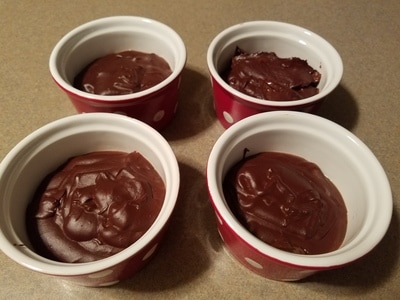
In a small ungreased skillet over medium heat, roast the jalapeno and garlic, turning regularly, until they are soft and blotchy brown, about 5-10 minutes. Put the jalapeno and garlic in a small bowl while hot and cover with plastic wrap and let them steam. This will allow you to peel the skin off the garlic and mince; cut the stem off the jalapeno, peel the skin (or scrape with a paring knife), then quarter and thinly slice Combine whole tomatoes, Rotel, onion, jalapeno, garlic, sugar, salt, lime juice, and cilantro in a blender or food processor. Pulse about 10 to 15 pulses. You are looking for the consistency of restaurant salsa. Test seasonings with a tortilla chip and adjust as needed. Refrigerate salsa for at least an hour. Do you have a favorite salsa recipe? Please share! Dished With Love, Denise This delicious dark chocolate pudding was a labor of love, but I really didn't give it enough forethought before making it! When something says it is healthy, it can be in many ways, such as all-natural or organic with no-preservatives or artificial sweeteners. It is not so healthy overall if you're making it for a two year old, when that chocolate has caffeine in it, and not for a diabetic when the 100% maple syrup sounds healthy but is only a fraction healthier for you than granulated sugar. So don't let words like "Paleo" and "grain-free" in a recipe fool ya!
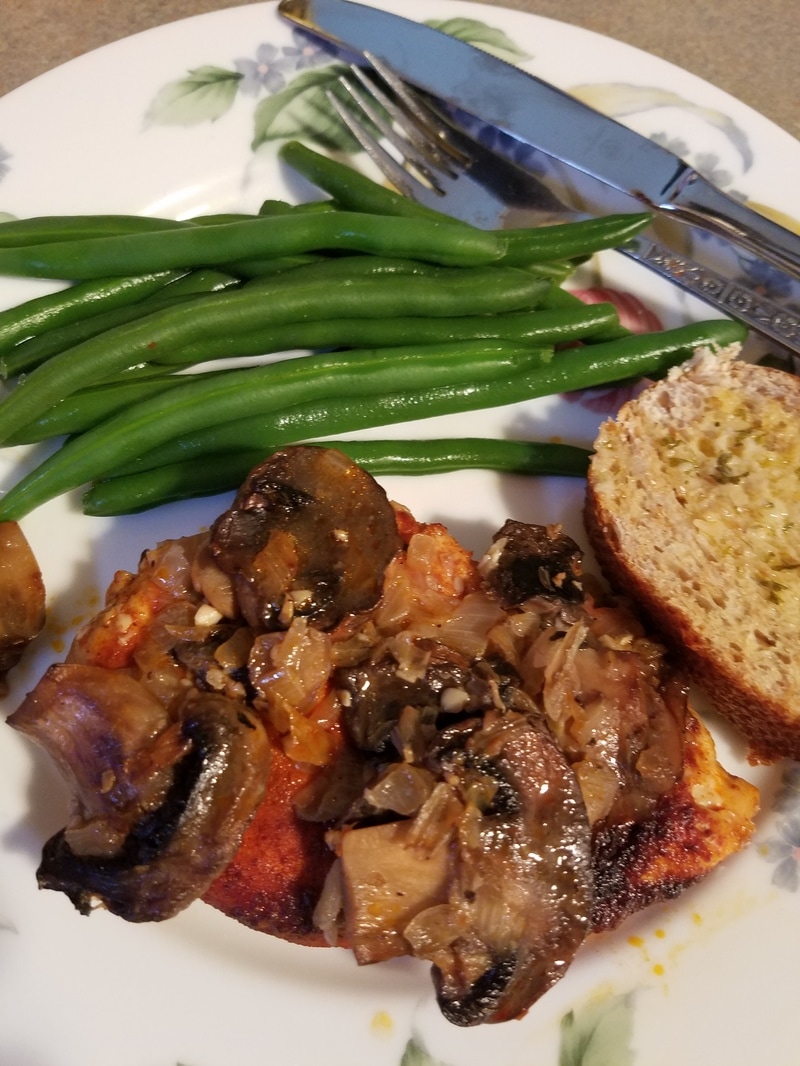
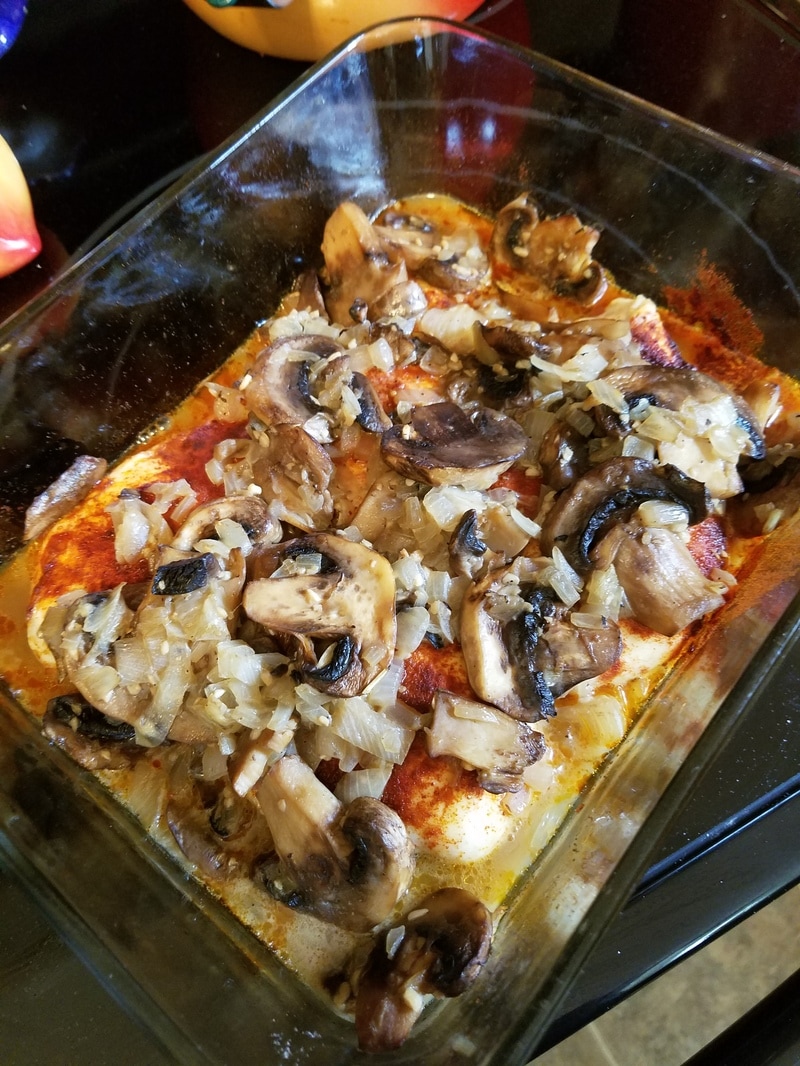
If you're looking for a delicious, creamy and rich dark chocolate pudding to enjoy, and you don't have to worry about caffeine and sugar, this is a recipe for you! Click on the picture for the recipe! Enjoy! Yay, it's Friday!! I will admit, the end of the week doesn't have the same meaning as it did before I retired! Fridays now for me are a day with Sawyer, and I always look forward to time with her! Sawyer just turned two! For my loyal friends and followers, you know this blog and Sawyer were born on the same day, and Dished With Love is dedicated to her, with much love! I have been busy, busy lately. With Summer comes a lot of vacations and requests for a pet sitter, and I have a nice client list. I have a photo gallery on here of my pet "clients". I was home this week and was able to cook a little in the kitchen and prep a few things for next week when I'll be gone again! I had some chicken breasts thawed out and bought some fresh mushrooms earlier in the week, so I came up with this easy and delicious recipe! I was doing several things at one time, so I didn't even think about taking photos until the dish was already in the oven! It is so easy, though. I had two chicken breasts that I bought at Sam's. They came in a package that had two breasts individually wrapped in four separate packs that were ready for the freezer! Most of the time I'll save money and separate large packages and put in individual freezer bags myself, but sometimes these convenience packages are so appealing that I can't resist! I cut the large breasts into four pieces, about four ounces each. Ingredients:
Directions:
Enjoy this easy, impressive, delicious, and healthy dish! I have two honorable mentions this week. Sawyer just turned two, so I must show you how beautifu she is. From this picture you can tell she gets that from her beautiful mother, Lindsay! On a sadder note, my pet friend, Bo, died last week. He was the sweetest big dog who loved to play catch with his tennis balls and cool off in the pool. He belonged to my friends, Jeff and Carrie, and was part of Willie and the Boys. Willie is the cat and Marley is Bo's brother. They have all been featured in previous blogs and Willie, Bo and Marley are in the pet slideshow on the right side of this page. He is missed.
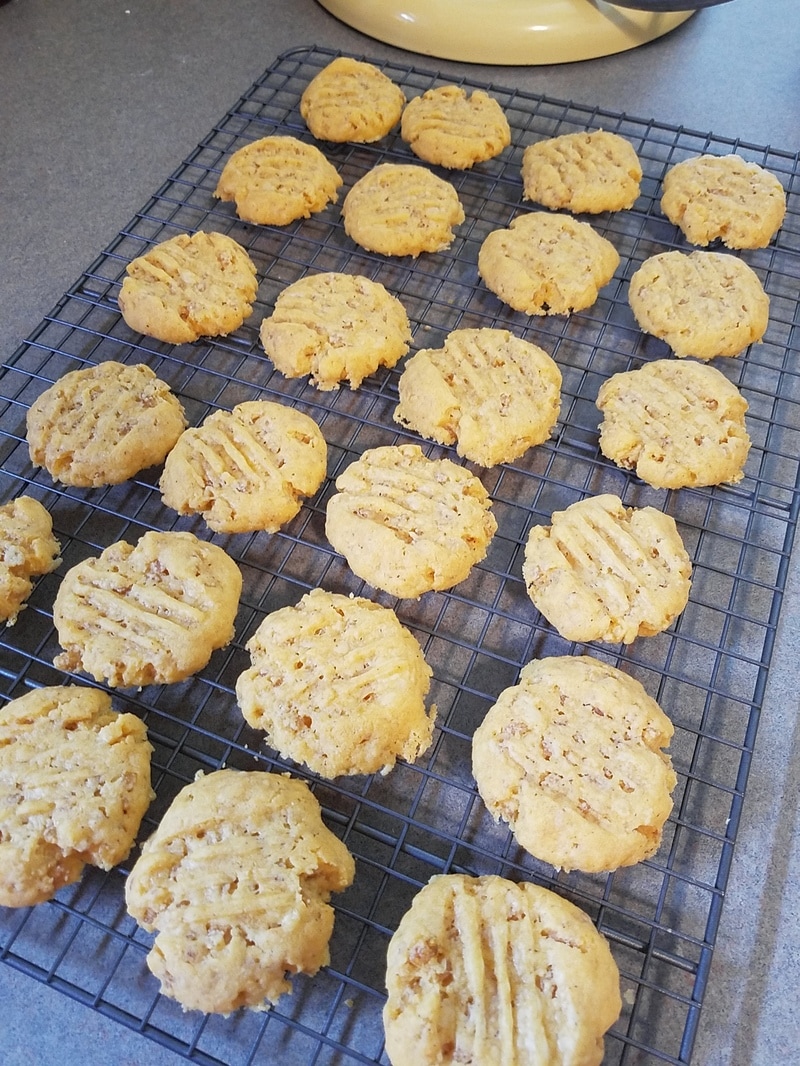
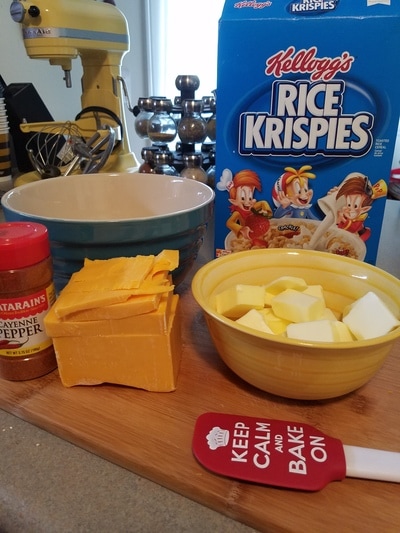
Another cheese recipe!! Yum! These are a Southern favorite, and a must have at any baby shower, bridal shower, wedding, etc. They might be a favorite up North, too, but I've never been there, so I don't know! You can find an Olive Cheese Ball recipe that I made for a friend a while back by using the super-duper search feature on this page. Another friend mentioned that she liked the cheese straws with Rice Krispies in them, so I found a recipe I like, tweaked it a little bit, and they turned out wonderfully! I will admit that I made two batches and by the time I got to the end of the second batch the crisps were getting bigger and bigger, not uniform and professional looking the way they started out. I took the last batch on vacation with us and I did have to put it back into the oven to cook a little longer. They crisped up very nicely and stayed crisp in a tin canister. I sent some to my sister's office, and some to my friends, Jimmye and J.C. Jimmye says J.C. buys them from the Byrd Cookie Company in Savannah, and I told her to tell him I was taking orders! If you want a real crowd pleaser that is easy to make and delicious, this is it! They make a great gift! INGREDIENTS:
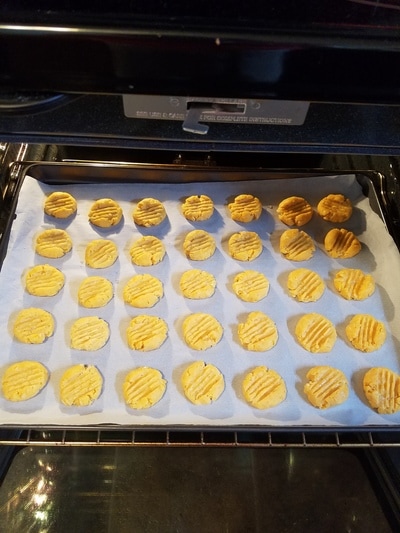
16 oz extra sharp cheddar cheese, grated 2 cups all-purpose flour 2 sticks butter, softened 2 cups Rice Krispies (or other puffed rice cereal) 1/2 teaspoon ground cayenne pepper (or to taste) INSTRUCTIONS: Preheat oven to 325 degrees. Line baking sheets with parchment paper, or very grease them very lightly with a cooking spray. Combine all of the ingredients together. Mix all of the dry ingredients first before adding the butter. This can be done in a large electric mixer with a dough hook, but I donned my food service latex gloves and mixed it by hand. Don't over-mix any kind of dough because it will become tough! Roll into small balls about one inch in diameter and place them on the cookie sheets an inch apart. Flatten the balls with a fork that has been dipped in water and bake at 325 degrees for 12-14 minutes or until lightly browned. Don't forget! If you make the balls much more than one inch in diameter then you will need to cook them a little bit longer, depending on how big they turn out. Just watch them in the oven, without opening the oven door if possible! I made some special crisps for myself by sprinkling extra cayenne powder on top of them before baking. I do like spicy! Enjoy! Denise My sister and I were getting ready to go on vacation with a friend, Jan, to who I owe a birthday dinner. We live in different towns so we haven't been able to connect on that, but when my sister said that Jan always has chocolate chip cookies in her house, that made her birthday gift easy to decide on!
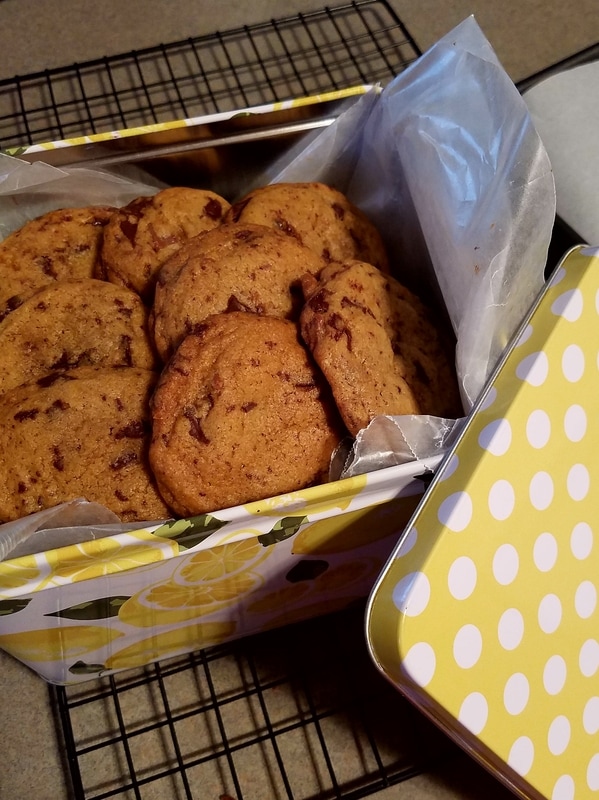
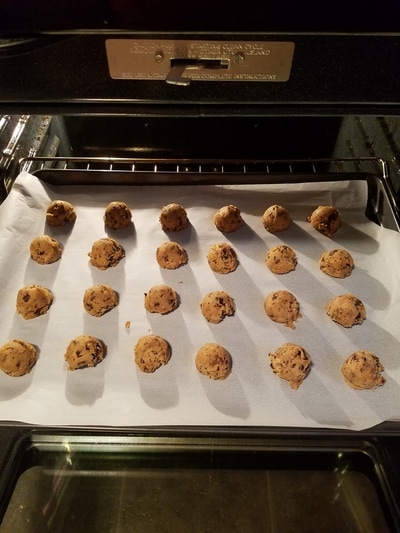
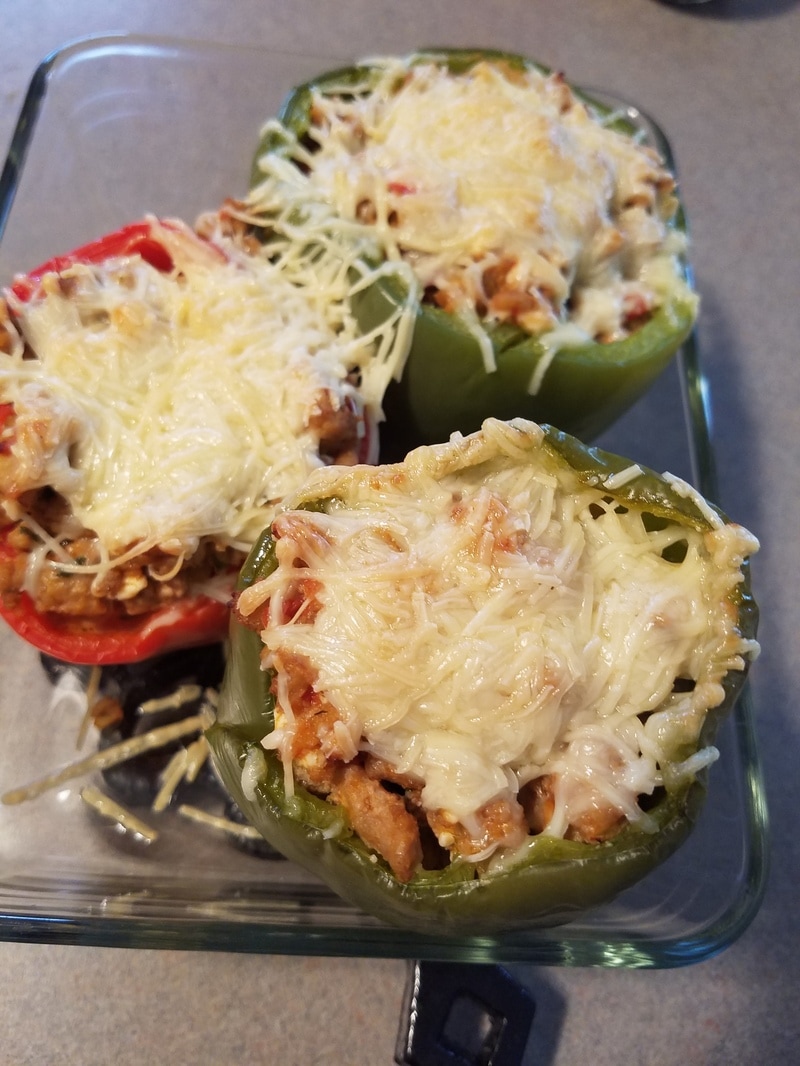
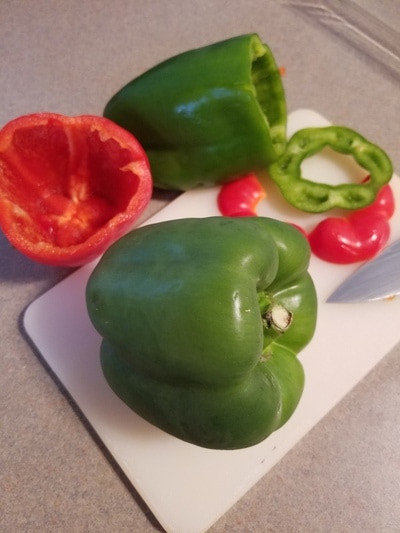
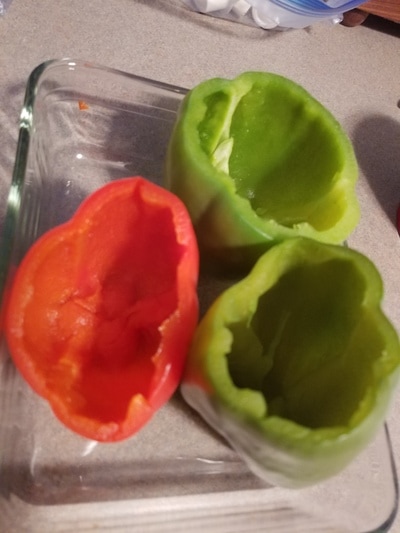
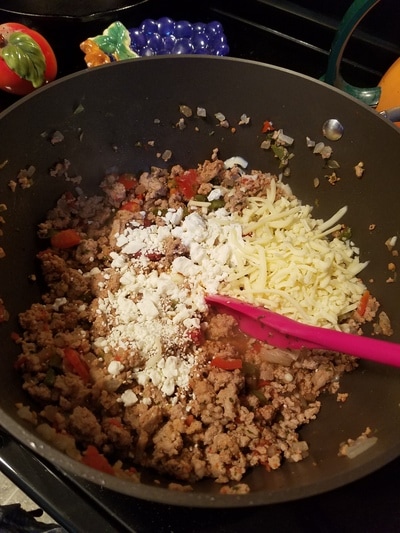
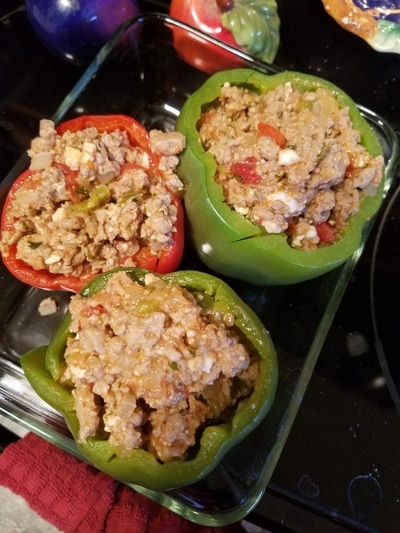
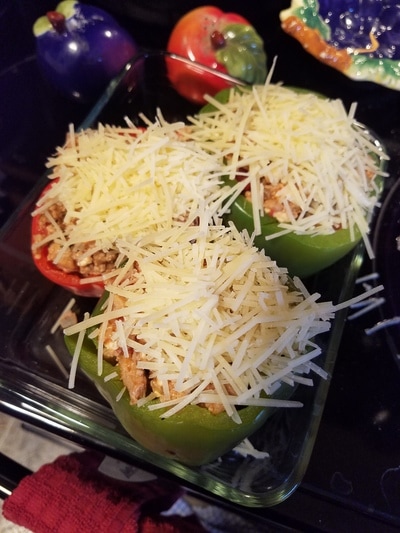
This recipe came from a Facebook page that I follow, Once Upon a Chef by Jennifer Segal. The cookies turned out wonderfully fat, crispy on the edges and soft on the inside, with lots of chocolate! Click on the picture of the cookies for the recipe! These were enjoyed by many! I made two batches and shared with my sister's co-workers, set aside some for Jan, and had a batch to carry with us on vacation. They were also super easy! Try to make them ahead of time so you can put the dough in the refrigerator overnight. Best of all, the dough can be made a week or month ahead of time, per the recipe! Easy and delicious, and loved by all! You can't beat that! Here's a dish that we enjoy at home, and it can be done up many, many ways, and as healthy as you want it! I use 93/7 ground turkey and I leave out the "fillers" of rice or orzo. When you buy turkey, any turkey, you do need to make sure you have good seasonings, as it can be bland, and some times some added fat. I use a little of a good olive oil when needed. I do buy the 93/7 ground beef occasionally, because it does taste very good! As with the turkey, the addition of a little fat may be necessary for moisture. One negative here, of course, is that the leaner meats are more expensive. If you have space in your freezer (mine is limited), it is cheaper to buy these in bulk. This recipe is for four peppers, but I only had three on hand. I had some goody leftover stuffing to have later. I love to buy the pretty bright colored peppers, and I can't wait until the homegrown tomatoes start coming in. They are good for stuffing, too! Did I mention there are three cheeses in this recipe? I buy the fat free Feta and low-fat mozzarella. The parmesan on top came from Sam's in a big container, because you can use it on many, many things, such as sauces and vegetables! Enjoy! INGREDIENTS:
4 3-oz. bell peppers, with flattest bottoms you can find (I only had three peppers on hand) 16 oz. ground turkey (or beef, or lamb) 2 oz. onion, finely chopped 1 Roma tomato, finely chopped 1 T. tomato paste 1/3 c. water ¼ c. red wine 1 large clove garlic, minced 1/8 tsp. dill weed (optional) ¼ tsp. crushed dried oregano ¼ c. parsley, chopped ½ c. feta ½ c. Monterrey Jack cheese 4 T. Parmesan (I used shredded, or sometimes the grated in the sprinkle bottles) I also used extra, as you can tell in the photos. DIRECTIONS: To speed up the cooking process, boil the bell peppers for 4-5 minutes to soften before stuffing and baking, after you cut off the tops and clean out the inside. Dice those pepper tops up to cook in the ground meat. Then preheat the oven to 350º. Brown the ground turkey in a non-stick skillet. Add onion, diced bell pepper, garlic, tomato, tomato paste, wine and water. Next add the parsley and spices. Simmer about 10 minutes, stirring, until tomato and onion are fully tender and the liquid is evaporating. Add feta and Monterrey Jack cheese. Stir to blend and melt. Remove from heat. Stuff the peppers and sprinkle the tops with the Parmesan cheese. Pop in preheated 350º oven for 30-35 minutes or until pepper shells are tender. The Tiki Hut is open! I don't think it actually ever closes! I'm talking about the pool hangout belonging to my friends, Jeff and Carrie. They are also parents to Willie and the boys, Bo and Marley, who are in the pet gallery here. As you ca see in a blog from the Summer of 2015, Jeff has a Primo grill and loves to cook and smoke on it, and lots of us love to eat his food! We had a great time this weekend with great food, pulled pork barbecue and smoked chicken, and I made some new friends!
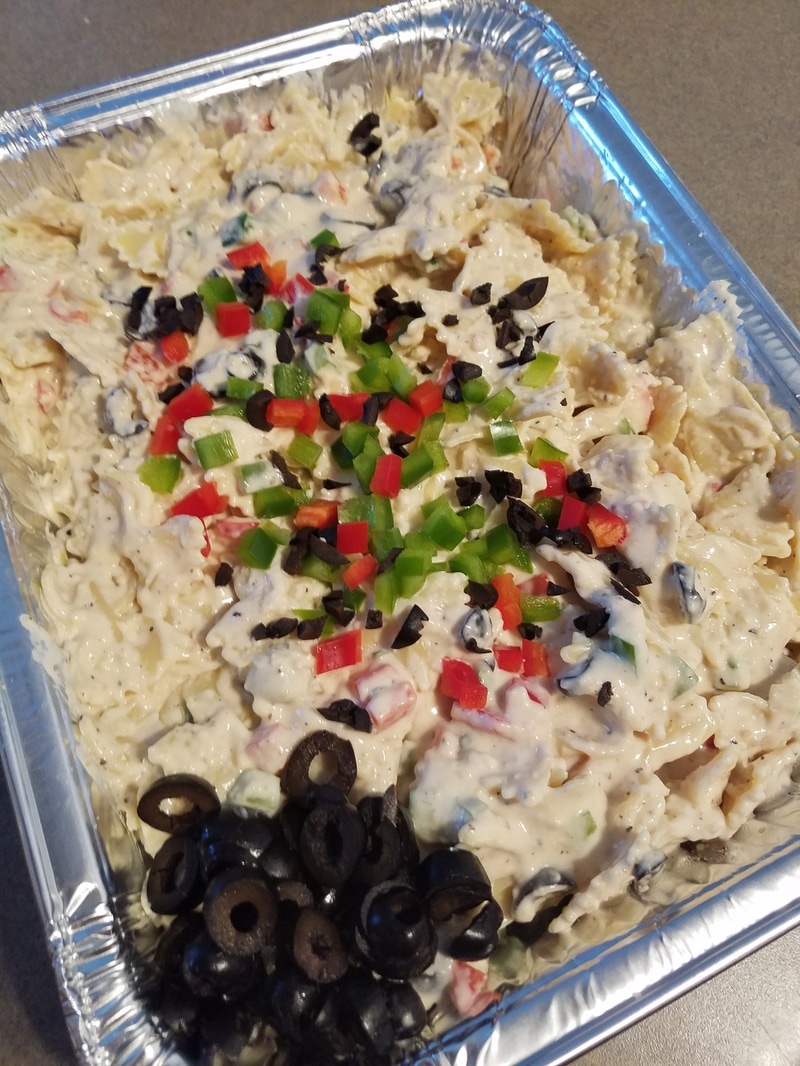
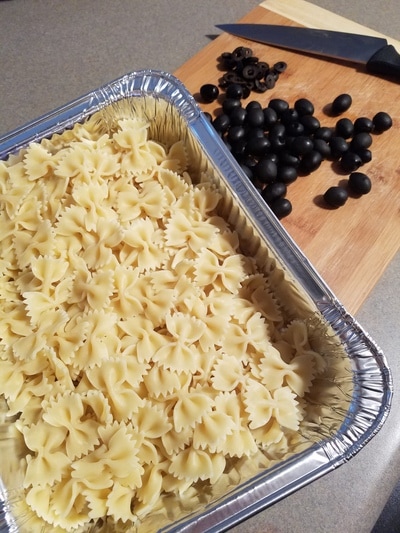
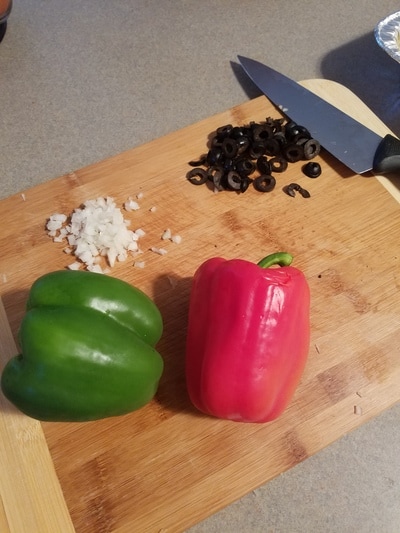
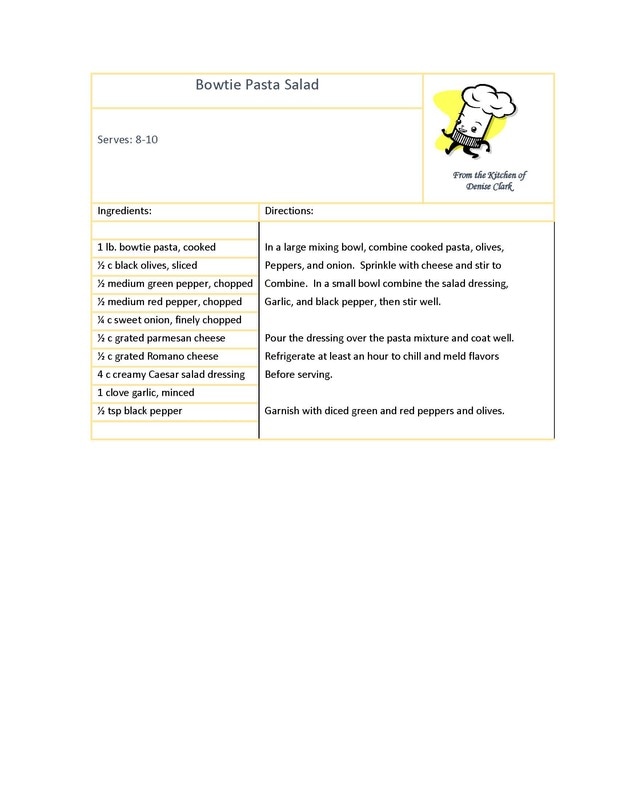
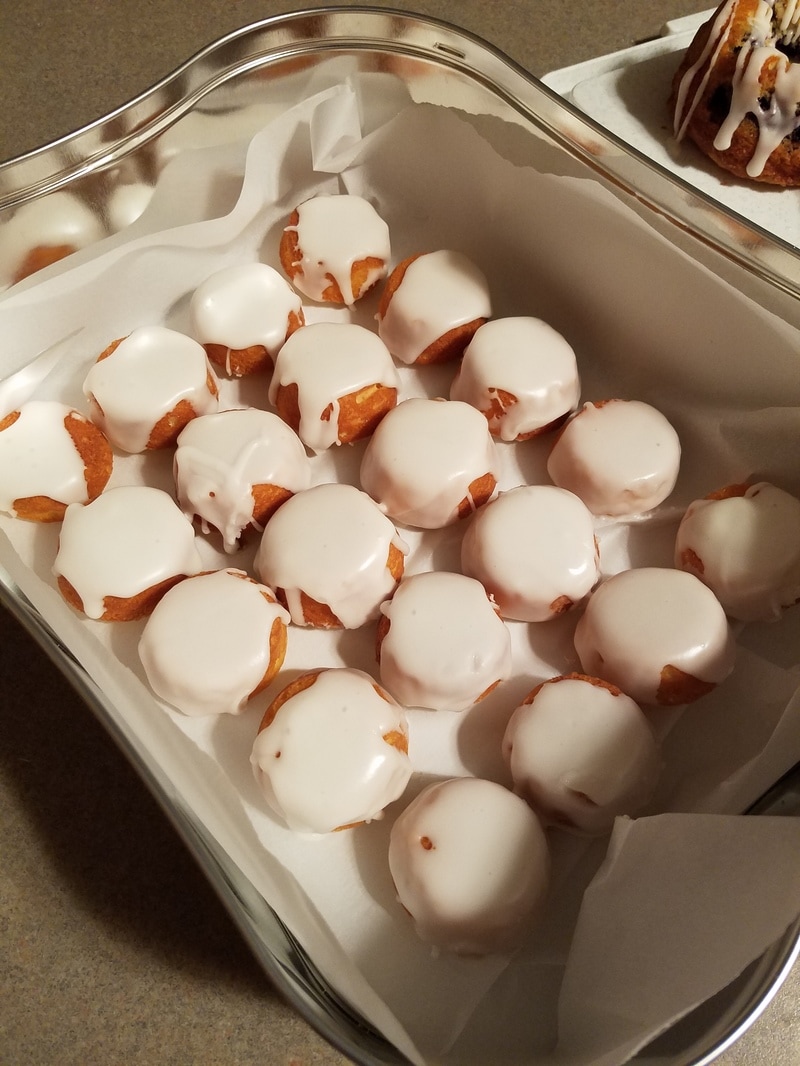
My contribution to this get together was a creamy Bowtie Pasta Salad, always a big hit at any gathering! This is a very simple and delicious recipe and it is a big recipe. It says it serves 8-10 but it would probably go to more like 12-16. I'm posting it here so you can use it, especially for the great summer parties and cook-outs coming up! We made this recipe in culinary school, but we did make our own ceasar dressing then. If anyone is interested in that recipe I will gladly post it, but it sure was easy to open a couple of bottles of dressing, although it was not as thrifty, but you don't have leftover anchovies, either! Enjoy! Here's a couple of goodies that I shared with my sister's office. They're working very hard during tax season! I'm calling these mini cakes Li'l Lemon Drops. They were made from the same made from scratch batter as the mini bundt cakes, and drizzled with a lemon juice and confectioners sugar glaze. Fill the mini muffin tins halfway, bake at 350 degrees for 12 minutes. Find the batter recipe and the lemon glaze recipe by using the search feature and look for Blueberry Lemon Bundt Cake. There is another delicious recipe on the blog made from a cake mix. Just type in Mini Lemon Pound Cakes in the wonderful search feature on this page, and click on the picture for the recipe. The recipe for these beautiful mini blueberry lemon bundt cakes is also on the blog, in a full-sized 10" bundt cake. Search Blueberry Lemon Bundt Cake! This recipe will make six Mini Blueberry Lemon Bundt Cakes and 24 Li'l Lemon Drops. If you just want to make six mini cakes, cut that recipe in half! When making the mini-bundt cakes, the temperature and cooking time is also different. Preheat your oven to 375 degrees and cook for 20-25 minutes. Check to see if they're done by inserting a toothpick that comes out clean! I hope you enjoy these as much as my friends and I have!
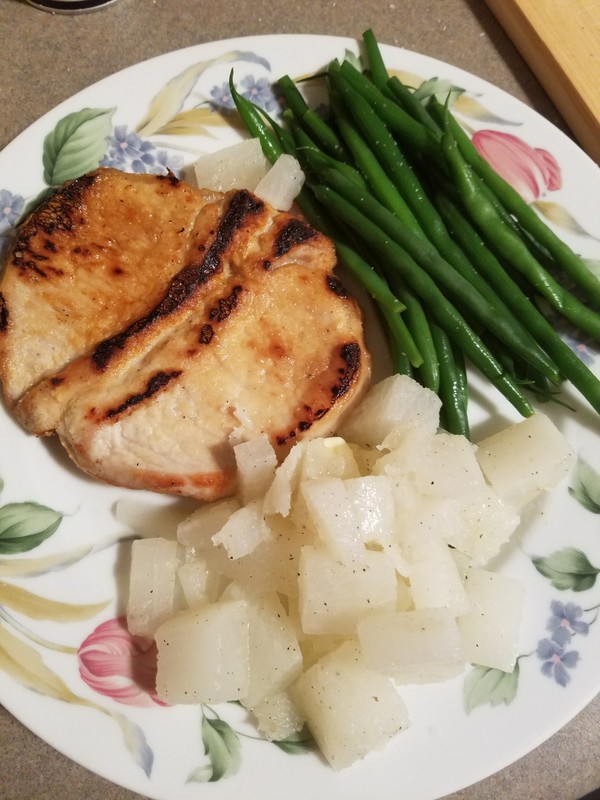
Here's a very easy dinner I made recently, and since it is so pretty I wanted to share it with you. Okay, I did get my iron skillet a little too hot, but we like char at my house, thank goodness!! This is a center-cut pork chop, thinly sliced, so it cooked very fast. I just flipped it in the iron skillet with some olive oil, and salt and pepper, and cooked for about three minutes on each side. Just do it on medium heat.
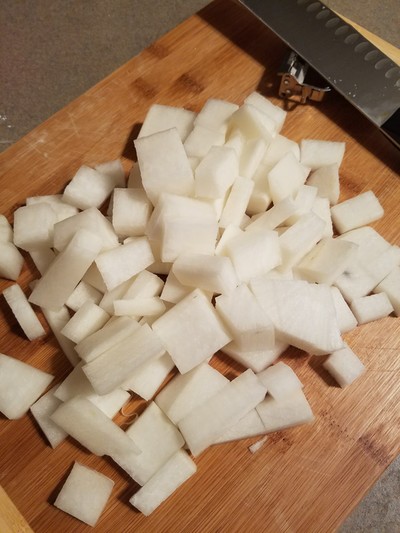
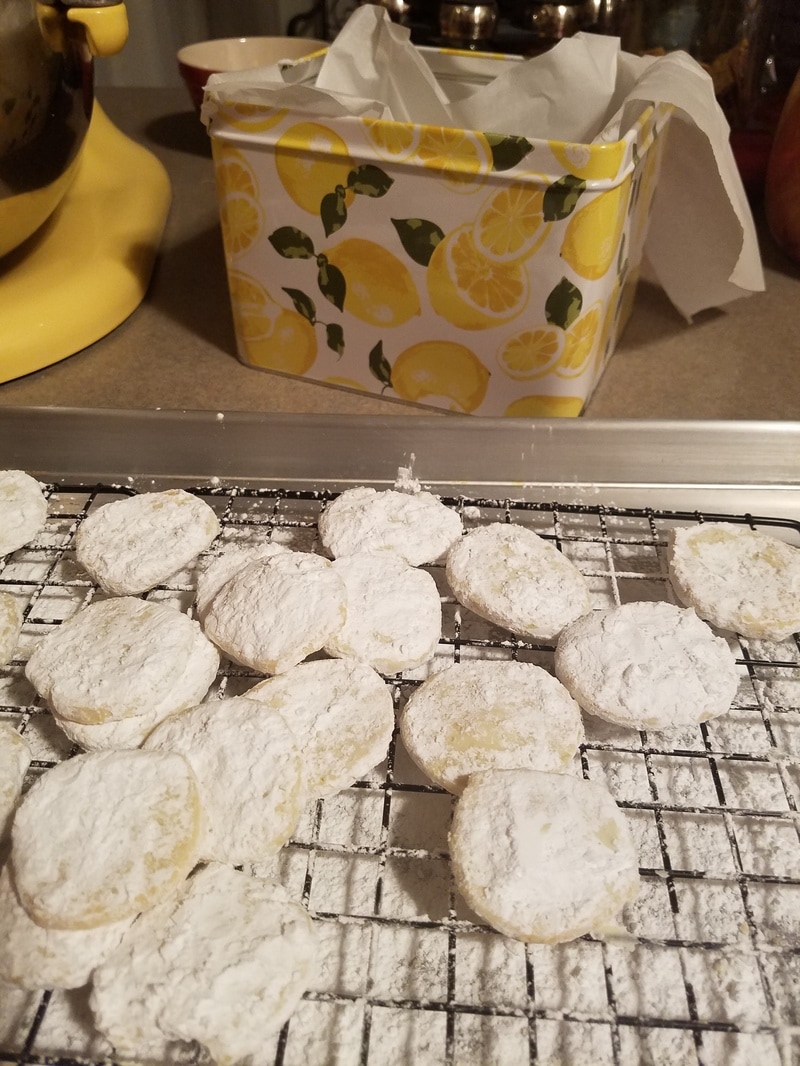
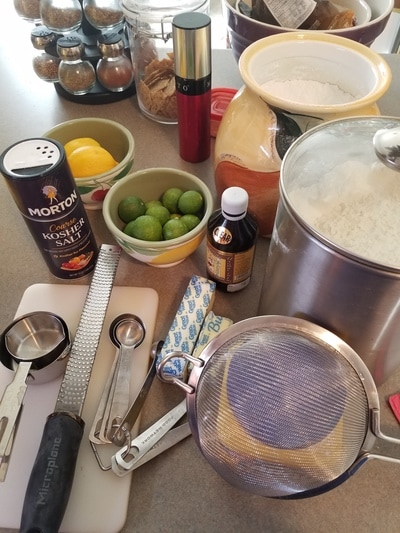
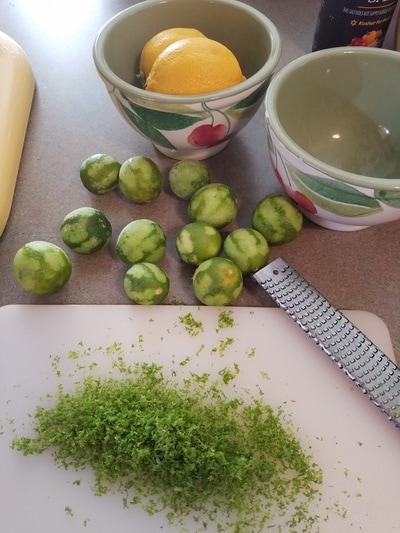
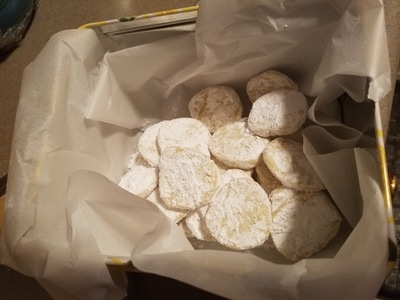
The asparagus, which was a great price at the grocer since it is in season right now, was roasted in the oven. Don't forget to break off the woody ends of the asparagus. Heat your oven to 400 degrees. On a sheet pan sprinkle salt, pepper and olive oil on the asparagus and stir it around until it is all coated. Layer the asparagus evenly. If your asparagus is thin, like mine was, check it after 15 minutes. For thicker pieces, cook about 20 minutes and check. Cook it until it is softened but still pretty and green. After you take it out of the oven sprinkle it with parmesan. Delicious! The other veggie on the plate is one of my new favorites. Nope, it's not potatoes, it's diced Daikon radish, which is super healthy and super delicious. I bought this at the Buford Farmer's Market in Doraville, Georgia. Just peel it and dice it like you would a potato and boil it in salted water until tender. If anyone knows where the radishes can be bought closer to Rome, Georgia, please let me know!! So there it is, delicious AND healthy! I love citrus! It's bright and sunshiny, and happy, and summery! These cookies are also a favorite of mine. I believe I first had them in Savannah, from the Byrd Cookie Company. Maybe I bought them at a gourmet coffee shop I used to work in, but I know I have loved them for many years! This recipe is from Martha Stewart, and I substituted key limes for the regular limes. I can't tell the difference from my cookies and Savannah's! Click on the picture for Martha Stewart's Lime Meltaways recipe!
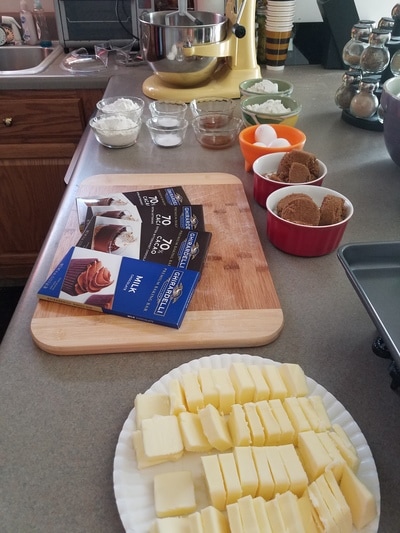
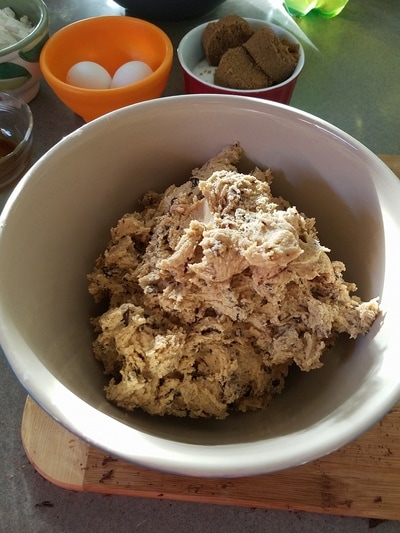
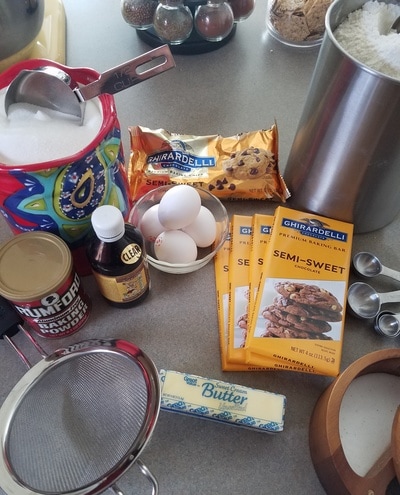
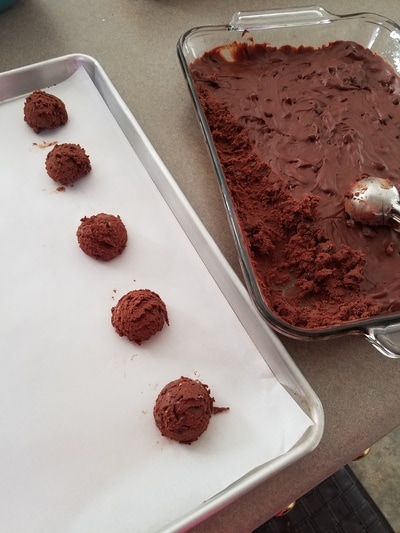
Do you love chocolate, or brownies, or cookies? If so, you need to check out this easy and delicious recipe from Food and Wine. Everyone knows chocolate is most popular in February for Valentine's Day, but my friend Lindsay, who is Sawyer's mother, has a birthday in February and one of her favorite cookies is a chocolate cookie from a local deli. I'm trying to duplicate it for her, and although I haven't done that exactly, these practice cookies are definitely a recipe worth having! Don't forget "Mise en Place", which means "everything in its place". Put all of your prepped ingredients and the tools you'll need in one place before you start mixing and blending (this means you have to read the recipe in its entirety before you start!). I promise, it will make your cooking and baking experiences seem effortless and be so enjoyable! START WITH A FEW SIMPLE INGREDIENTS:
INSTRUCTIONS:
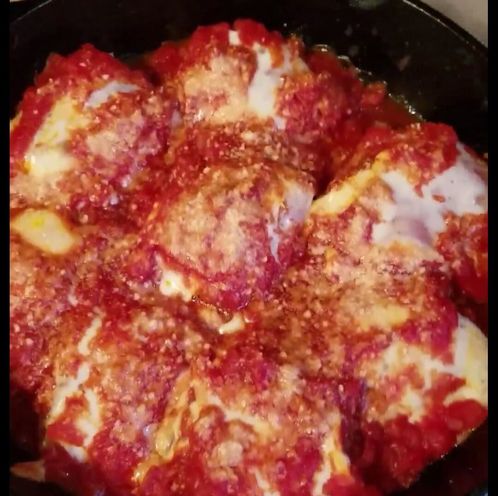
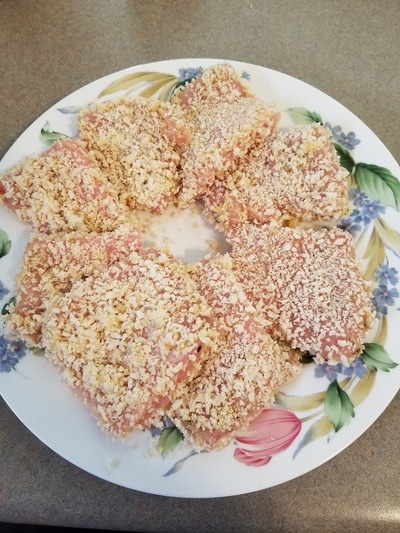
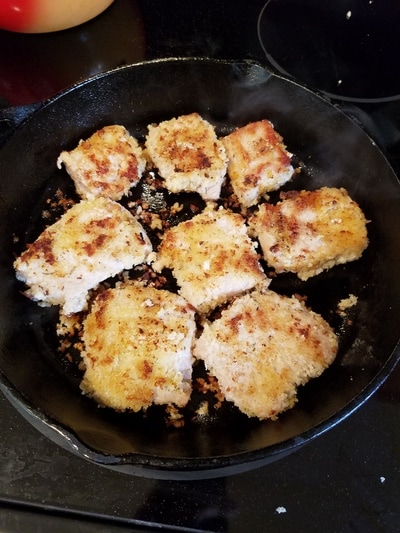
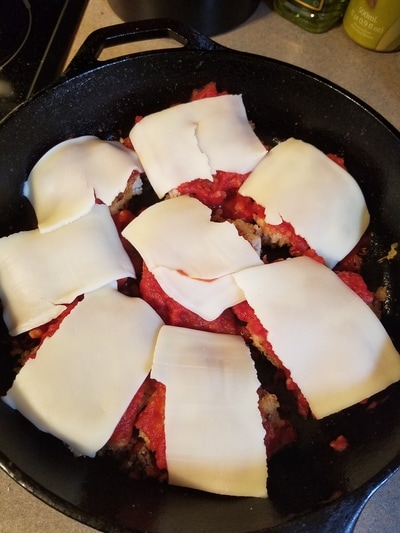
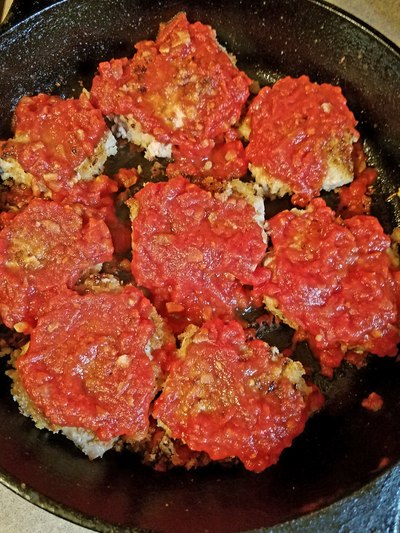
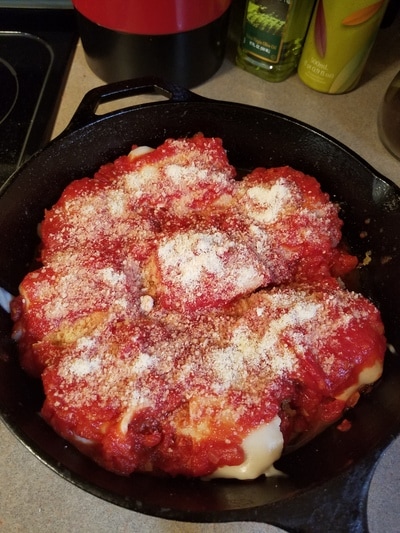
Here's a link from TheKitchn that I intend to use to freeze cookie dough and have it on hand when needed. http://www.thekitchn.com/how-to-freeze-cookie-dough-cooking-lessons-from-the-kitchn-195223 Brownie Cookies,..for a chocolate lover they are perfect for any occasion! Dished With Love, Denise! There's nothing like cold weather in February, when it's time to bring out all the hearty, meaty soups, stews and dishes that warm the heart and soul! This Winter we've had to make our own comfort food nights without the cold weather because Winter hasn't come to Georgia yet! It's in the 70's today! I'm not complaining, except I don't know how to dress, I'm not ready to begin cutting the grass yet, and I hope there are no tornados or blizzards looming in the near future. With that said.... My sister and I love Parmigiana dishes, usually made with chicken cutlets and pasta. We're working on reducing carbs in our diet, so we didn't have pasta here. I had a thawed out two-pound center-cut pork loin in the refrigerator so I made my own pork "cutlets" This is a really simple dish, but you can't really tell that when it's finished. Oh, and it has two different cheeses, sliced mozzarella and grated Parmesan! Click on the picture for the recipe, and let me tell you how I made this! I used regular Panko bread crumbs because that is what I had on hand. It worked just fine, but the finer bread crumbs give you the more traditional dish. I like to use the herbs and spices in recipes but I usually cut back on those, to taste. When you use them you'll learn how intense some of them can be and how to use them to your own taste. Don't forget, you can add them but you can't take them away. Use a little at a time, tasting along the way, to make your dish perfect.
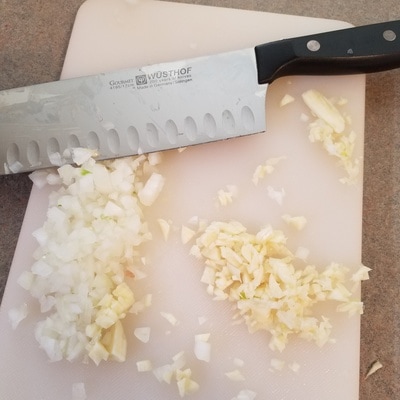
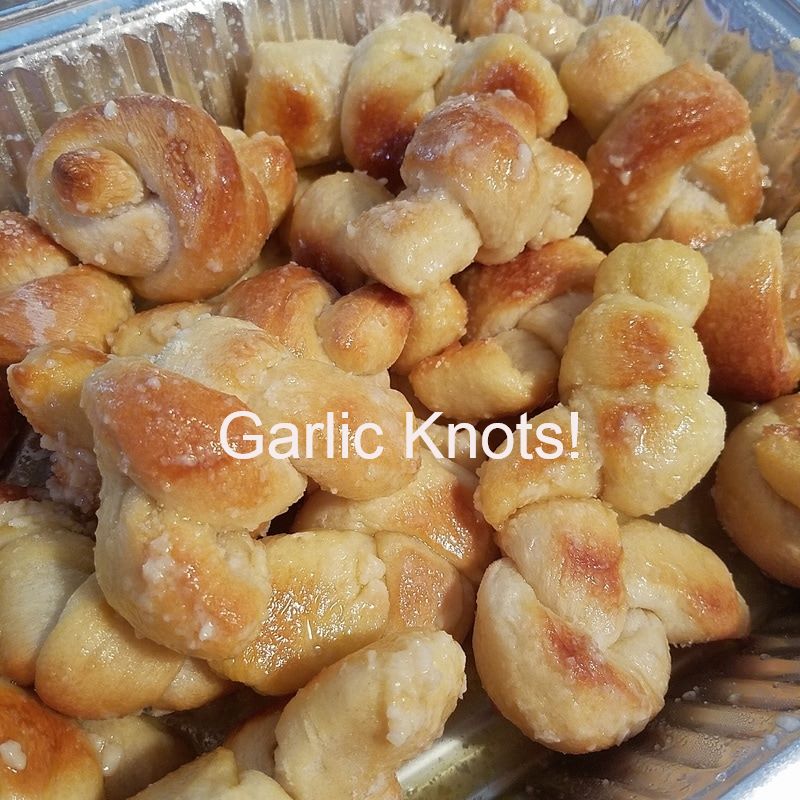
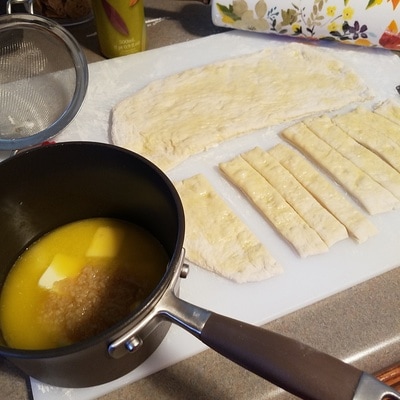
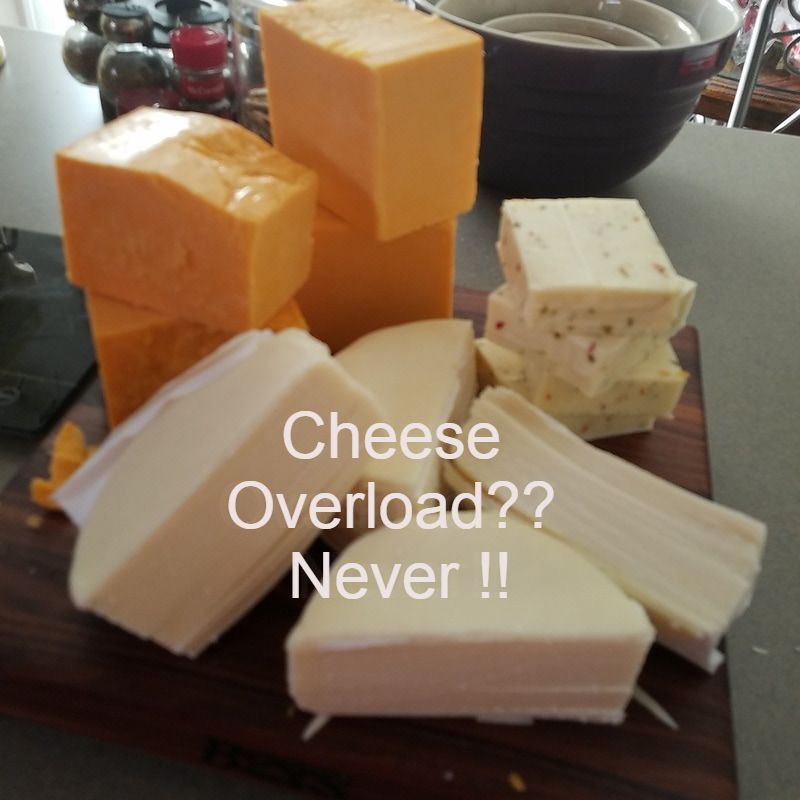
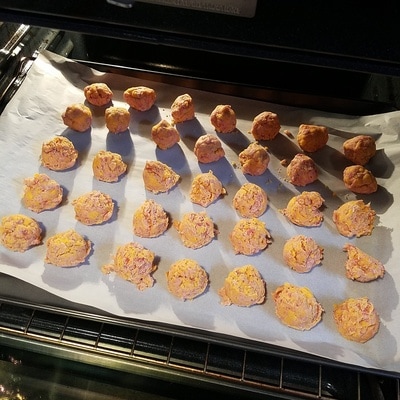
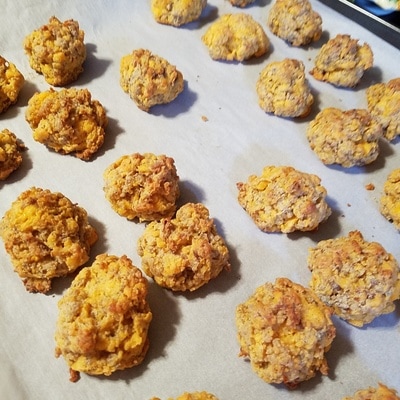
One of my most favorite things in the world is an aromatic tomato sauce, and this is a simple and delicious version I'm sure I will make over and over. It tastes like the sauce that is piled on top of a favorite lasagna at a local restaurant, and they also serve it with homemade bread. Heat some olive oil, saute some finely chopped onions and fresh garlic, add two cups of canned crushed tomatoes, oregano, salt and pepper, bring to a boil, simmer for a few minutes, and you have heaven! The attached recipe calls for a large skillet and a baking dish for completing the dish, but I used my iron skillet on the stove-top and in the oven, making this a one pot recipe. You can't get much better than that! We thoroughly enjoyed this, and it's perfect for a quick and easy weeknight dinner! The next time I make it I will use chicken, which is a main staple in our household, and I'm already looking forward to it! Dished With Love, Denise! Hailing from Georgia, congratulations to the Atlanta Falcons for making it to the Super Bowl. It would have been nice if we had won, but we'll be rootin' for them in the Fall! We began having a Super Bowl party 12 or 13 years ago with friends, and throughout the years there have been many, many friends come in and out of the doors, in the house, in the yard, in the garage, on the carport, and we have had at least three large screen televisions set up each year if you want to watch the ballgame! It's always fun to see old faces and meet new people! Of course, this year was extra special because Atlanta was in the game! Now let's talk about the food at the party! For those of you who know I am constantly trying to eat healthier and lose weight, Super Bowl Sunday is a cheat day! Gail, who hosts the party in her home, made lasagna this year, so I found this easy, easy garlic knot recipe. Who doesn't love garlic bread drowning in garlic and butter?? I would love to say I made the dough for this bread (I did go to culinary school after all), but I bought pizza pie dough from the bakery at Publix. I love it. It takes some flouring, and a lot of "stretching", but it's very convenient! Here's how to use it and what you need: Pizza Pie Dough (store bought or homemade) A little olive oil for brushing Flour for lightly dusting A stick of butter (eight tablespoons) Kosher or Coarse Sea Salt 1/4 cup grated Parmesan Romano Cheese-Had it on hand 2 Tbsp of fresh chopped parsley (I left the herbs off because I have friends who have adverse reactions to herbs, but this bread was gobbled up!) Preheat oven to 375 degrees and lightly grease two large baking sheets. (I used my Misto that holds olive oil). Recipe makes about 24 knots. Set the sheets aside. Lightly sprinkle some flour on the ball of dough, and the cutting board, and the rolling pin, and roll the dough out into about a 12x16 rectangle. I'm no expert here, but pick up the dough and let the weight of the dough stretch it (like pizza makers on television). If you're brave you can toss it in the air. I did not try that. Try not to overwork the dough, it will get tough. Brush the rectangle of dough with olive oil, and slice as shown above. Stretch each piece a little, if needed, and tie it into a knot! Place the knots on prepared baking sheets about 2-inches apart. Sprinkle the tops of the knots with salt. Cover with plastic wrap or a clean kitchen towel and let rise in a warm, draft-free place for about 30 minutes. Bake until golden brown, about 20 minutes. Transfer to a large mixing bowl and toss gently with the warm garlic butter, Parmesan Romano cheese, and parsley. Add salt to taste if necessary. Serve immediately. There's provolone for the ham and cheese sliders, extra sharp cheddar and pepper jack for Jumpin' Jack Cheddar, and extra sharp cheddar for sausage balls! Easy and popular appetizers and party dishes! Here's another fan favorite, my Jumpin Jack Cheddar! Go to the little searchy thingy on this page and you'll find the recipe! The recipe has been edited a couple of times, and I think I have it just right! Here's a classic! These were requested by my sister. Some recipes call for three cups of Bisquick, but that makes them really "biscuity" and a little dry, so cut back on the Bisquick and you can judge by the raw, mixed dough before you get them too dry. Bisquick Sausage Balls
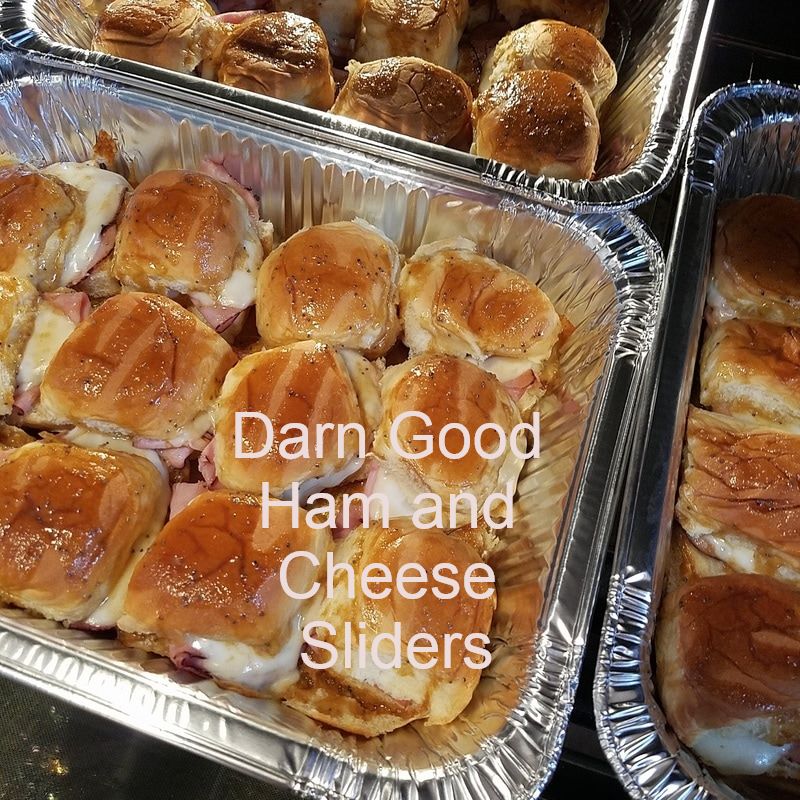
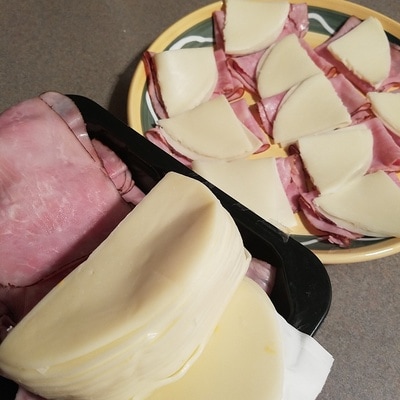
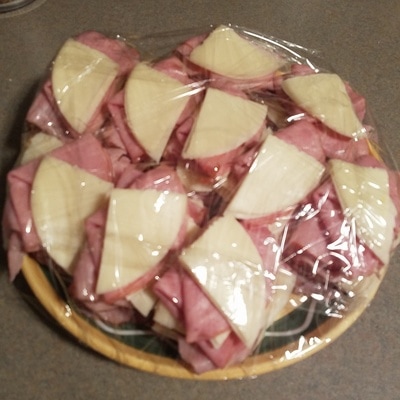
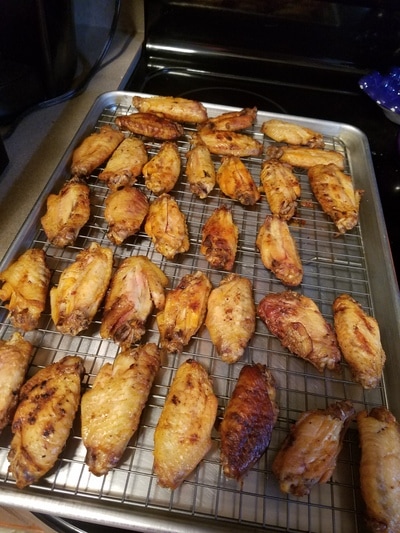
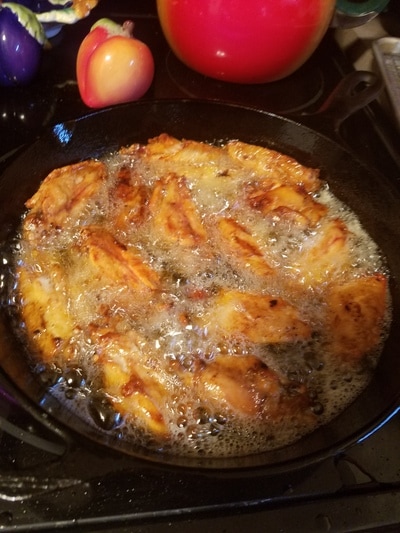
Combine all ingredients. Mixing by hand mixes it the best. Mix until all ingredients are evenly combined. Roll dough into 1 1/2 inch balls and place on a baking sheet one inch apart. I used a cookie scoop for making evenly sized sausage balls. Bake at 350 degrees for 20-25 minutes or until lightly browned on the bottom. How easy is that?? Here's a Super Bowl Party staple, and always a favorite. I buy the two packages of the black forest ham and one of the provolone cheese in the big packages at Sam's, along with the King's Hawaiian rolls. I use one slice, folded, of the ham, and one-half of a cheese slice, folded, on each roll. This makes at least seven (7) dozen sliders. Click on the picture above for the recipe! My sister (sous chef) is always helpful in helping me put these together! Cook's Tip: If you buy the Hawaiian rolls that have not been pre-sliced, place the layer of rolls on your cutting board or a flat tray. Hold gently by placing the clean palm of your hand on the rolls, and slice the pack of rolls gently with a long, sharp serrated knife. Voila! These delicious chicken wings get honorable mention, because you can't have a Super Bowl party without them, right? My sister contributes toward these every year. These were actually some that were steamed, and not crispy like we like them. We brought home the leftovers, I dried them out on a rack in the oven at 200 degrees for about 30 minutes, flipping them once. They still weren't crispy enough, so I fried them in my iron skillet. I'm glad this was all we had because I could have eaten a hundred. They were so delicious, fried, as they should be! Another Super Bowl gone by, hopefully Atlanta will make it and win next year, they deserve it! Before I end, let me show you current pictures of Girly Sawyer! This was before a daddy-daughter date at Chick-Fil-A. She gets more beautiful every day! Until next time, Friends! Thanks for stopping by and your comments are always appreciated!
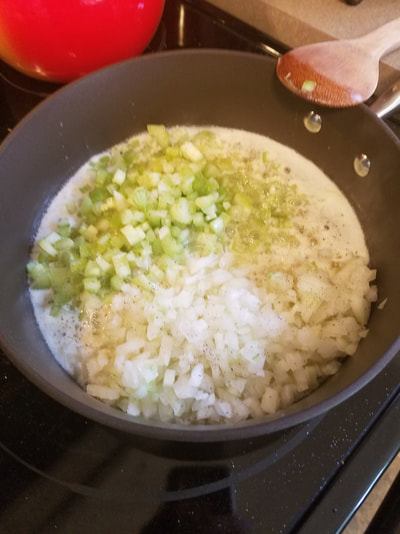
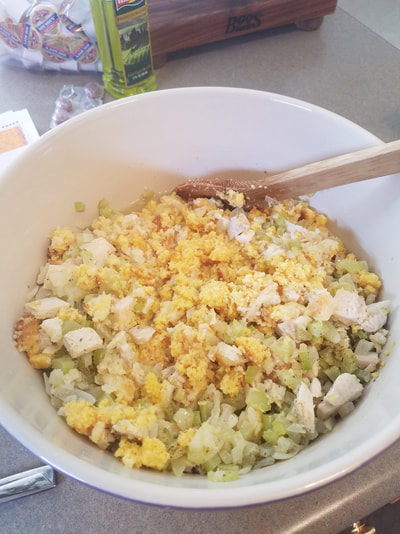
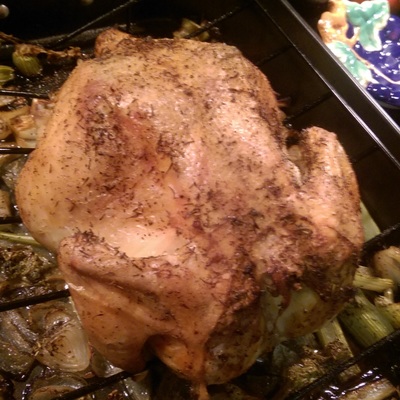
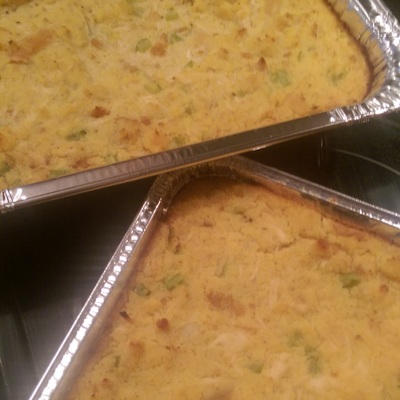
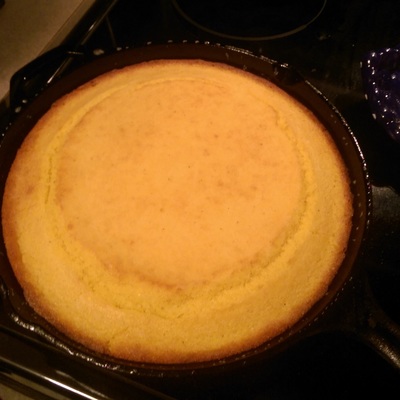
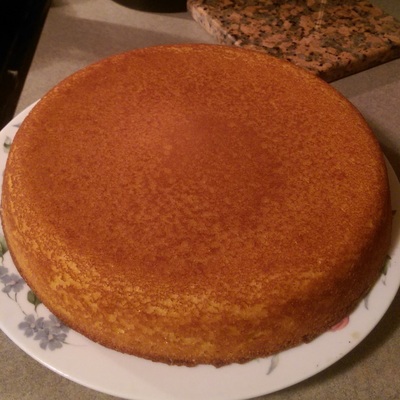
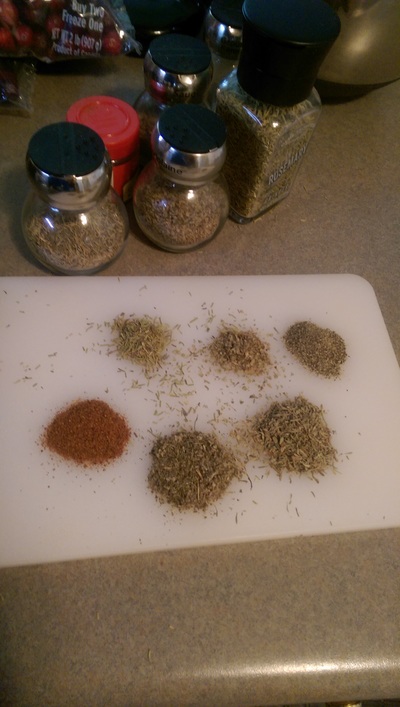
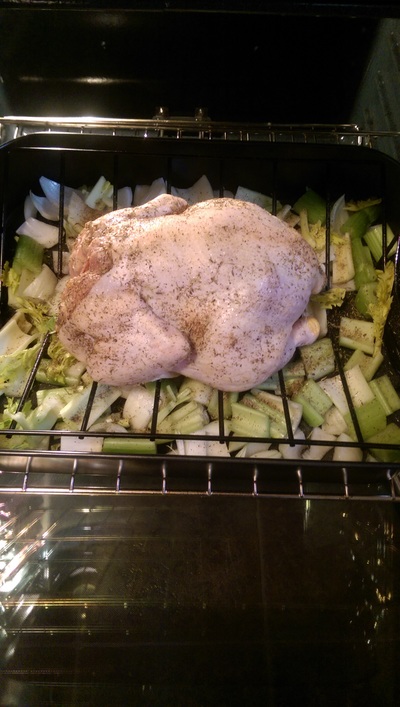
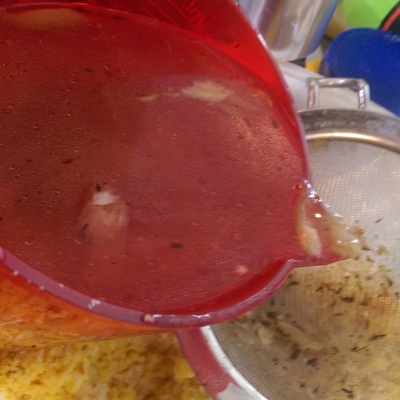
Dished with Love, Denise Well, now we've had Thanksgiving and we're headed to Christmas! This time of the year is so wonderful, and so busy!! There are lots of holiday dinners and parties to prepare for, and in our friends and family there's lots of birthdays! We just had a wonderful retirement party for a dear friend to throw into the mix. That was a great time, seeing old friends and co-workers. I'm keeping Sawyer three days a week now, and she brings lots to be thankful for and lots of happiness. She's such a sweet and happy baby! Sawyer's mother, Lindsay, told me how her mother makes her own stock in a Crock-pot to use for her Thanksgiving dressing, so of course I had to make my own stock. I started mine out by roasting the chicken in a roasting pan with a rack (guess what, friends, those cheap roasting pans work as good as those expensive ones). I rubbed the chicken first with a little oil, then homemade poultry seasoning, and placed the chicken on the roasting rack in the pan. I also cooked this chicken with celery and onions in the roast pan, but they didn't hold up well. I did not use those in the stock. I think I should have made the chunks of vegetables bigger. I cooked the chicken for an hour and a half at 425 degrees. The chicken is done when your meat thermometer is at 165 degrees, or you cut between the leg and thigh and the juices run clear. Then I did a lazy thing. I put the whole cooked chicken in the Crock-Pot with big chunks of fresh celery and onions and the juices from the roasting rack. Cover this with water (and/or store bought chicken stock) and cook on high for four hours or low for six hours. The chicken will fall off the bones and that chicken should be shredded and placed in the dressing! Make sure you get all the bones and chicken out, strain the stock, and there you have your stock and chicken. Here's the recipe for the homemade poultry seasoning. It is two ingredients: six teaspoons dried sage and two teaspoons of dried thyme. How easy is that? Click on the picture of the cornbread dressing for a delicious buttermilk cornbread recipe! Here's the recipe for the dressing! I don't have a picture of the buttermilk biscuits on here. The ones I used were biscuits I had made previously and kept in the freezer. I'll be sure to post the biscuit recipe soon. Make the cornbread and biscuits at least a day or two ahead of time so they will be dry and will soak up all those dressing flavors! Old Fashioned Cornbread Dressing Ingredients:
Directions:
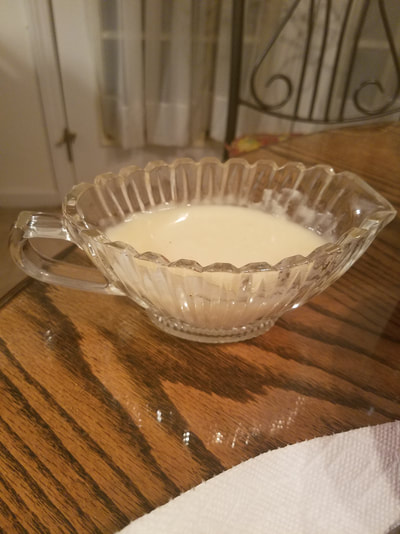
Here's a simple gravy recipe I made, and I put it in a fancy gravy boat and then I packed it up to go without taking a picture. Ingredients:
Instructions:
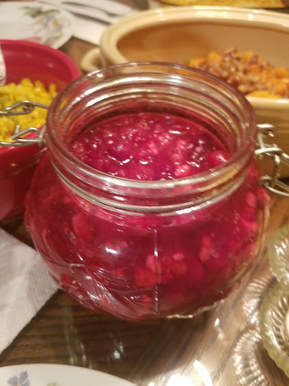
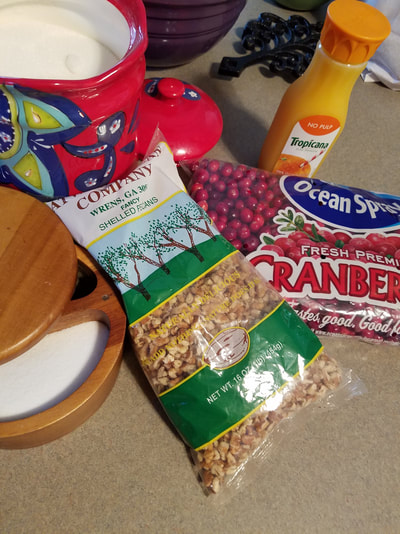
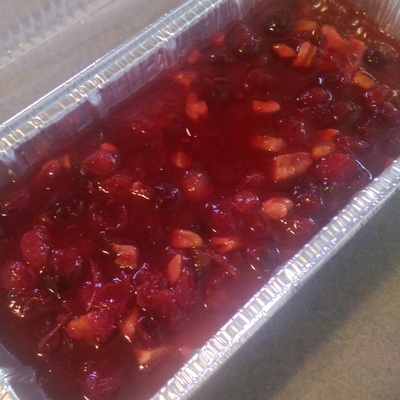
I know most of us grew up with canned cranberry sauce, and I still love it, but if you feel like getting a little fancy (with fresh cranberries and pecans), click on the picture on the right for this simple and delicious cranberry sauce. Delicious! These are some beautiful Autumn Poinsettias I saw in Kroger. I didn't know there was such a thing. The picture does not do them justice! Here is Sawyer at her Thanksgiving celebration at her aunt's house, and with her parents. She is really the most wonderful little girl! Since I started this post, my Sister Janise, and I made a quick trip to Florida to visit some friends in Freeport, Florida. We did make a little trip out of the way so we could see Panama City Beach, one of our favorite places. This scene is at dinner time at Schooner's, The Last Local Beach Club. We passed several places before we got here and some are closed for the season and some are just open on the weekends. Janise remembered Schooner's advertises as local so we went by there, and true enough, they're open year round. They also have a special from 4 p.m. - 6 p.m. that's pretty good! I love this picture!
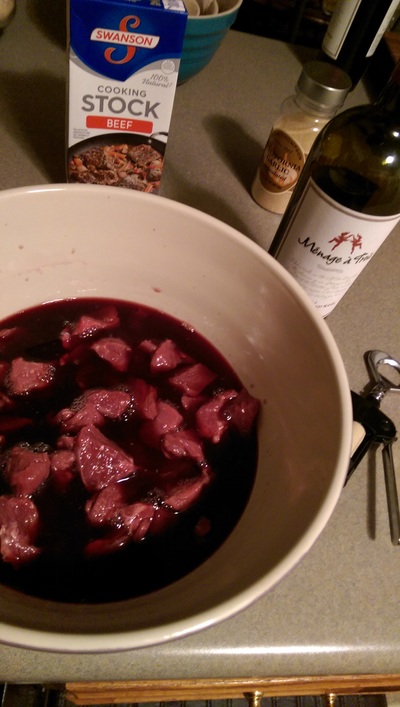
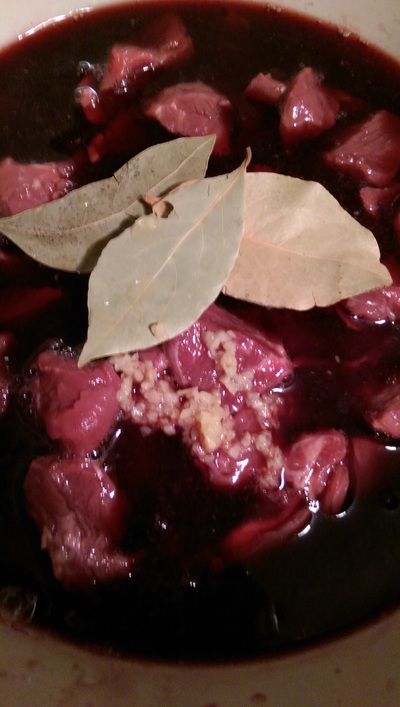
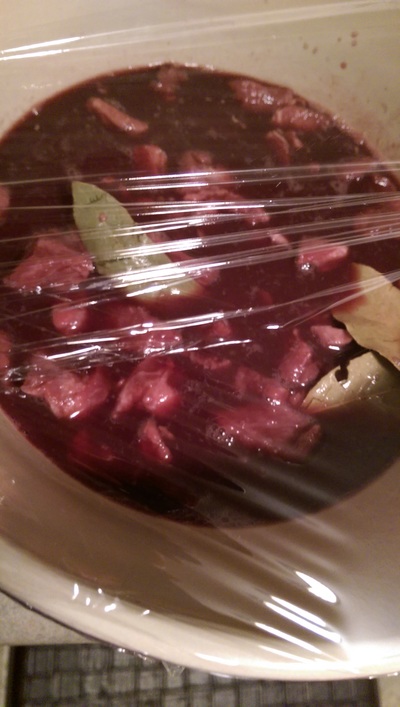
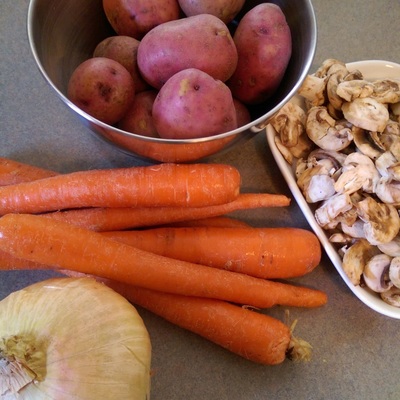
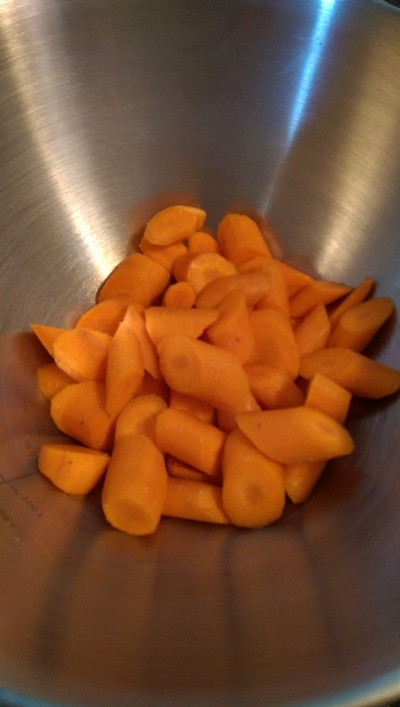
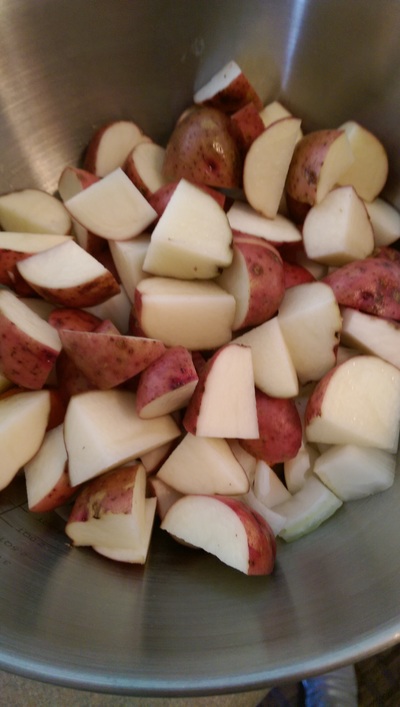
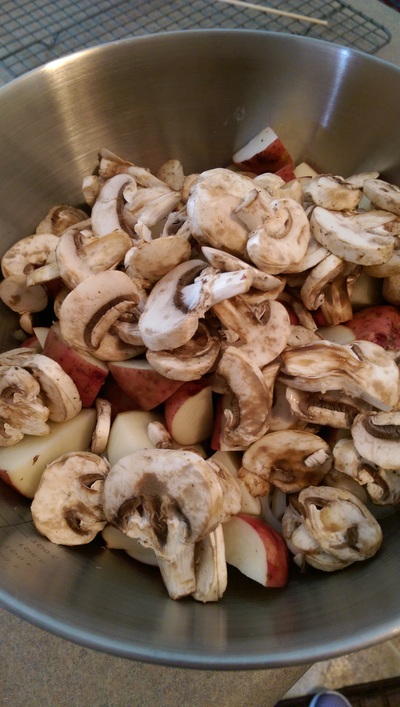
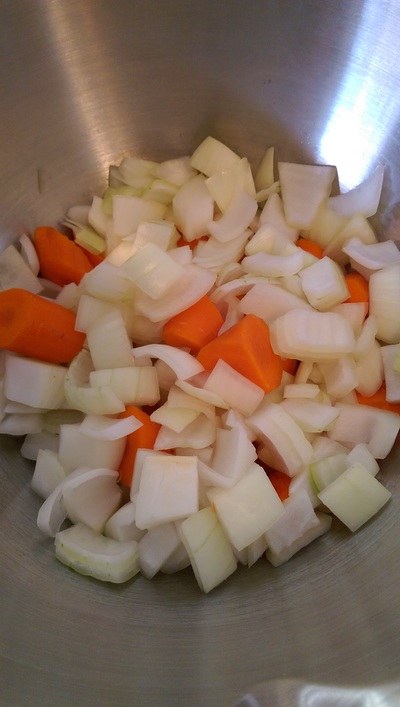
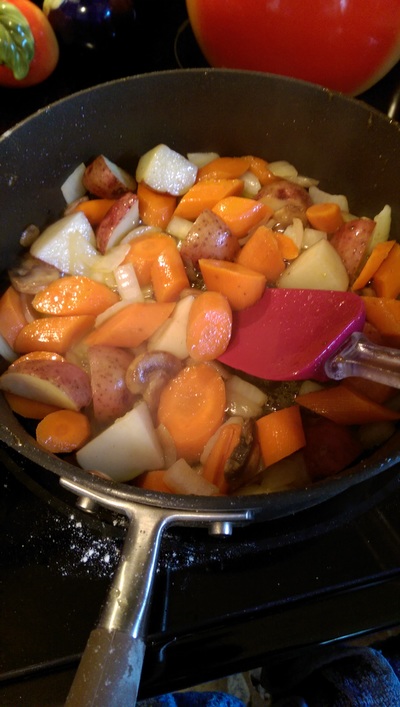
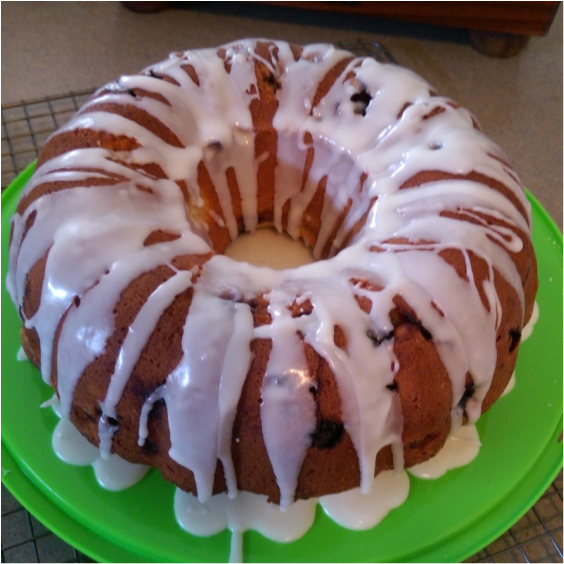
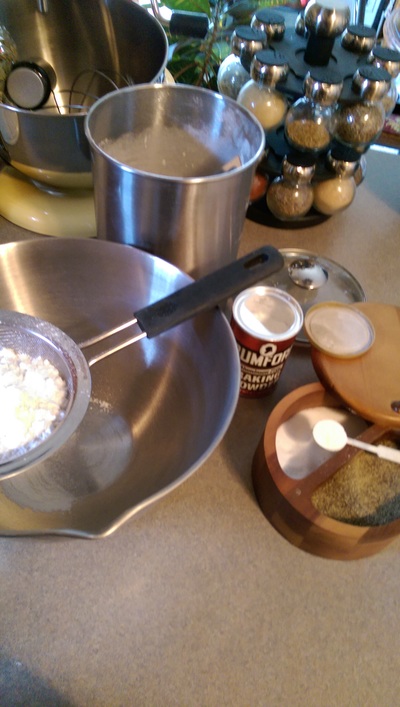
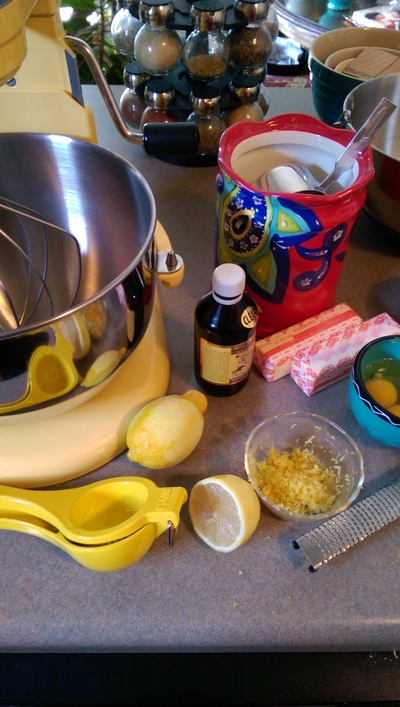
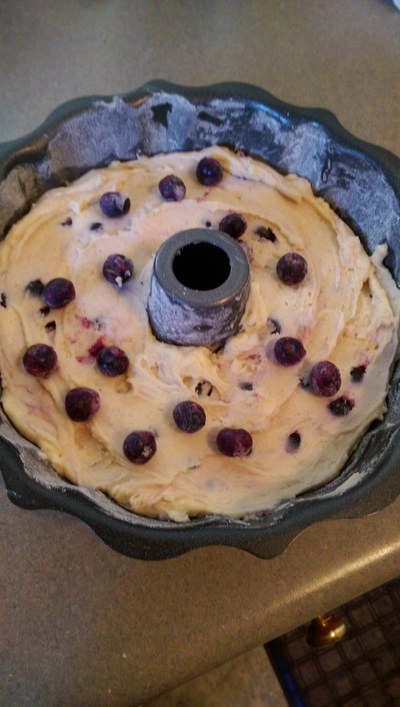
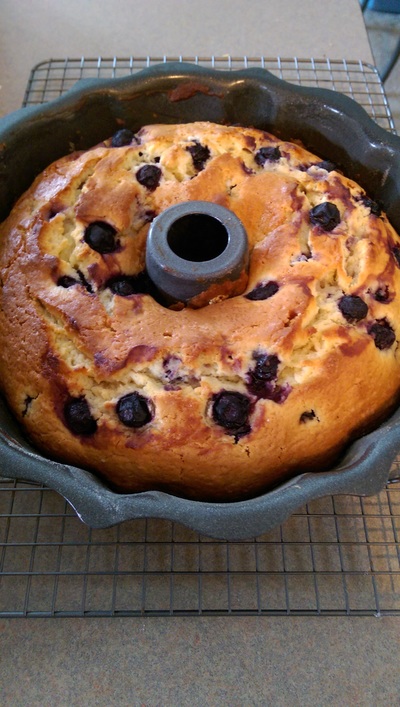
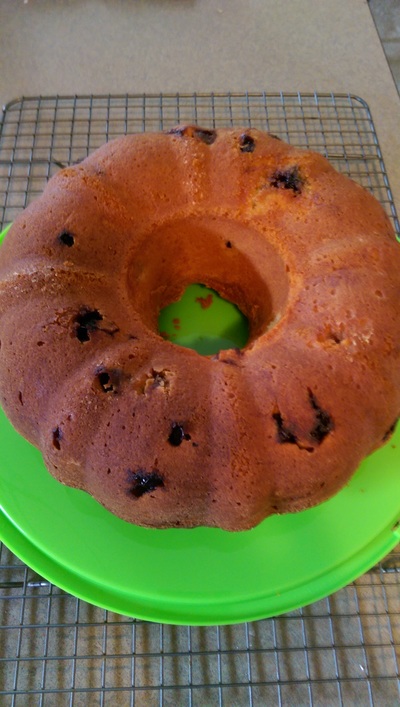
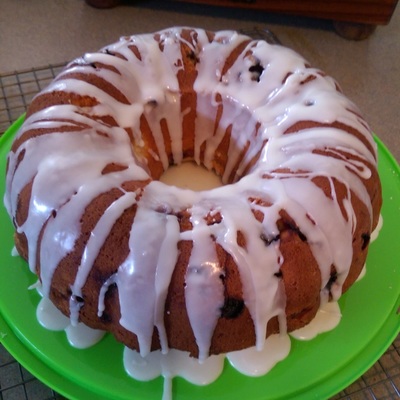
Thanks for stopping by, Friends! I hope you are all having a great holiday season! Dished With Love, Denise 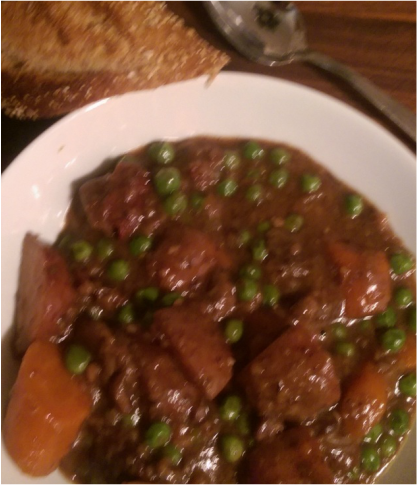 Special Beef Stew! Special Beef Stew! Hi, Friends! Even though it's not cold outside yet in Georgia in November, I've been stirring up some delicious, warm comfort food! This stew and lemon blueberry Bundt cake was for a friend whose mother passed away, and her family. I thoroughly enjoy the recipes, the shopping, the prepping, the cooking, and the cleaning (not so much) when I know others are going to be enjoying what I cook, especially in times of need. Like the cover page on the Dished With Love Facebook Page, I believe that Cooking is Love Made Visible, especially when used to comfort friends. I really, really enjoyed making the Bundt cake because I know it is one of my friend's favorite things that I have made. How do you like that prep work? The prep work is something that is so comforting to me. You may have to be a cook to understand, but to me the food is so beautiful, with life-giving nutrition and great taste, too! I may be feeling a little philosophical today! Put it all together and viola! You've just made someone feel better! This recipe came from Ina Garten, and you can click on the stew picture for the recipe. The only change I would make is I would not marinate the beef overnight, probably half that time, and I would use more beef stock instead of the 2 1/2 cups of marinade used when cooking.The flavor of the wine (a red wine blend is good) does not cook off as much as when you're using it in other dishes. If you want to leave the wine out completely, just make sure the beef is tenderized. You can do that by covering it in Saran Wrap and pounding it (a great stress reliever), or marinate it in your favorite beef marinade. It was, however, delicious as is, and it's just a matter of taste! The peas are added at the end, so don't forget those! I forgot them in my friend's dish, but it turns out that was a good thing because she hates peas. They are added in the second batch I made, pictured above. My least favorite thing about making cakes is, you don't get to taste them! I must say, this turned out beautifully, and I hope it tastes as good as it looks. You can find the recipe for this cake by using the search feature that I love so much on this page, and find the recipe on a previous blog. Just type in Blueberry Lemon Bundt Cake! I didn't get a taste of the cake this time, but it is so easy to make, I'll be giving it another go soon!
I hope you enjoy looking at my photos and you'll try these recipes. I made another batch of the stew for myself and Sis and another friend, and the job was definitely rewarding. Speaking of making dishes for family and friends, it's almost Thanksgiving, Christmas and New Year's!! Be looking for different things to be coming to the blog for the holidays, and please, please feel free to comment. The Facebook page needs likes, shares, and comments to stay front and center, so those are greatly appreciated! See you soon, and as always, Dished With Love! Denise |
Denise ClarkA place to share my favorite things...friends and food, dogs, college football, and my inspiration, Sawyer, the most beautiful little girl in the world! CategoriesArchives
December 2022
|





























 RSS Feed